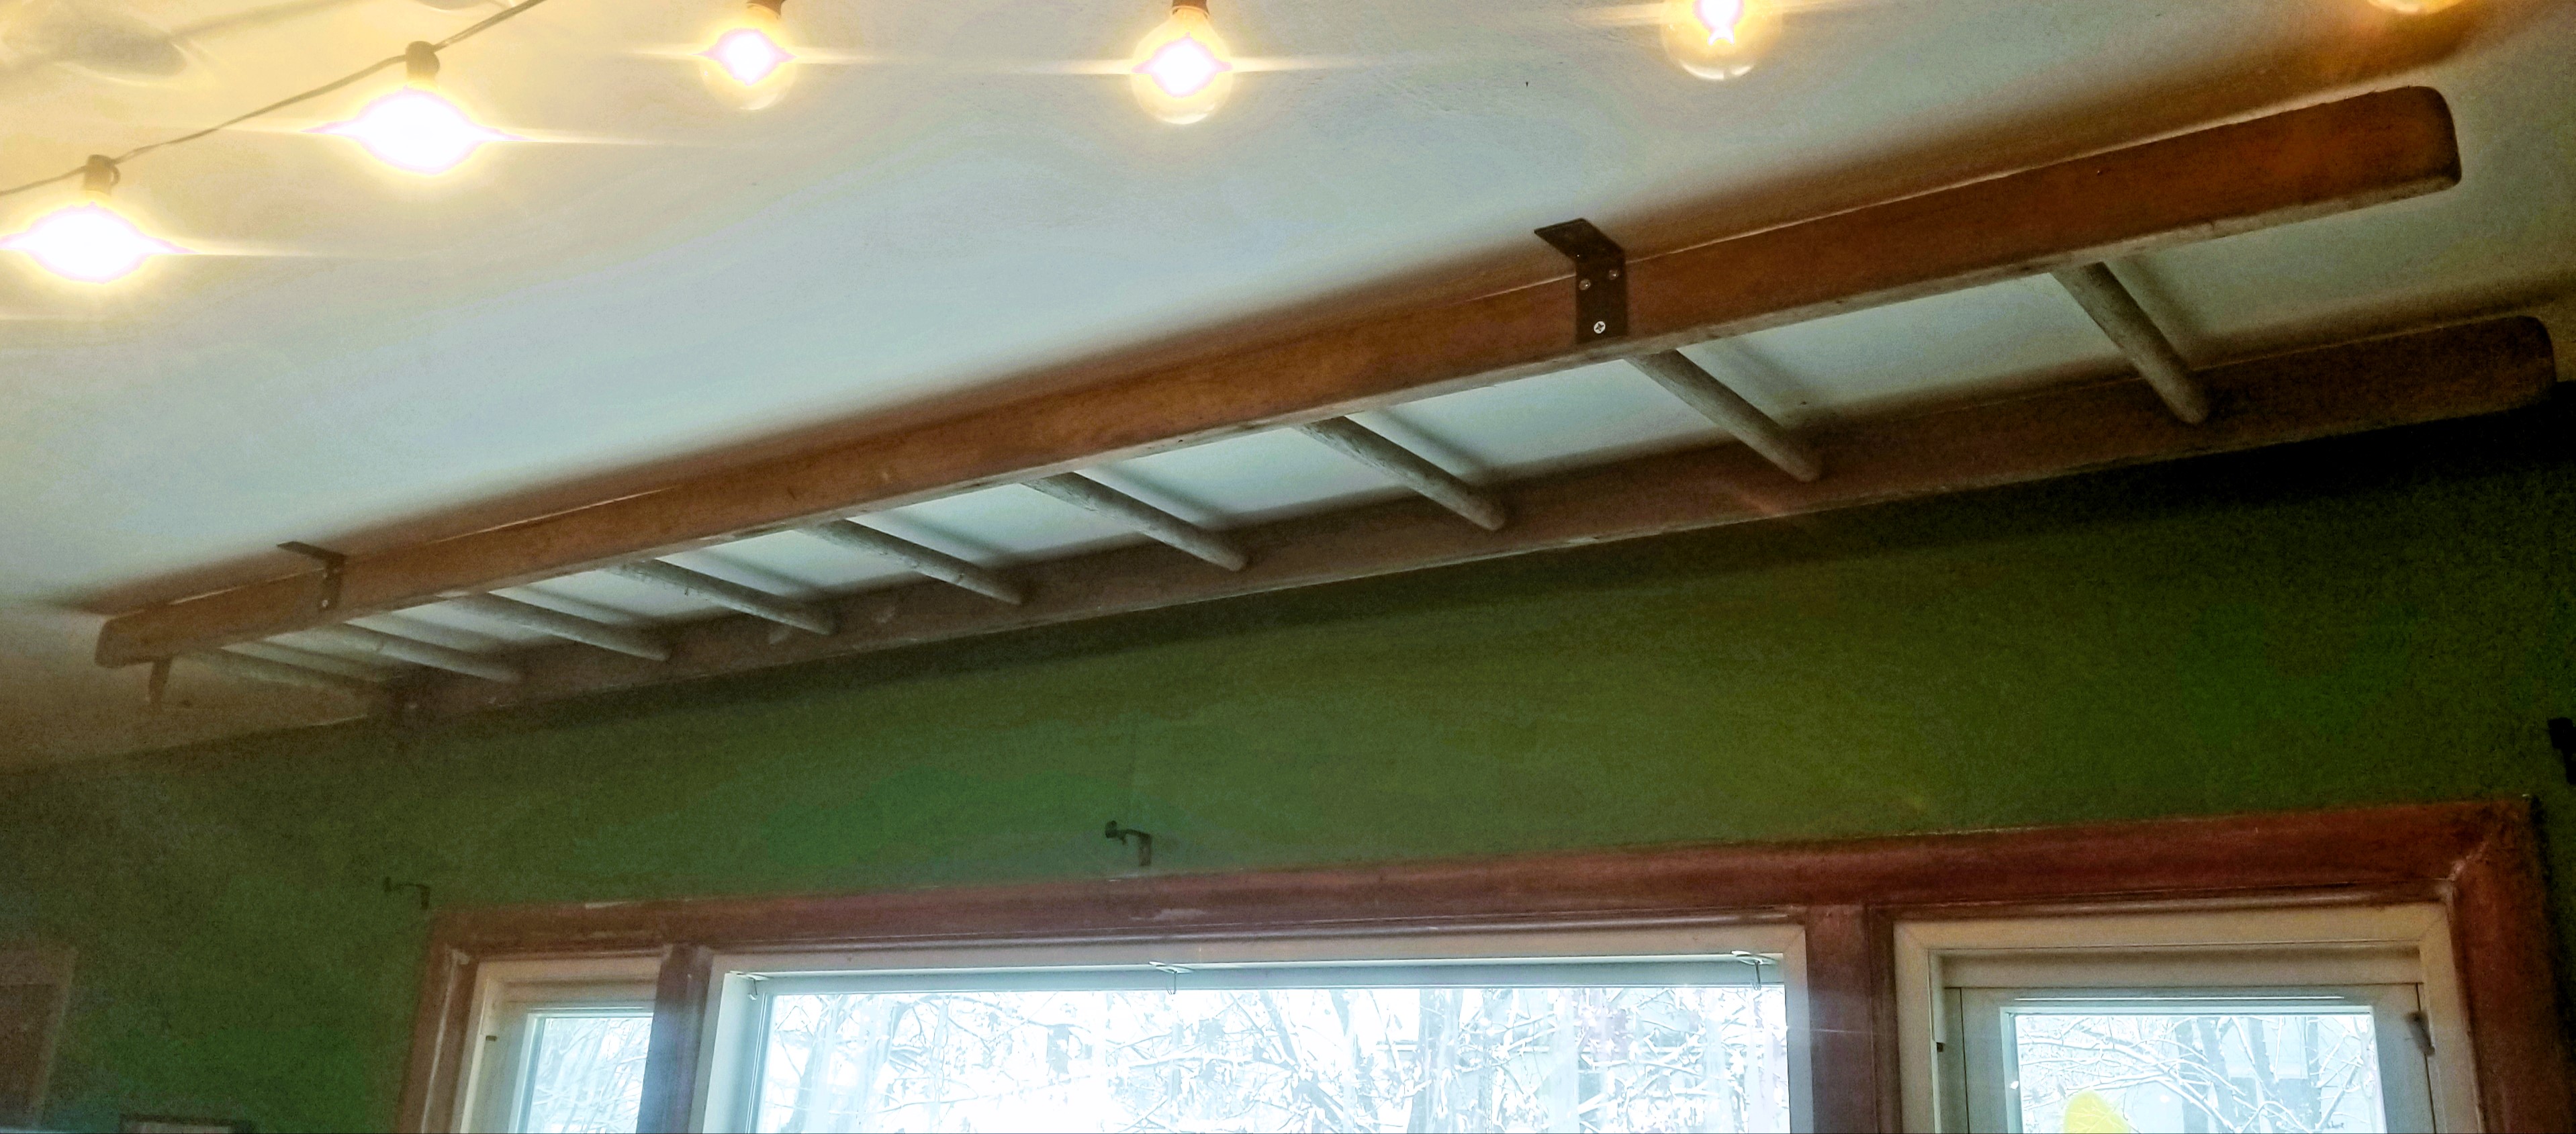
I have a habit, good or bad, of seeing a post or a photo or a commercial and getting an idea stuck in my head. Some are fairly simple and straightforward. Others are, to put it simply, seriously over the top (like attaching a ladder to the ceiling for hanging plants). Regardless, the idea sticks and grows and won’t go away until you do something with it. That happened to me the other week thanks to a post in an organic gardening group.
For some time now, as we expanded the items we want to grow, especially medicinal herbs and for more authentic, ethnic fare, it’s become a struggle to decide where to put what. Do I stop growing some items in favor of others? Do I expand to new places in the front yard, which, unfortunately, is not as fertile as the back? Do I expand my container gardening, perhaps experimenting with different items to see if I can grow the same amount with a smaller foot print?
So, what did I do? Well, actually, I said yes to all three questions and added “found” space. Most of which was unplanned.
An answer to the first question was the only one addressed last year when I laid out the garden using our predetermined scheme. As I’ve mentioned in previous pieces, we created five groups of three families of vegetables to spread across our fifteen beds, which gave us a pre-planned five-year crop rotation system. The vertical growing beds went on a four-year plan. Everything was already set.
And then…
If I am a creature of any habit, it’s this: I’m going to upset my own meticulously thought-out plans with new ideas to make things better (one hopes).
Some of you might call this “not leaving well enough alone.” But I guess I’m just not all that ready to settle into a routine that never evolves. As I noted in my last post, my godmother once asked if I ever slowed down. Now that I’m almost back to 100%, I have to say the answer is simply, “No.”
Tweaking happens.
To start, in response to the first question, I had already stopped growing peas in favor of making room for winter squash and more sugar pumpkins. I wasn’t having much luck with peas despite trying several varieties over several years, and I’m the only one who eats them. It was a no-brainer to swap them out. If I absolutely need peas for a dish, frozen ones are not expensive. Forgoing peas also allowed us to switch out a couple varieties of bush beans for pole beans. This opened up space for Mexican herbs and Japanese greens and cabbages.
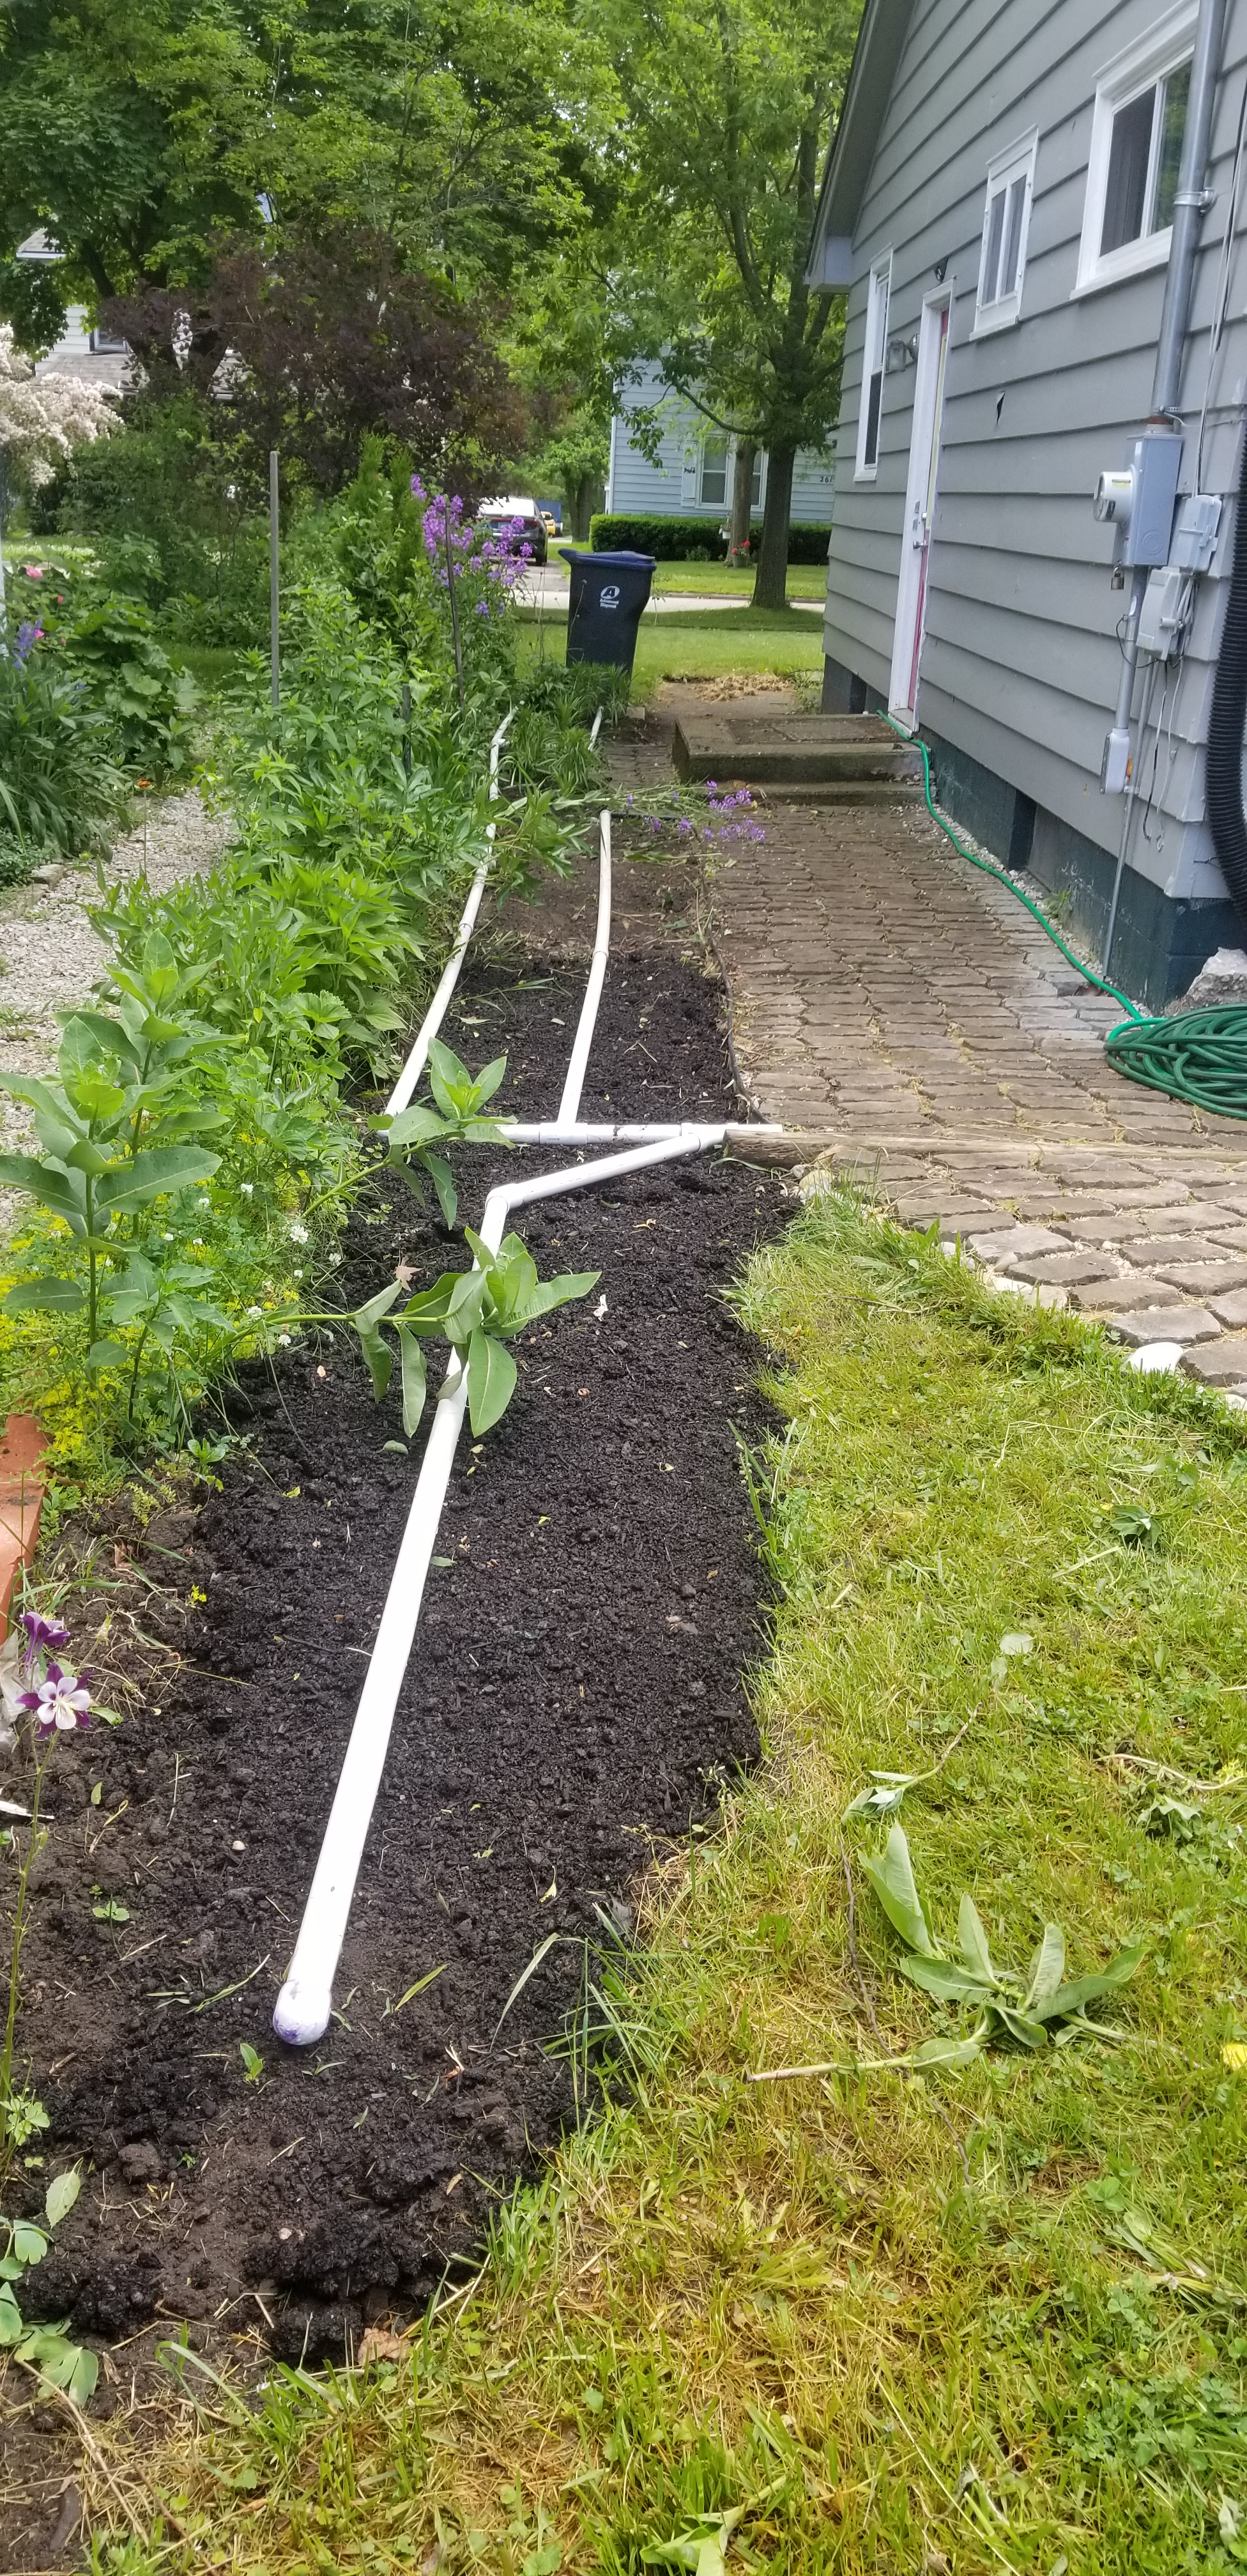
Second, I wanted to see if we could grow our own cumin. We already grow fennel in containers for seed because we use a lot. With our love of Tex-Mex (or at least mine), we go through a lot of cumin as well. Growing enough plants to get a sufficient amount of those tiny seeds requires considerable space. I wasn’t happy giving up most of a garden bed. So, last week, after that post got me thinking, I decided to use them as a border for the front walkway, a space we hadn’t tried growing anything in before and actually hadn’t planned out yet. We’re also relocating our shade garden plants, given there isn’t so much shade left after removing a couple of trees, and using that space for Jack O’Lantern pumpkins and bell peppers this year.
Third, items which will eventually become the understory of our burgeoning food forest, will go into containers which have sat unused for a couple of seasons. I also have ginger that sprouted in the pantry and is currently in water, growing roots in the greenhouse. Being a tropical, this will become a container plant so we can bring it in during the winter. We already have two pineapples I hope throw fruit this year. As for experimenting, I’m going to try potatoes in five-gallon buckets. Lay the seed spud on two inches of soil and fill to six inches, then continue adding soil as it grows until the bucket is full. If the idea works, I won’t have to dig to harvest; simply dump the bucket out.
The post, which triggered my thinking of restructuring in the first place, featured keyhole beds. This design is composed of two rectangular beds joined at the back, and having enough space in the center for you to get in to work them: the keyhole. Picture a big, thick, blocky C. If I were to convert fourteen of the fifteen beds (it has to be an even number), I would gain additional square footage equal to one and three-quarters of our eight-by-four-foot beds. This would solve our problems. At least until our constant add-ons exceeded that space. In the meantime, we’ll gain a few years and be able to focus more on building the front yard orchard/food forest.
We already needed to move beds one and two forward as they were too close to the vertical growing bed. We hadn’t planned on doing so this year. But, to try the keyhole design out, we shifted and converted them. If it’s manageable to maneuver around the extended design, we’ll convert the rest of the beds at the end of the year. So as not to upset my painstaking crop rotation scheme, I’ll treat the new sections as though they were separate mini-beds for the herbs and leafy vegetables with their own rotation.
Note: I did try reworking the over-arching schedule, regrouping and rearranging the placement of items. No bueno. I don’t need to reinvent that wheel. Mini-beds it will be. Keeping it to greens and herbs will remove any worries about cross-pollination, because I already worked those out in the current scheme.
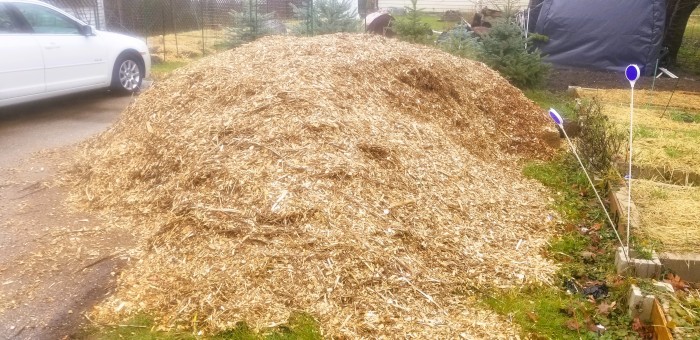
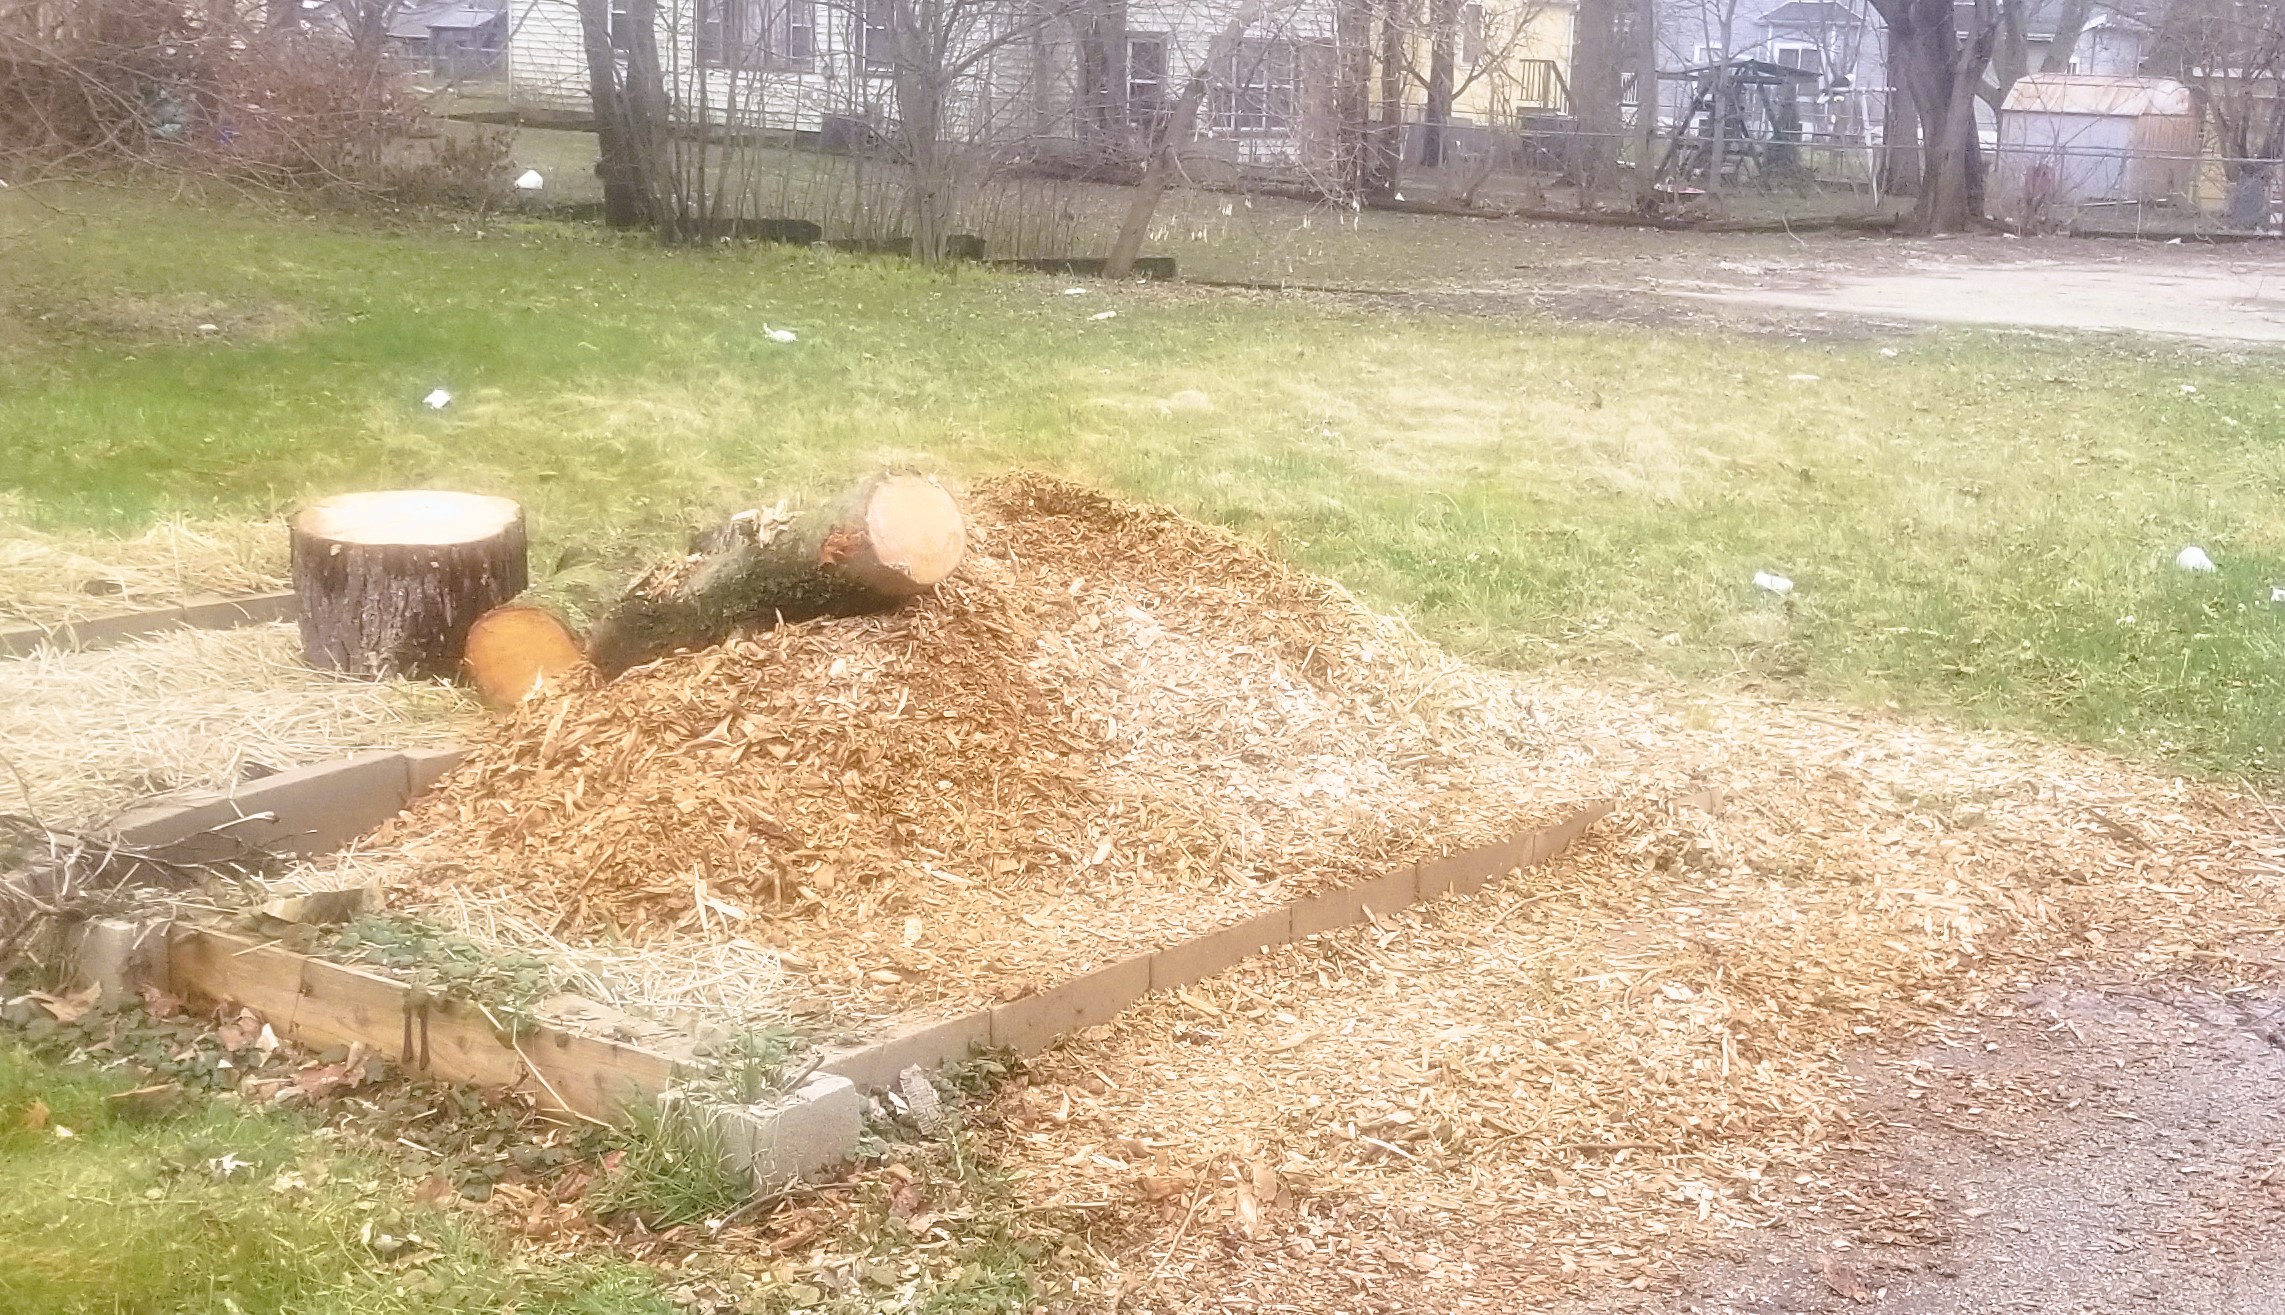
As if to tell me this was a good plan, the universe dropped me a gift. On the way home from the gym, I came across tree cutters; your typical, independent guys rather than a large, landscaping company. I stopped and asked what they did with the wood chips. In short, I have a few more logs for the fire pit and about five yards of fresh wood chips to use as mulch in the walkways around the rebuilt beds as well as the strawberry patch, etc. This was something I’d been considering. I’m signed up with a service to bring me chips, but have been waiting and waiting and waiting. Then I find these fellows just as I was thinking I should redesign the beds. I’ll take that as a sign. The service suggests tipping the arborist $20. When I held out the bill for the guys the other day, he said, “For real?”
They would have been happy just getting rid of them rather than paying a landfill to take them. Given this would have cost me over $200 for material and delivery, this was a win-win. Including for my neighbor, who assumed they were trash being at the back of my lot, and helped himself to most of the logs and about half a yard of the chips before I caught him. I would have said yes had he asked; he’s a nice enough guy. But he is, as they say, not the sharpest tool in the shed, so it’s hard to be angry with him.
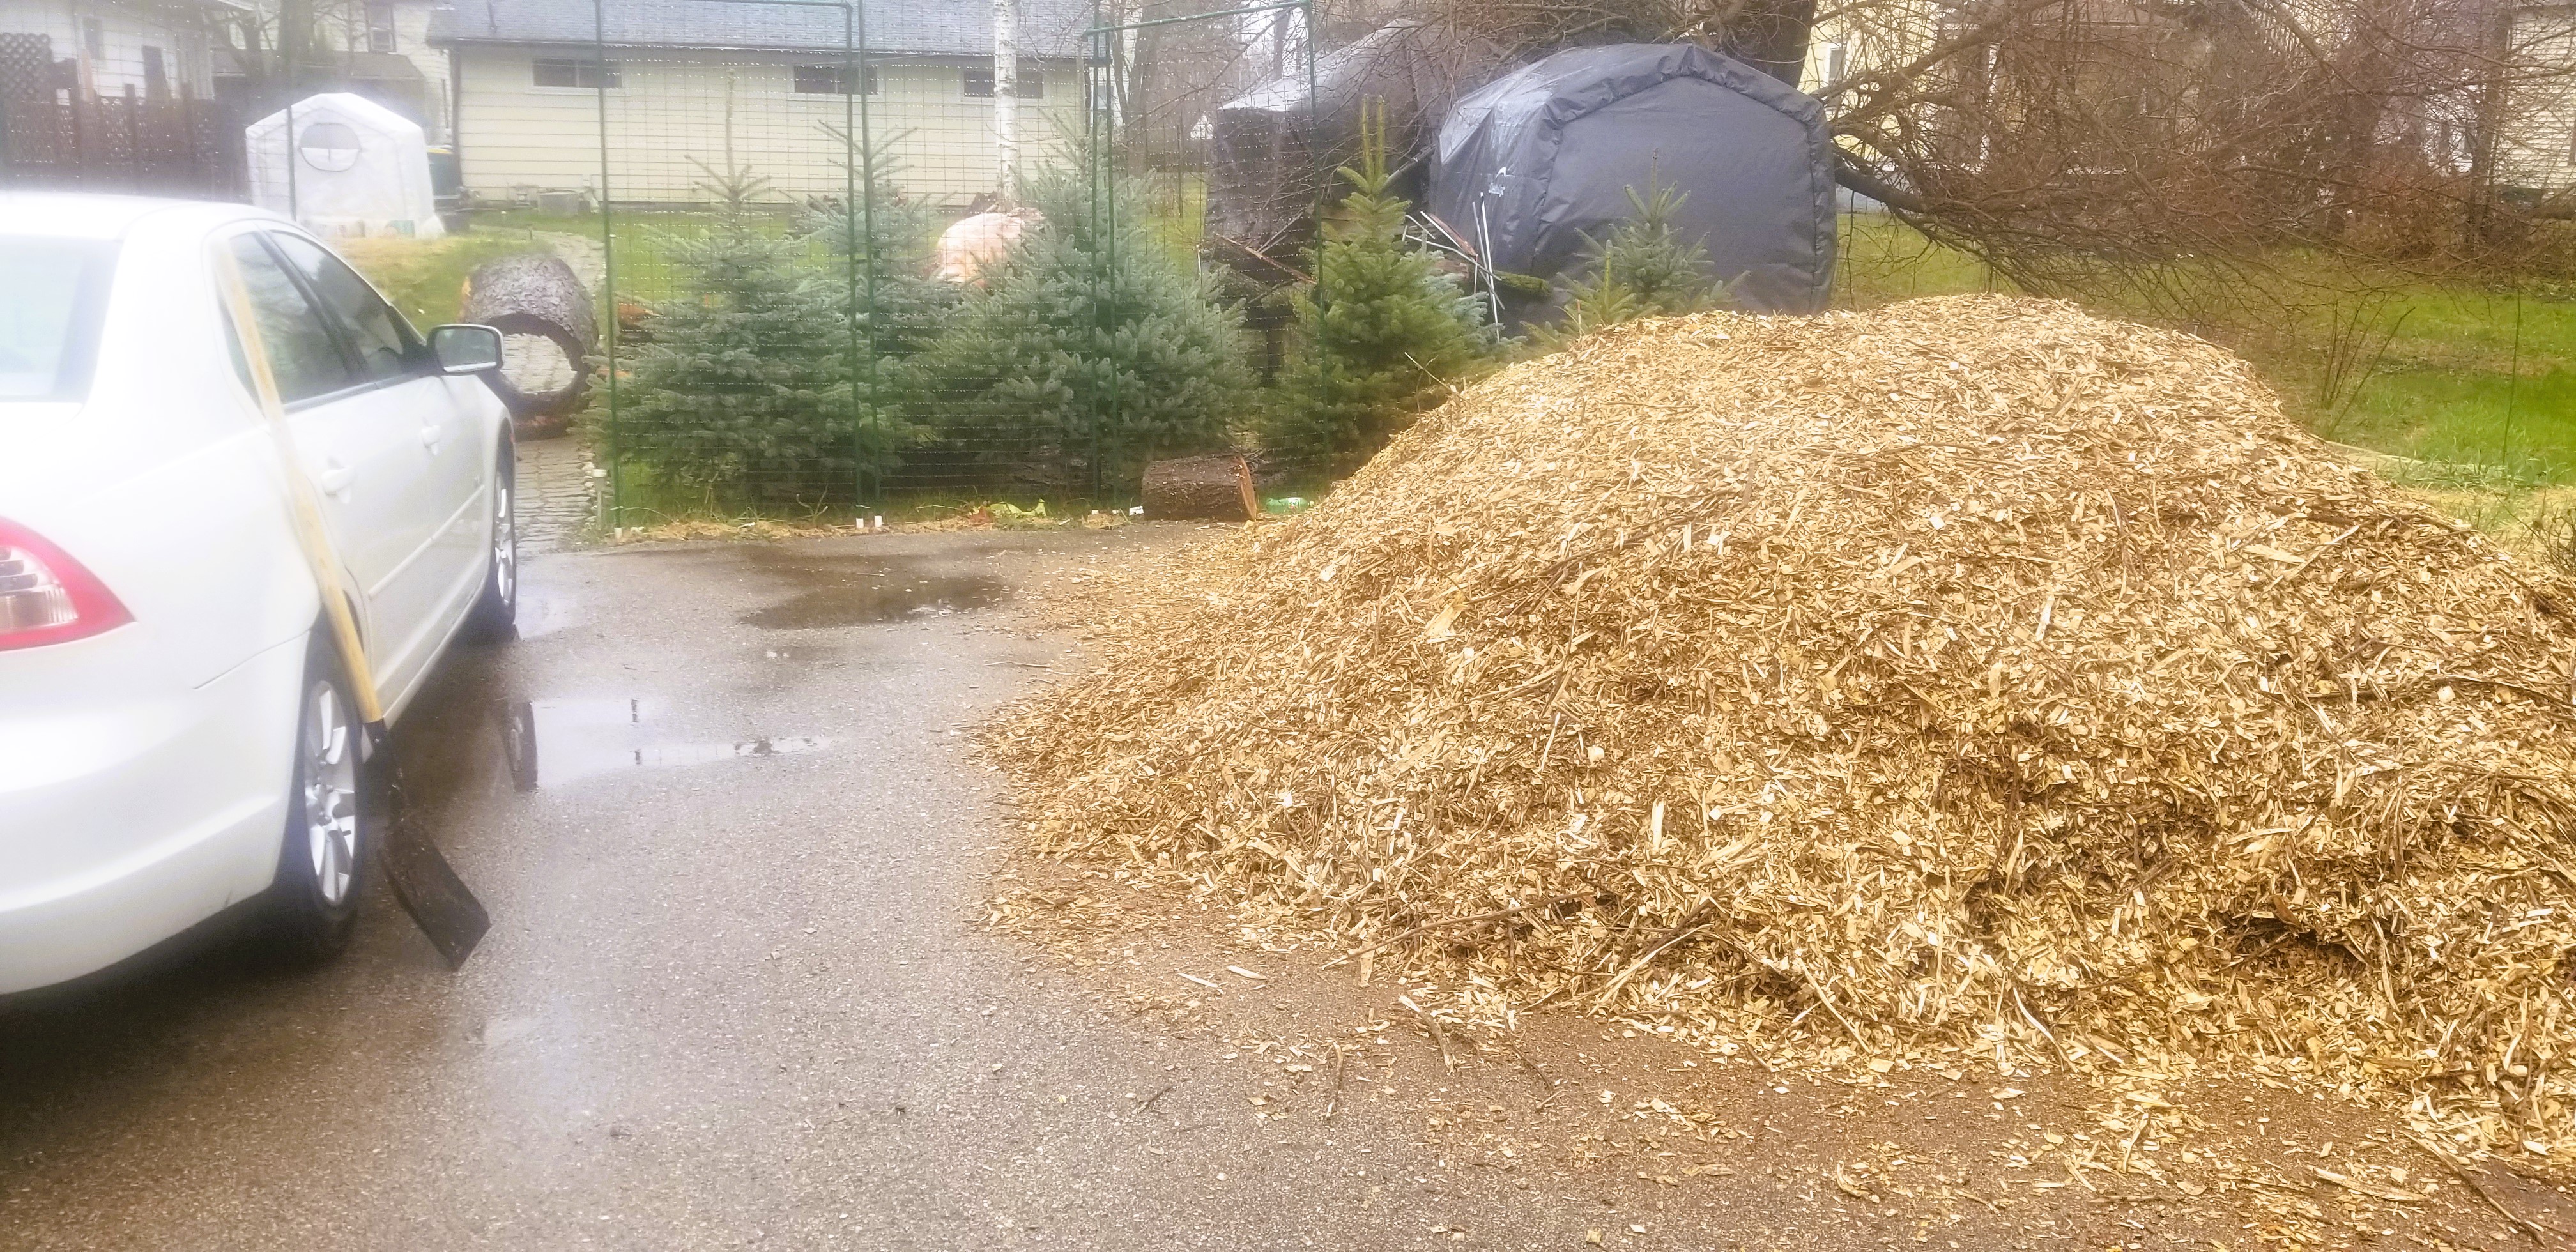
Anyway, I figured when I needed more wood chips, the tree cutters would be happy to bring me some without having to wait and wait and wait. As it turned out, he surprised me one day with an even bigger load and was happy enough just to give them to me.
February in Northern Illinois; below freezing temps, frigid winds, the possibility of snow, and with a still unstable jet stream: the chance of another bout with the Polar Vortex. In the greenhouse, however, warmth and green have prevailed. Our seventh season here has begun.
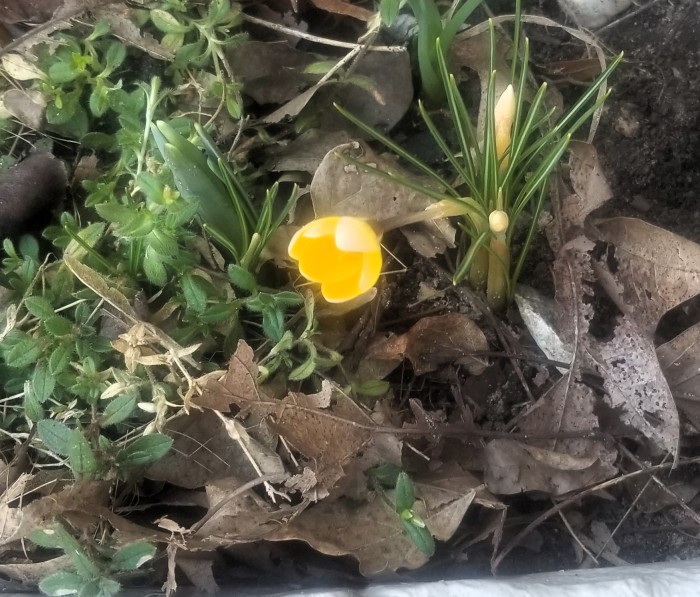
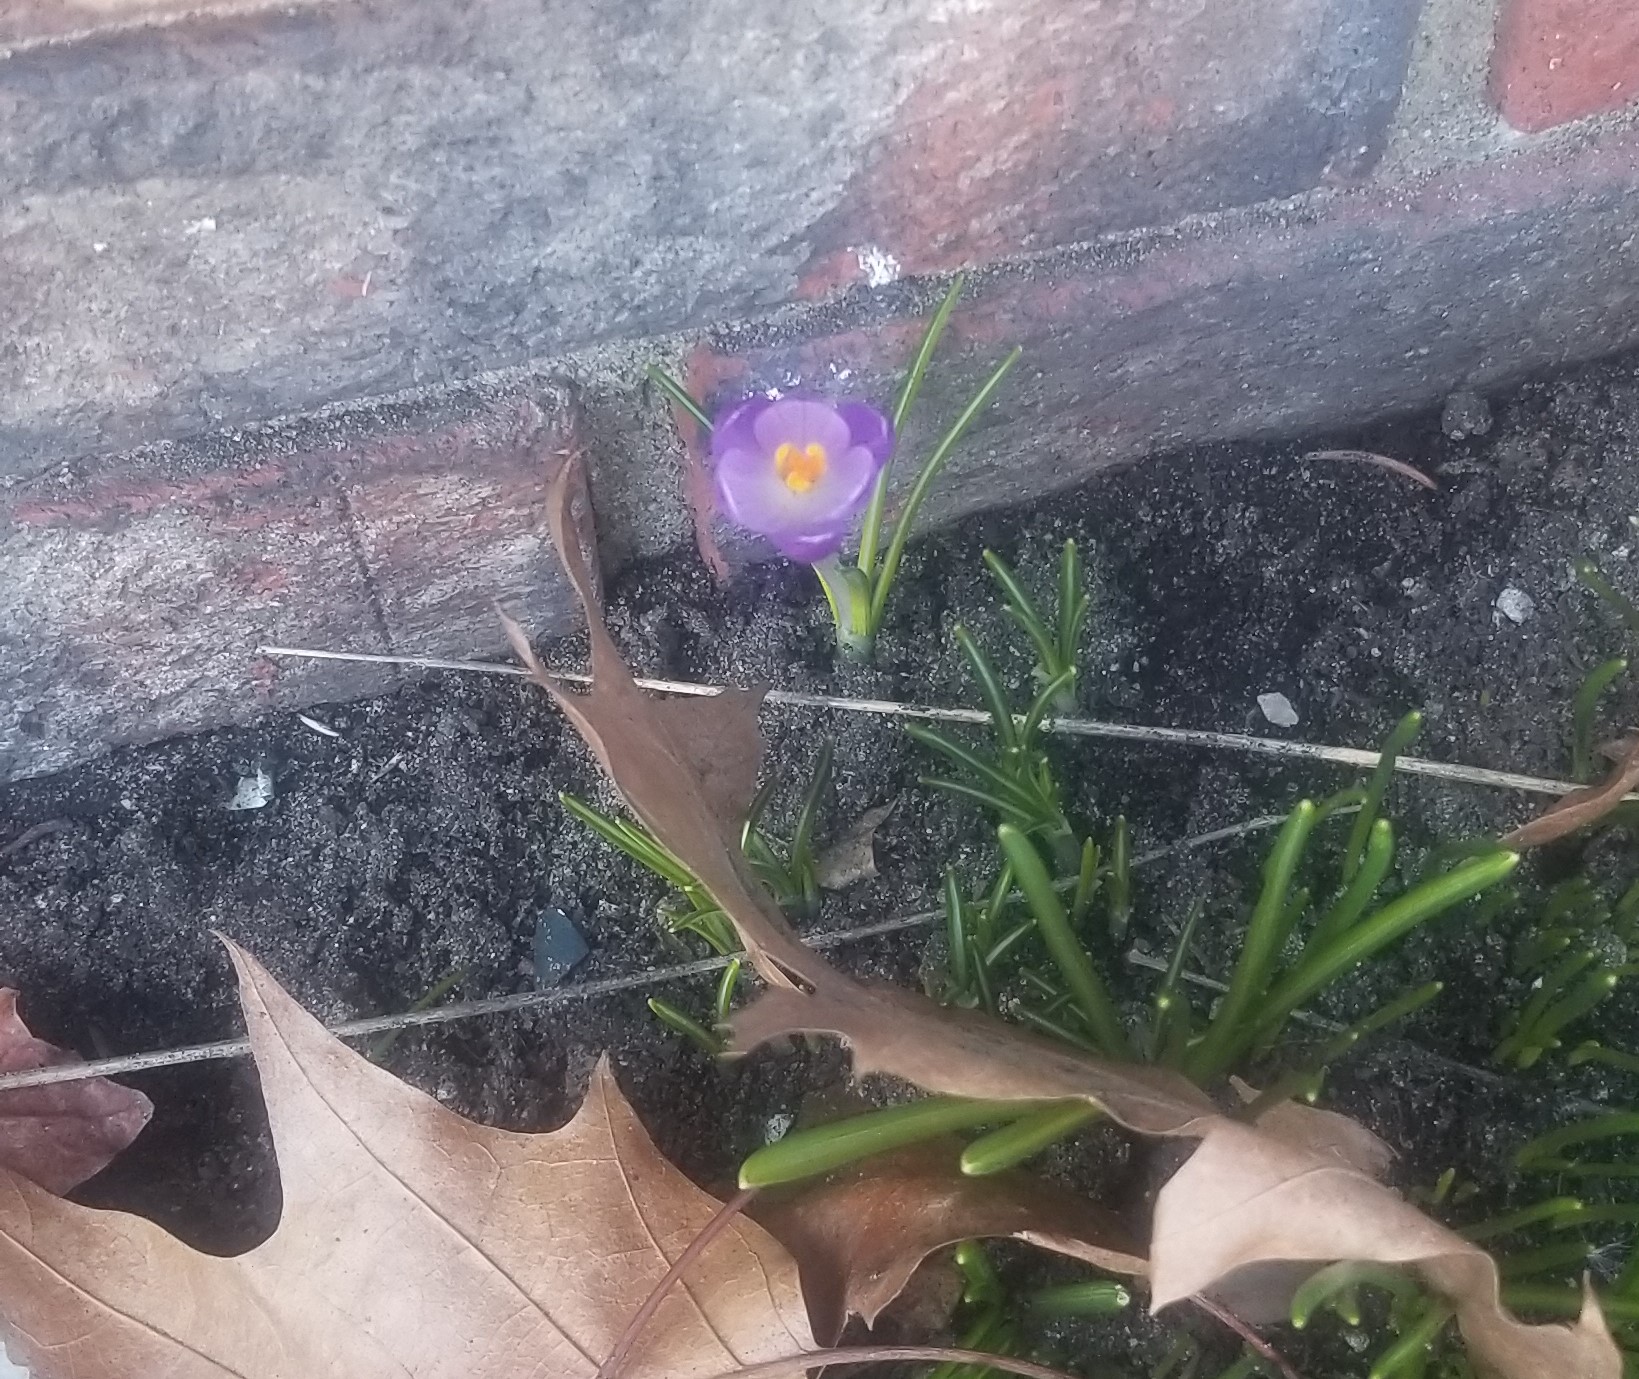
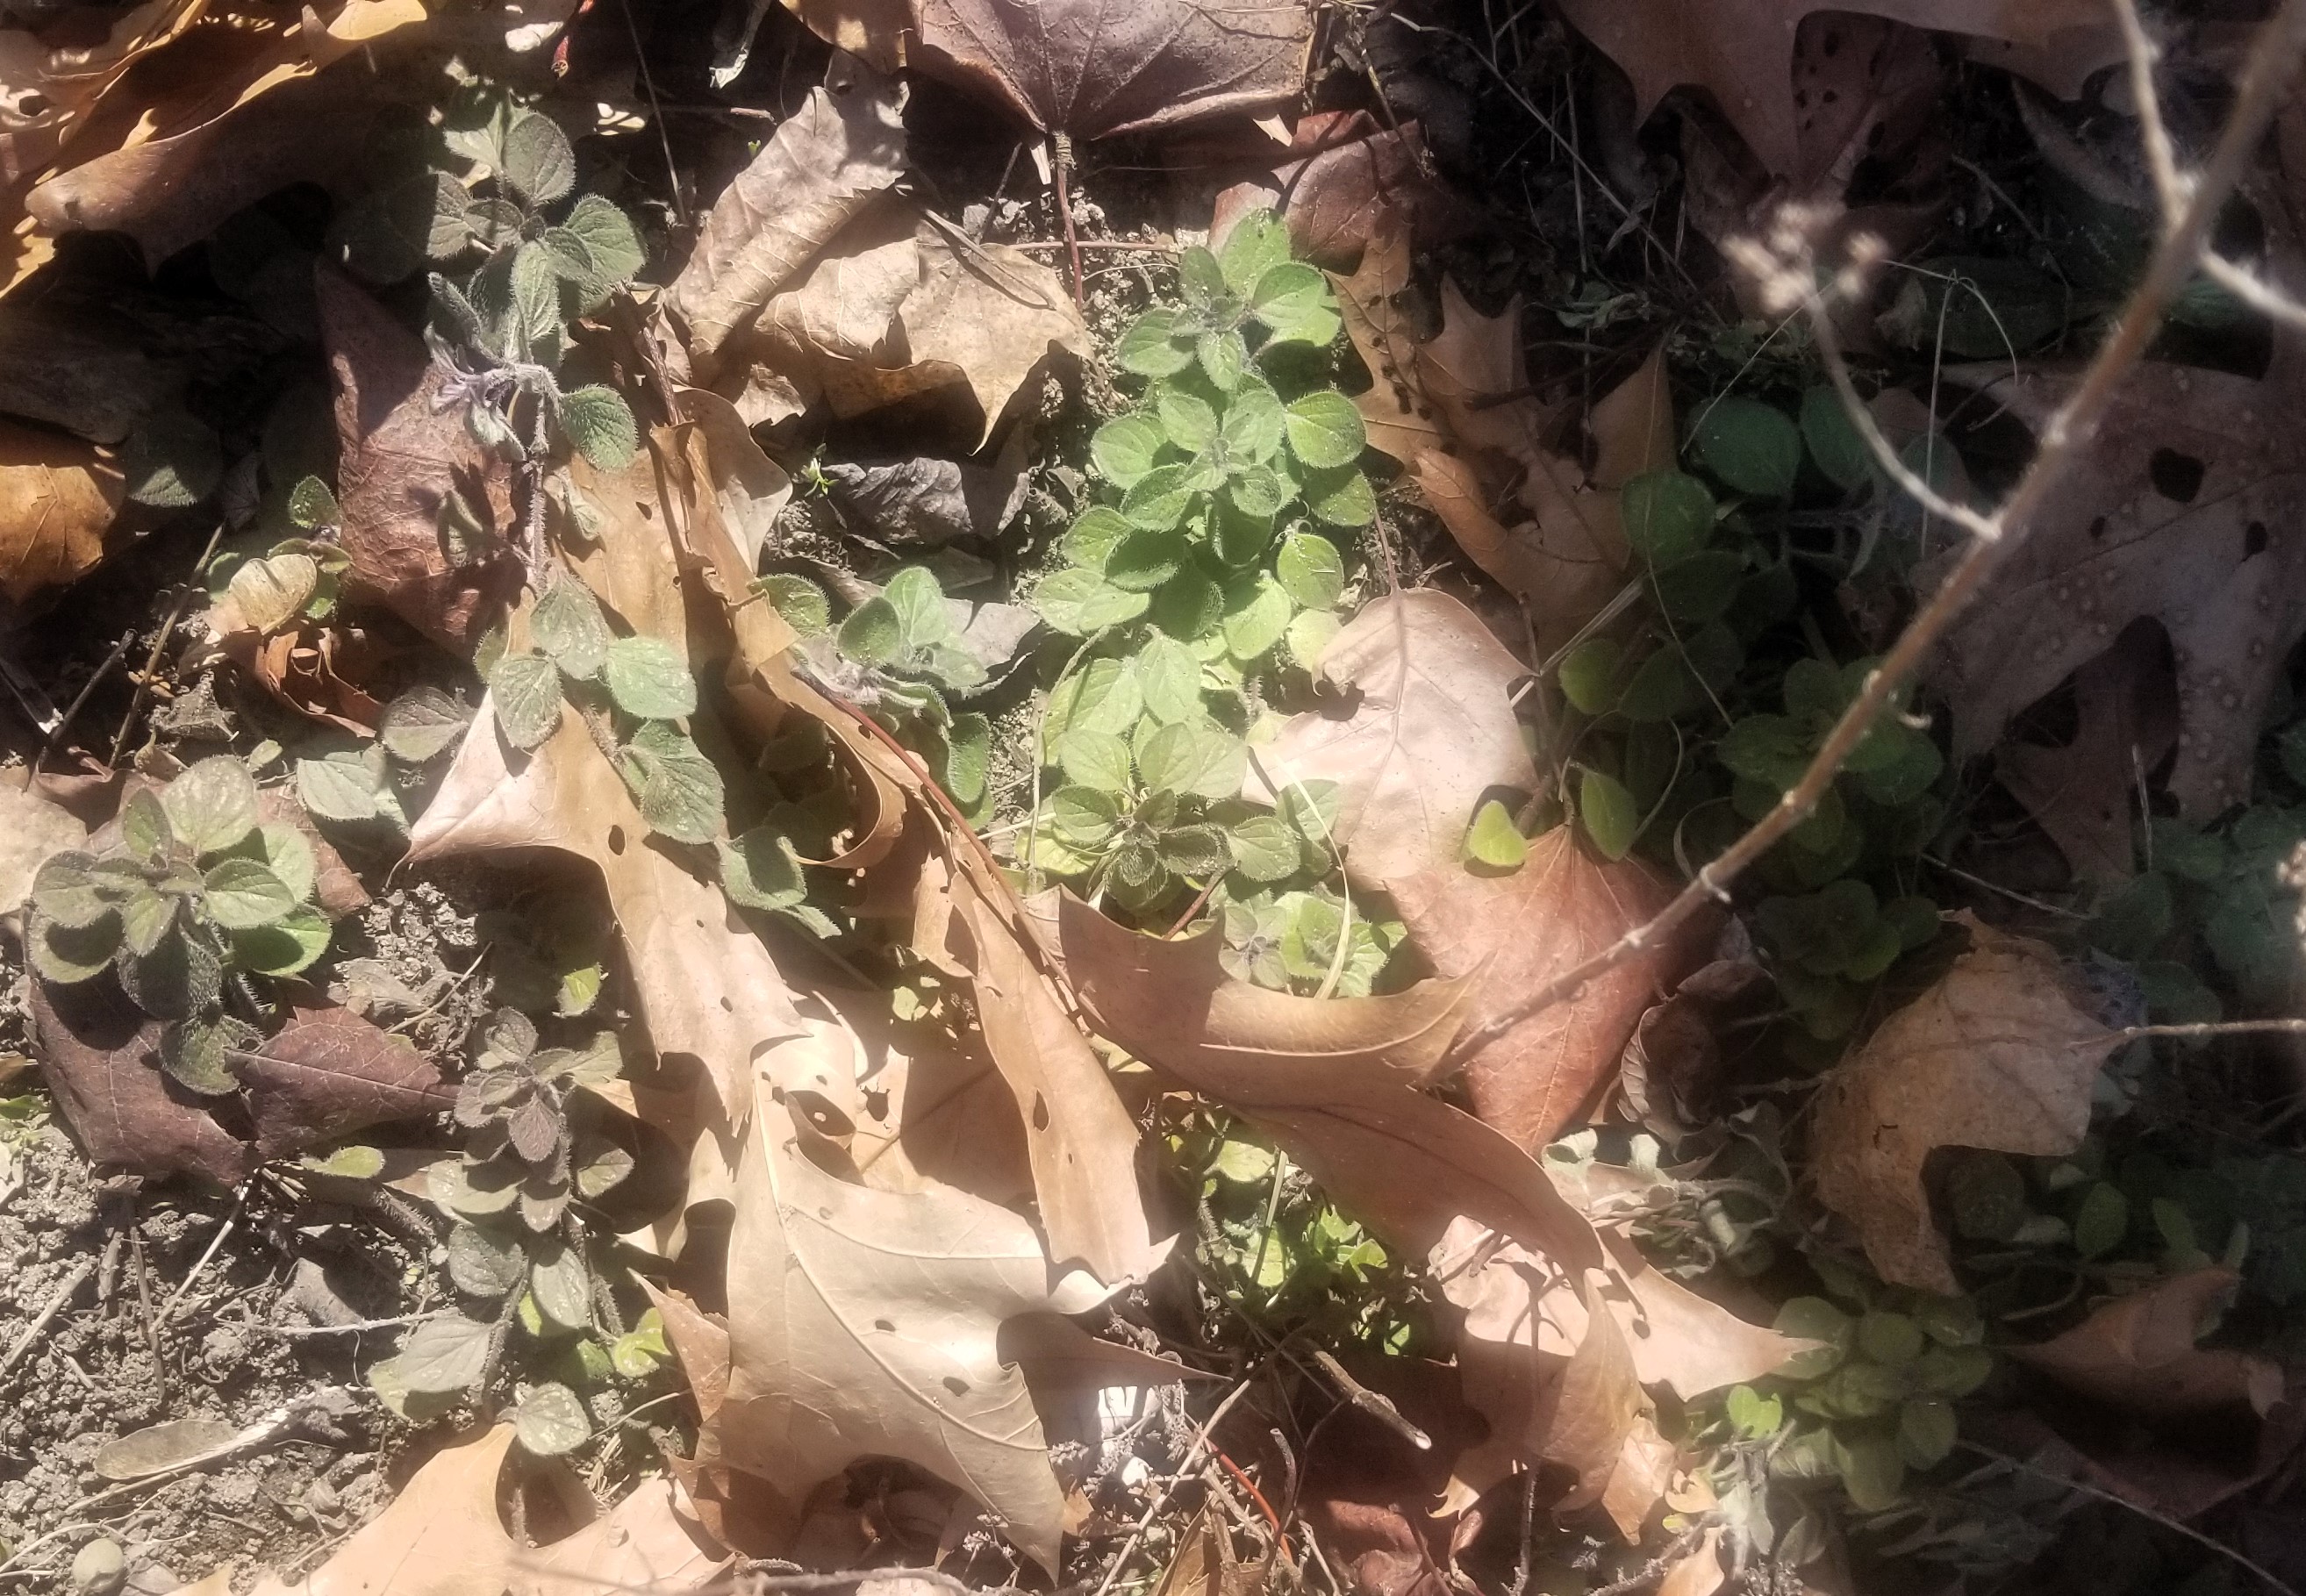
Despite a dusting of snow last week Friday, the forecasts have banished that chance of serious cold for the balance of winter, instead forecasting temperatures more normal for early April than the end of February and start of March. In fact, with the milder winter, our garlic sprouted a couple weeks ago along with our crocus and daffodils. Some of them are several inches tall already. The spring onions we planted last year have also sprouted, and there is green in the thyme and oregano. On sunny days, the greenhouse approaches 90°F (32°C) for a couple of hours, requiring active venting, including manually opening windows, earlier than I had expected. It would seem that groundhog was right about an early spring.
We’ve also been moved up from USDA Zone 5b to 6a because our winters have been milder over the last few decades. This encourages me to start earlier than I otherwise might have. Next year I’ll experiment with putting mini hoop houses over a couple of beds to see what, if anything, we can grow through the winter outside of the heated greenhouse.
Why do I keep going to extremes? Because I love and live to grow things. A lot of days I feel as though gardening and creating green spaces is my purpose in life. I would be happy with a house inside a five-acre conservatory; my own tropical island, so to say, like Silent Running without the apocalyptic plot twist. Thousands of trees and plants to care for. Butterflies, parrots – but no peacocks. Those things are loud! Just lock me inside. I’ll be fine. (Soaring violin music.)
Anyhow…
Last weekend, we started the long season crops which include Brussels sprouts. These take so long that to get decent sized ones, I need to extend the season considerably. At least, that’s what I’m hoping. I’ve never gotten a decent crop of Brussels sprouts, other than a handful of baby sprouts I just ate without having any to put up for the winter. If they don’t do well this year with starting them so early, that’ll be it. Every gardener needs to know when to cut their losses and switch to something that will produce. You need your square footage to yield food, not disappointments.
I’m starting more asparagus again because with the physical limitations from my illness over the last two years, they have been all but lost to the weeds. Asparagus does not compete well against anything. I’ve come to the point where I’ll be digging the beds up in early March, when it’s warm enough, so I can literally remove everything but asparagus at the deep root level. I may have to skip harvesting this year, but it’s either completely redo them or give up on asparagus. I’m not ready to do that just yet. Even though ground temperatures need to be 70°F (21°C) for transplanting outside, I’m starting them now because they can take up to thirty days to germinate.
We’ve also started our onions earlier in the hopes of getting larger bulbs this season. Onions have given me fits over the years. For the first three years I planted starts. They would sprout and grow well for a couple of months, then die back when the weather turned warm. When they restarted as the days cooled off, they would split into two or three mushy bulbs which never matured or grew to any decent size. Three years ago, I tried direct sowing seeds as soon as the weather allowed and got a handful of tiny onions at the end of the season as few germinated. Onions can have a notoriously low germination rate.
The last couple of years, though, I’ve had more success. Two years ago, I managed to get a few large onions and several medium ones out of the few seedlings that survived to make it into the garden. I realized then I would need a greenhouse to get anywhere with them. Last year I broadcast them into a tray of starter mix in the greenhouse (before the improvements) with the intention of transplanting what sprouted into six-packs to allow them each to grow their own root system before going into the garden. I sowed 300 seeds, expecting to get about half. I got about 250! I spent over three hours one day transferring them one by one into six-pack cells. I had way too many.
This year we put them directly into the small sized cells (72 per tray) a month earlier and sowed 144 seeds with some reserved for cells that don’t germinate. This should provide enough plants and space to get large bulbs. The trick with intensive gardening techniques is figuring out the line where the elbow room is just right, versus too little, versus could have gotten more in.
Fingers crossed.
The same goes for celery. I had a decent crop one year so far. Last year I tried intercropping them around the tomatoes, which ended up having a banner year and shading the celery too much. No more intercropping then. The celery is getting a dedicated spot now and forever (subject to crop rotation). We’re starting thirty, some for producing seed as seasoning and for planting next year. Sowing celery is fun (he says in his sarcastic voice). The seeds are tiny and require soaking overnight. So now you have the ittiest-bittiest little seeds which are sopping wet to work with. Thank goodness they are a surface sow. You only need to wipe them onto the starter mix, which should already be wet. To do so, I took a plant label stake and dipped it into the water near the seeds, allowing surface tension to grab two or three at a time to lift from the cup. Tedious, but not difficult.
Cauliflower is another one to start early as it also needs a long time to develop. I’ve also switched varieties due to lack of success with what I was using over the last few years. The thing about making the decision to change varieties is that you can have a bad couple of years not because the type doesn’t work in your garden, but simply because it was a bad couple of years for that plant in general. Something always underperforms. Although, after three years of smaller heads and none at all last year I can conclude it’s the variety, not bad luck. The new choice began sprouting in four days.
We’re also changing our broccoli variety and getting pelleted carrot and lettuce seeds from a new supplier for the same reason: chronic underperformance. It’s too early to start those yet, though.
It feels good to have gotten some seeds in. For a week or so, my anxious heart should be soothed with having started for the year. My love of gardening makes every winter my winter of discontent. I need to be growing things – anything (other than mold). Every spring is exciting, a new adventure waiting to be lived and experienced, a noble mission to be pursued and achieved. That’s how it feels to me.
Unfortunately, we finished the greenhouse too late last year to get much use out of it over the winter. It gave me some relief from the winter blues to tend for the plants we put in it. Only, we got them in so late they didn’t really get established before the days got too short and the nights too cool to promote much growth (even with the heater). Next year will be different, of course, because we can start as early as we want and plant short day varieties; I can take some solace there.
In the meantime, Garden Quest 2024 has begun. (Theme music plays)
It’s been my experience that most home gardeners focus on vegetables, then herbs, then fruit in two stages. First, a strawberry bed and maybe a couple of melons. Second, looking to get a serious amount of produce, perhaps as part of an overall, self-sufficiency scheme, rather than as an add-on. This year, we are moving to this higher level with fruit.
By fruit, I mean the items we traditionally view as fruit in the market, not the botanical definition. Let’s not open that bag of seeds.
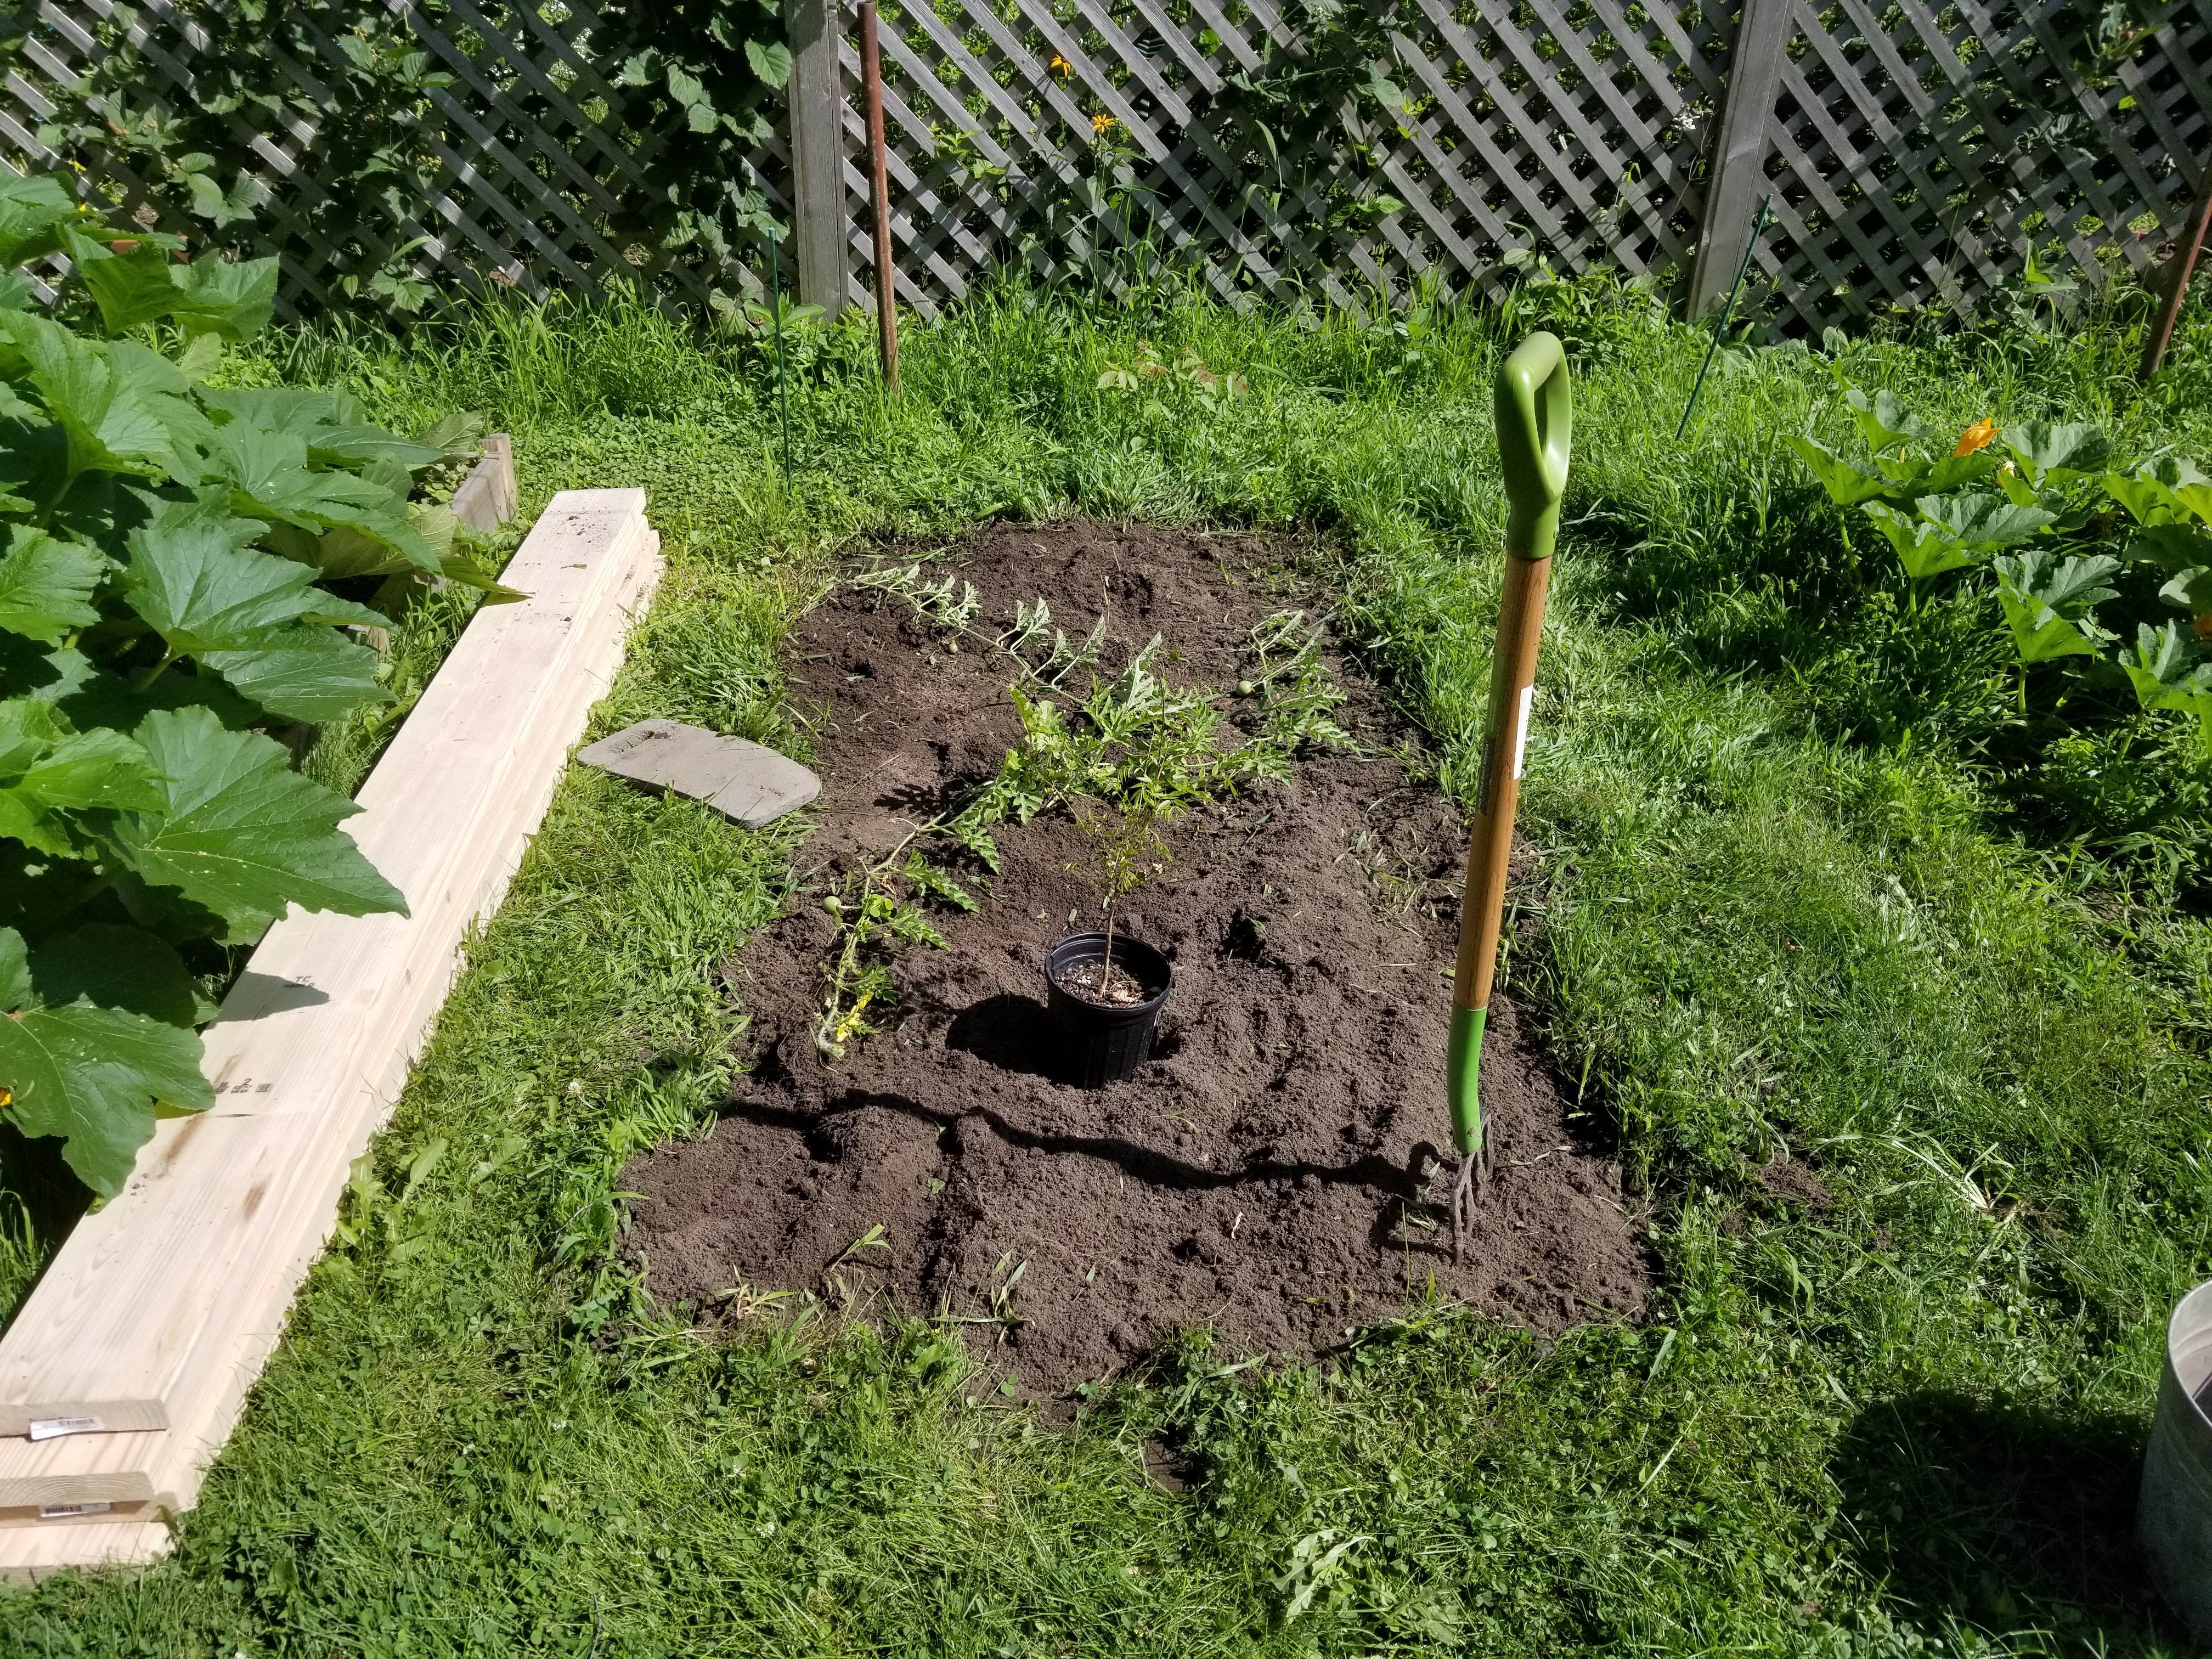
Technically, we started last fall by planting two apple trees and a pear tree out front in what will eventually become a mini food forest. Those trees and the berries we’re adding this year are from a nursery that’s been in business almost two centuries and come with a guarantee. The trees were pricey, but our local centers don’t carry dwarf varieties. Beth splurged on those to perk me up when my treatments had me down.
Granny Smith apple tree breaking dormancy
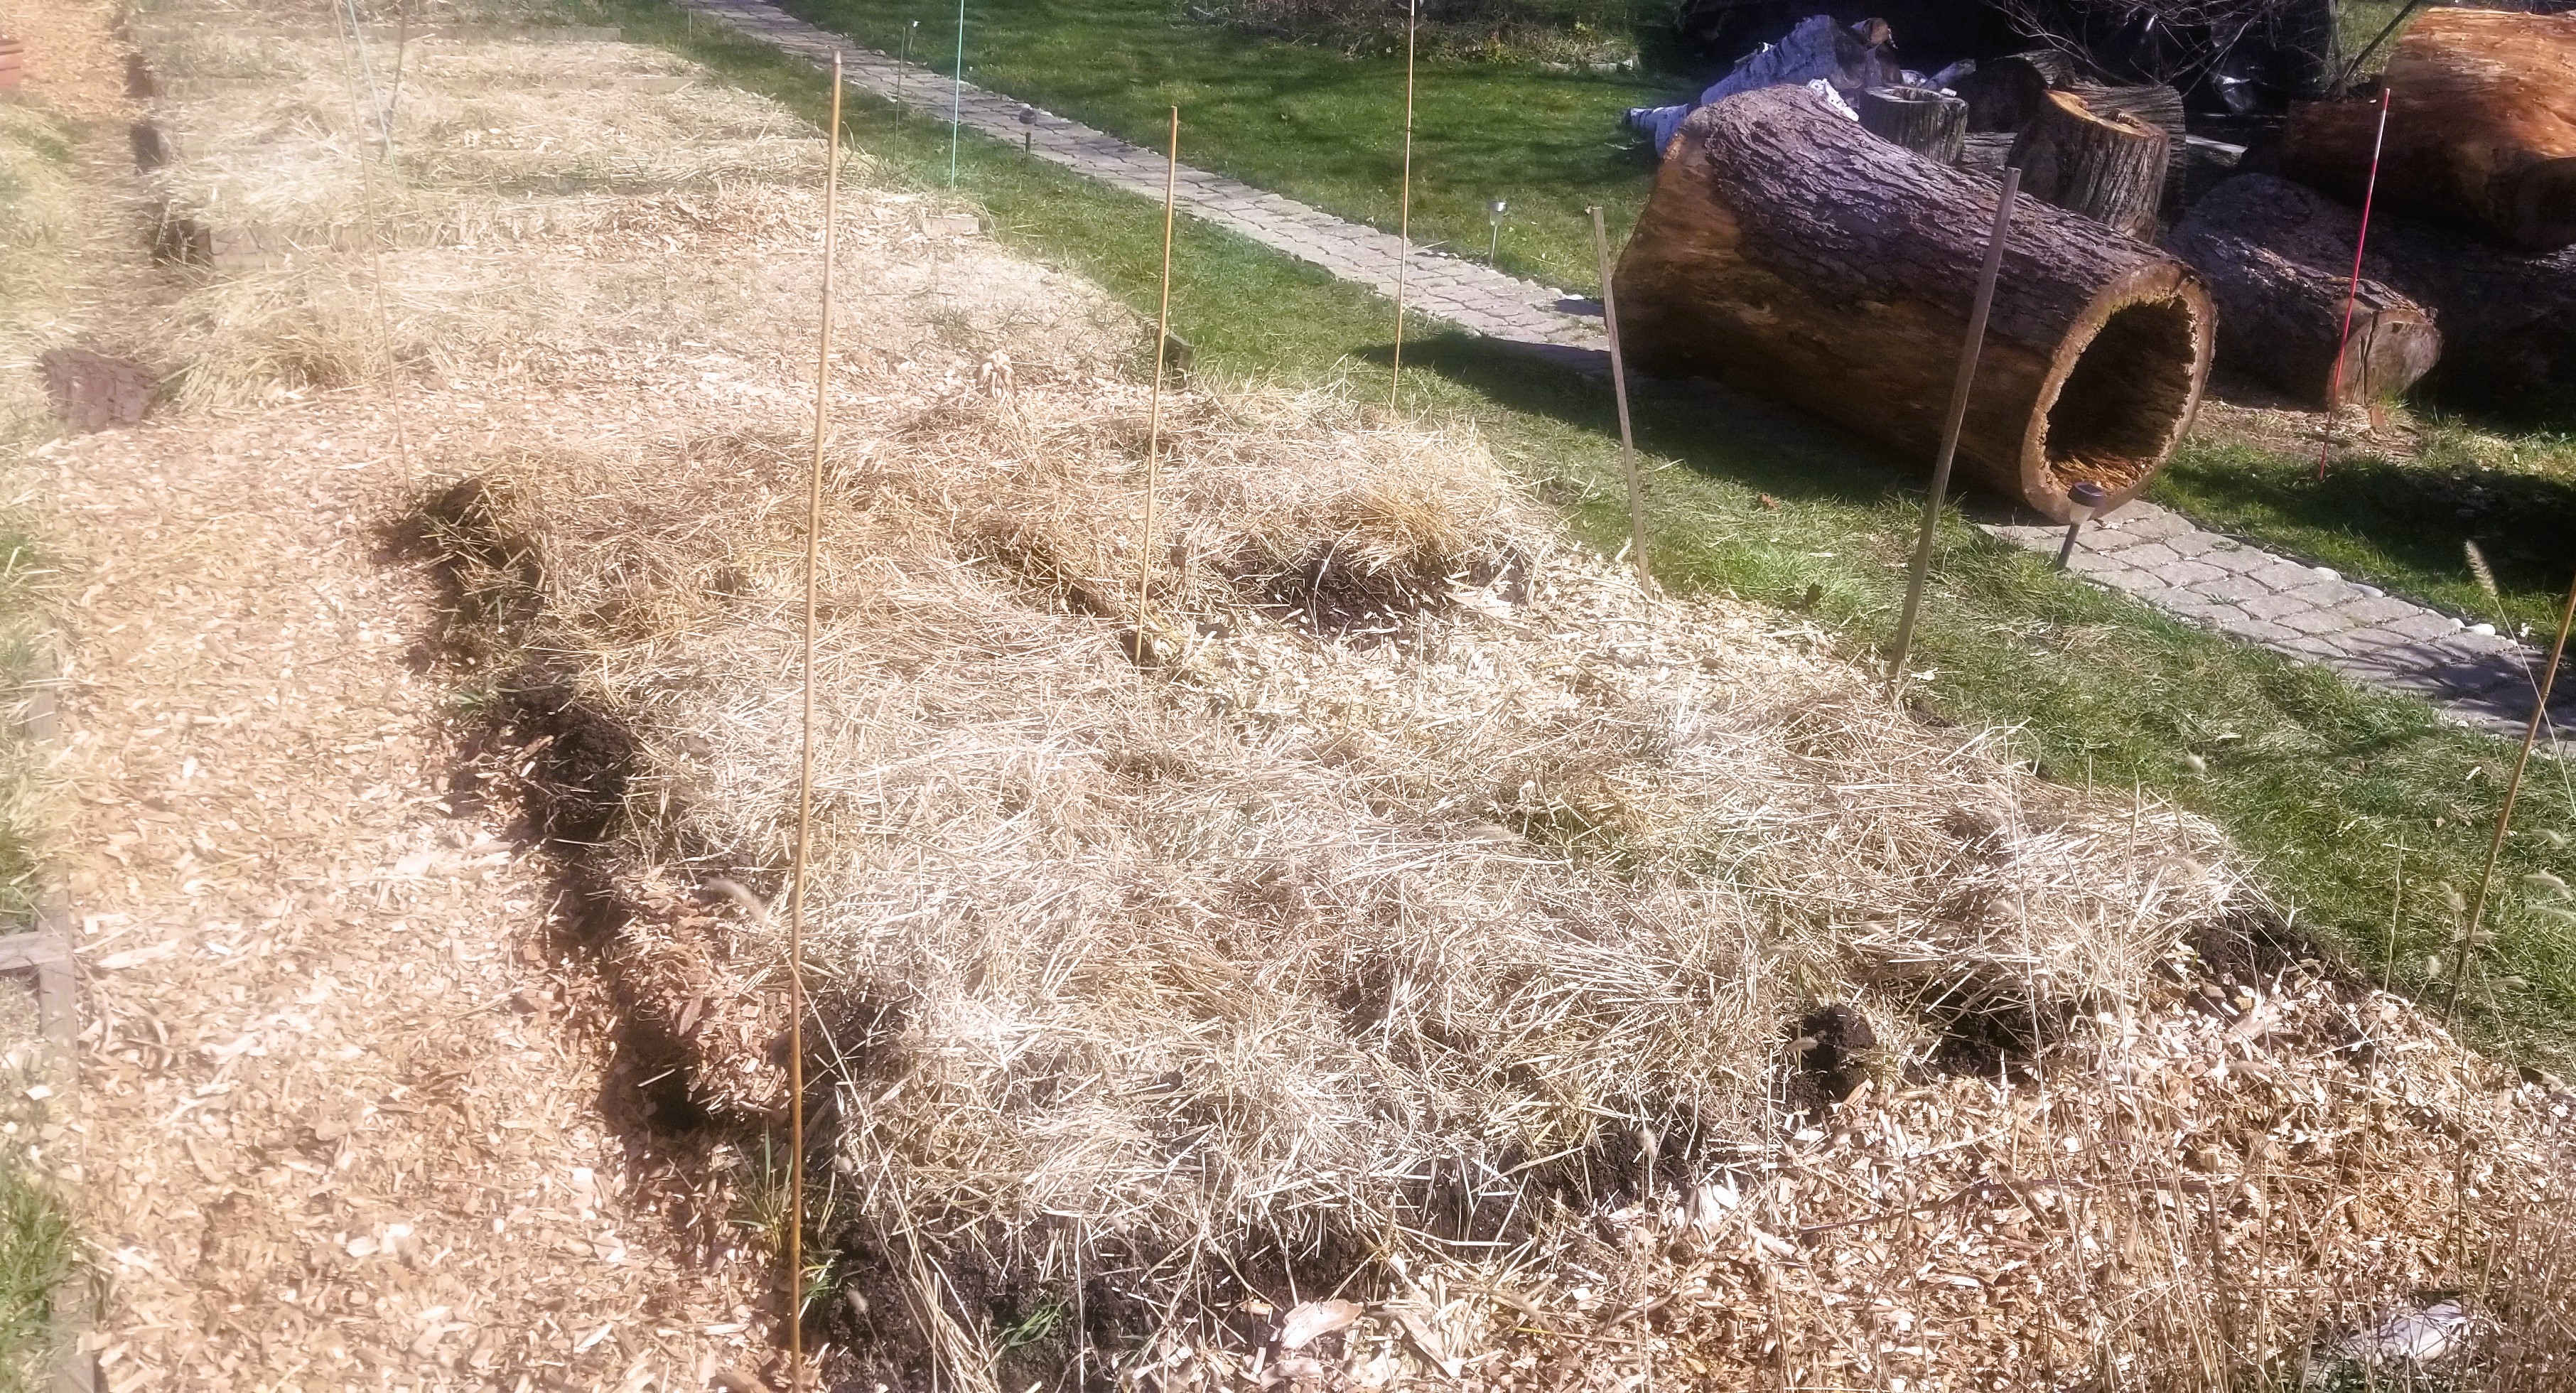
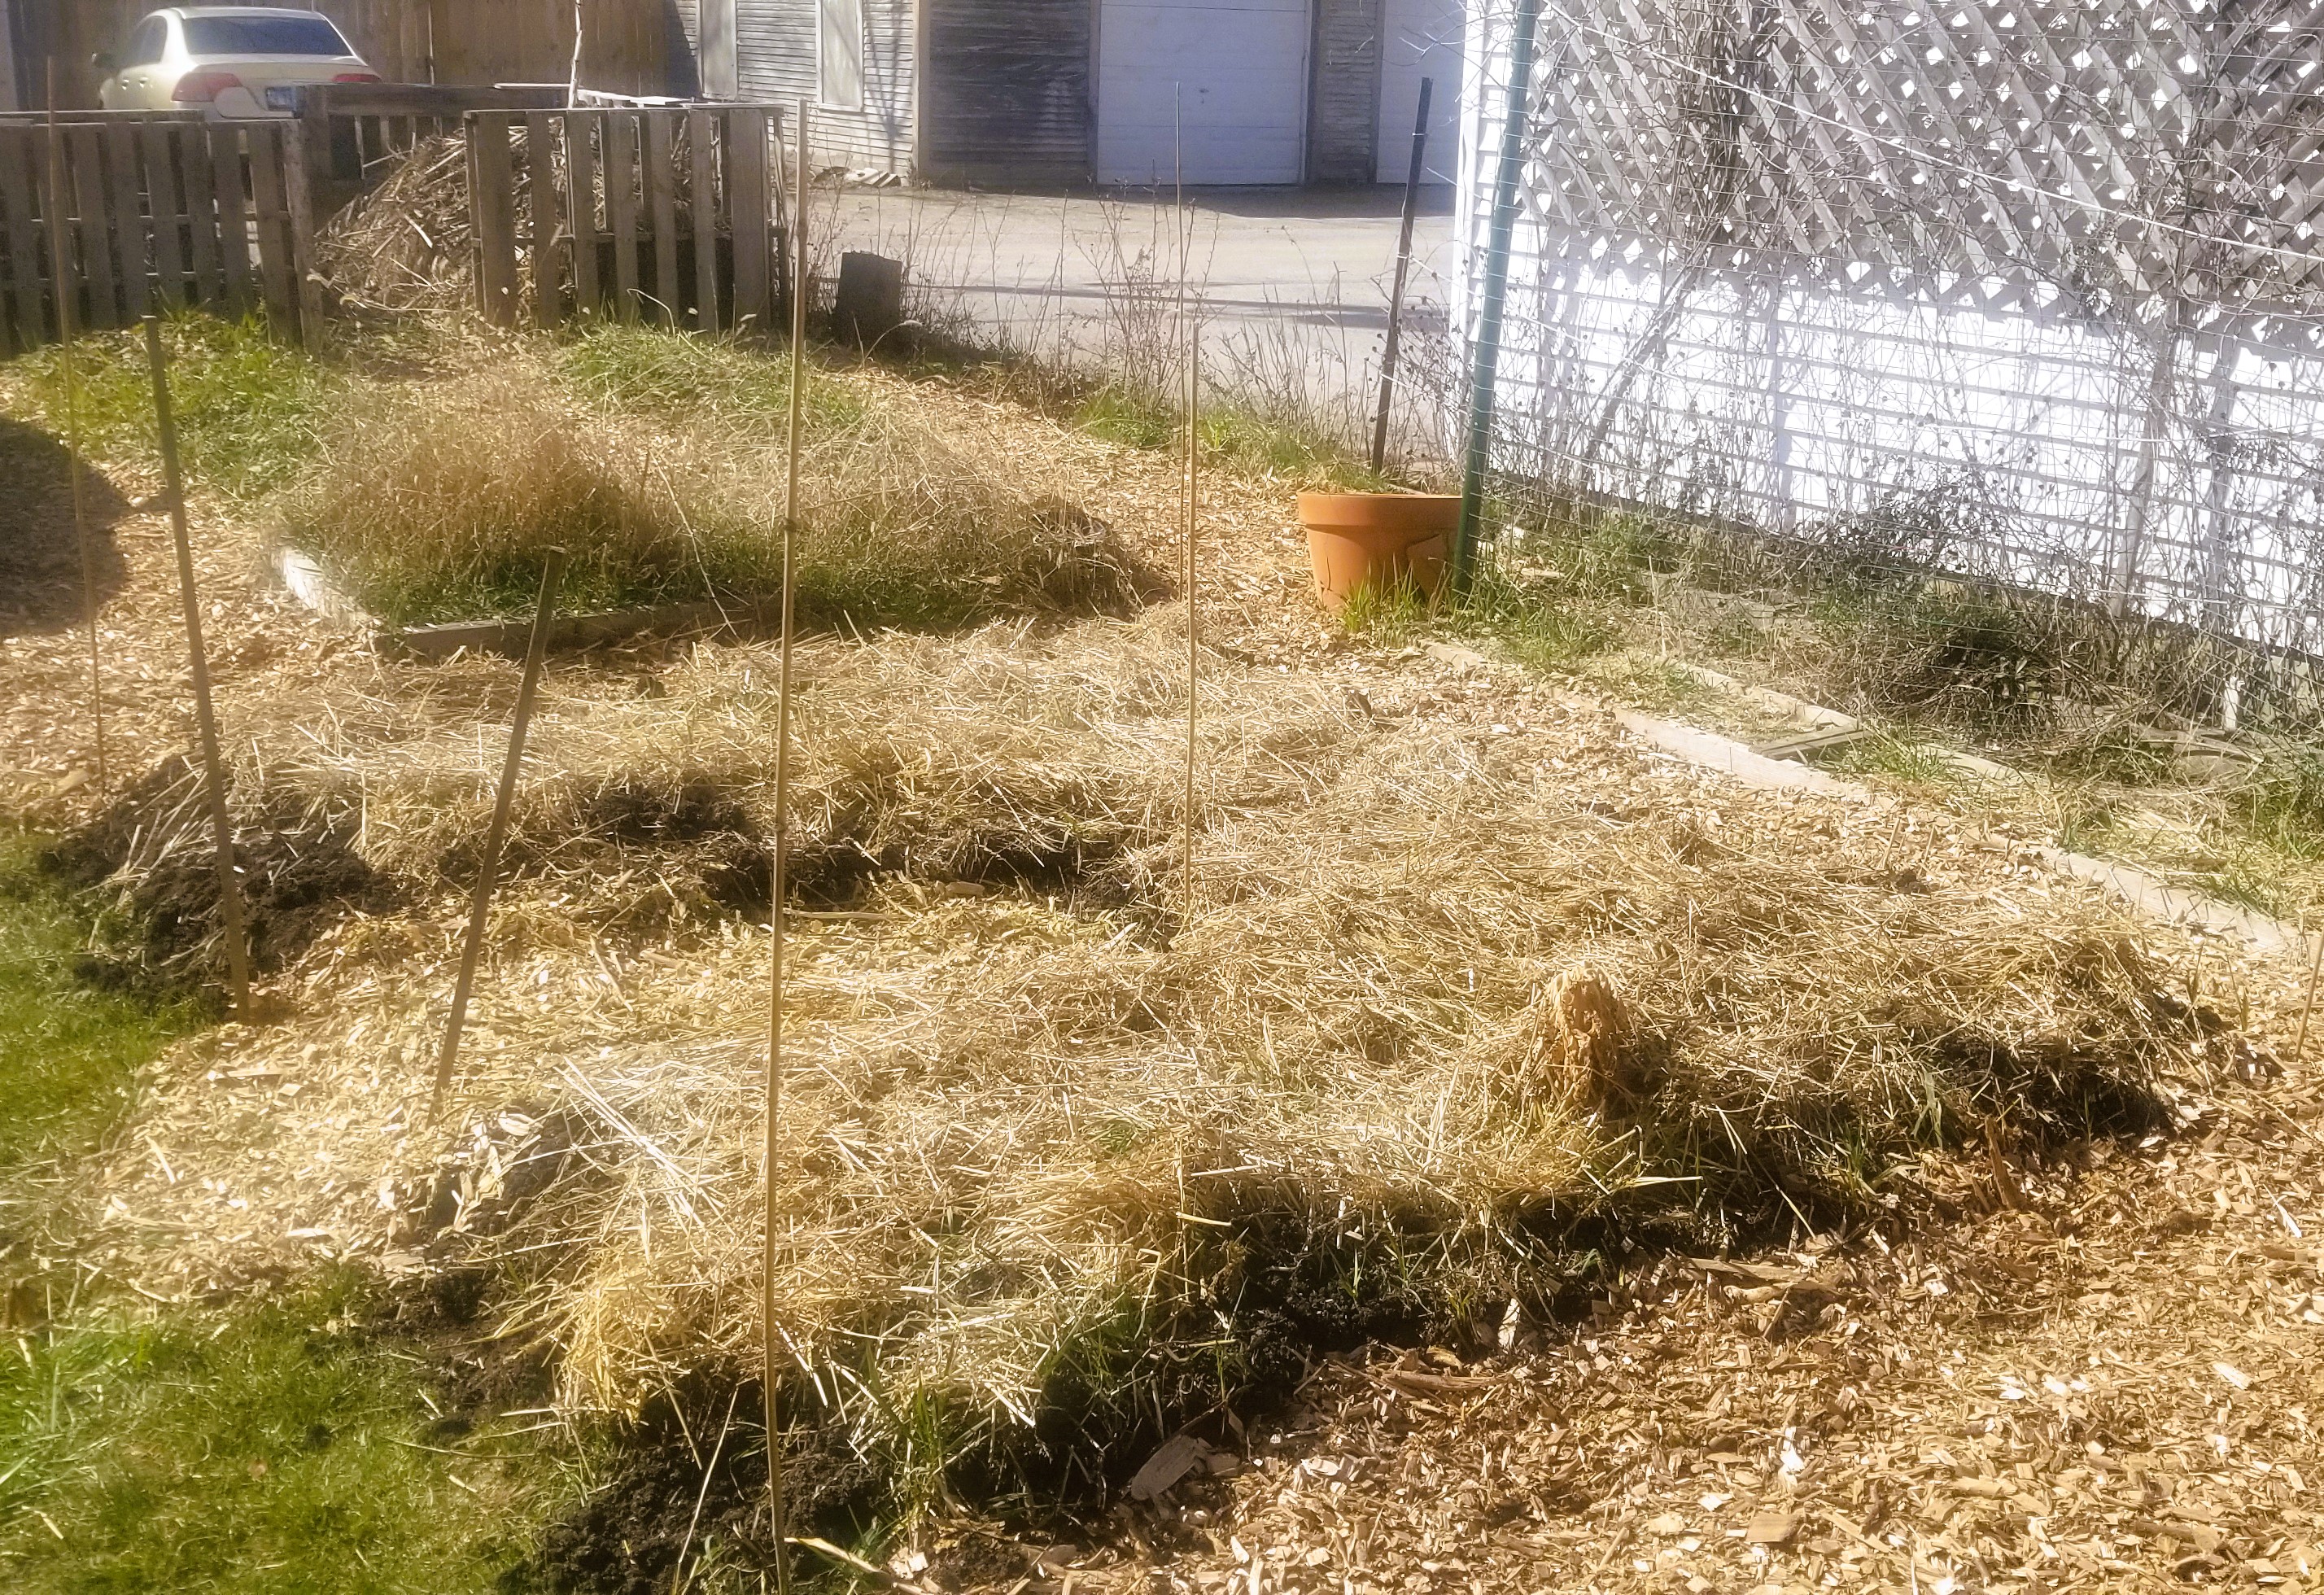
Thanks to a sale and an internet coupon, the raspberries and strawberries worked out to be cheaper than buying them at a garden center while being of equal or better quality. We did have a strawberry bed and a black raspberry, which were doing poorly, at the back of the property. Once I became ill and could no longer tend the area, they were overrun with tall grass, and weeds, birds, and the frustration that came with it. Weeds three to four feet high blanketed the space.
Raspberry free to a good home
Except for one section, where I had intended to put more raspberries. Not even weeds were doing well there.
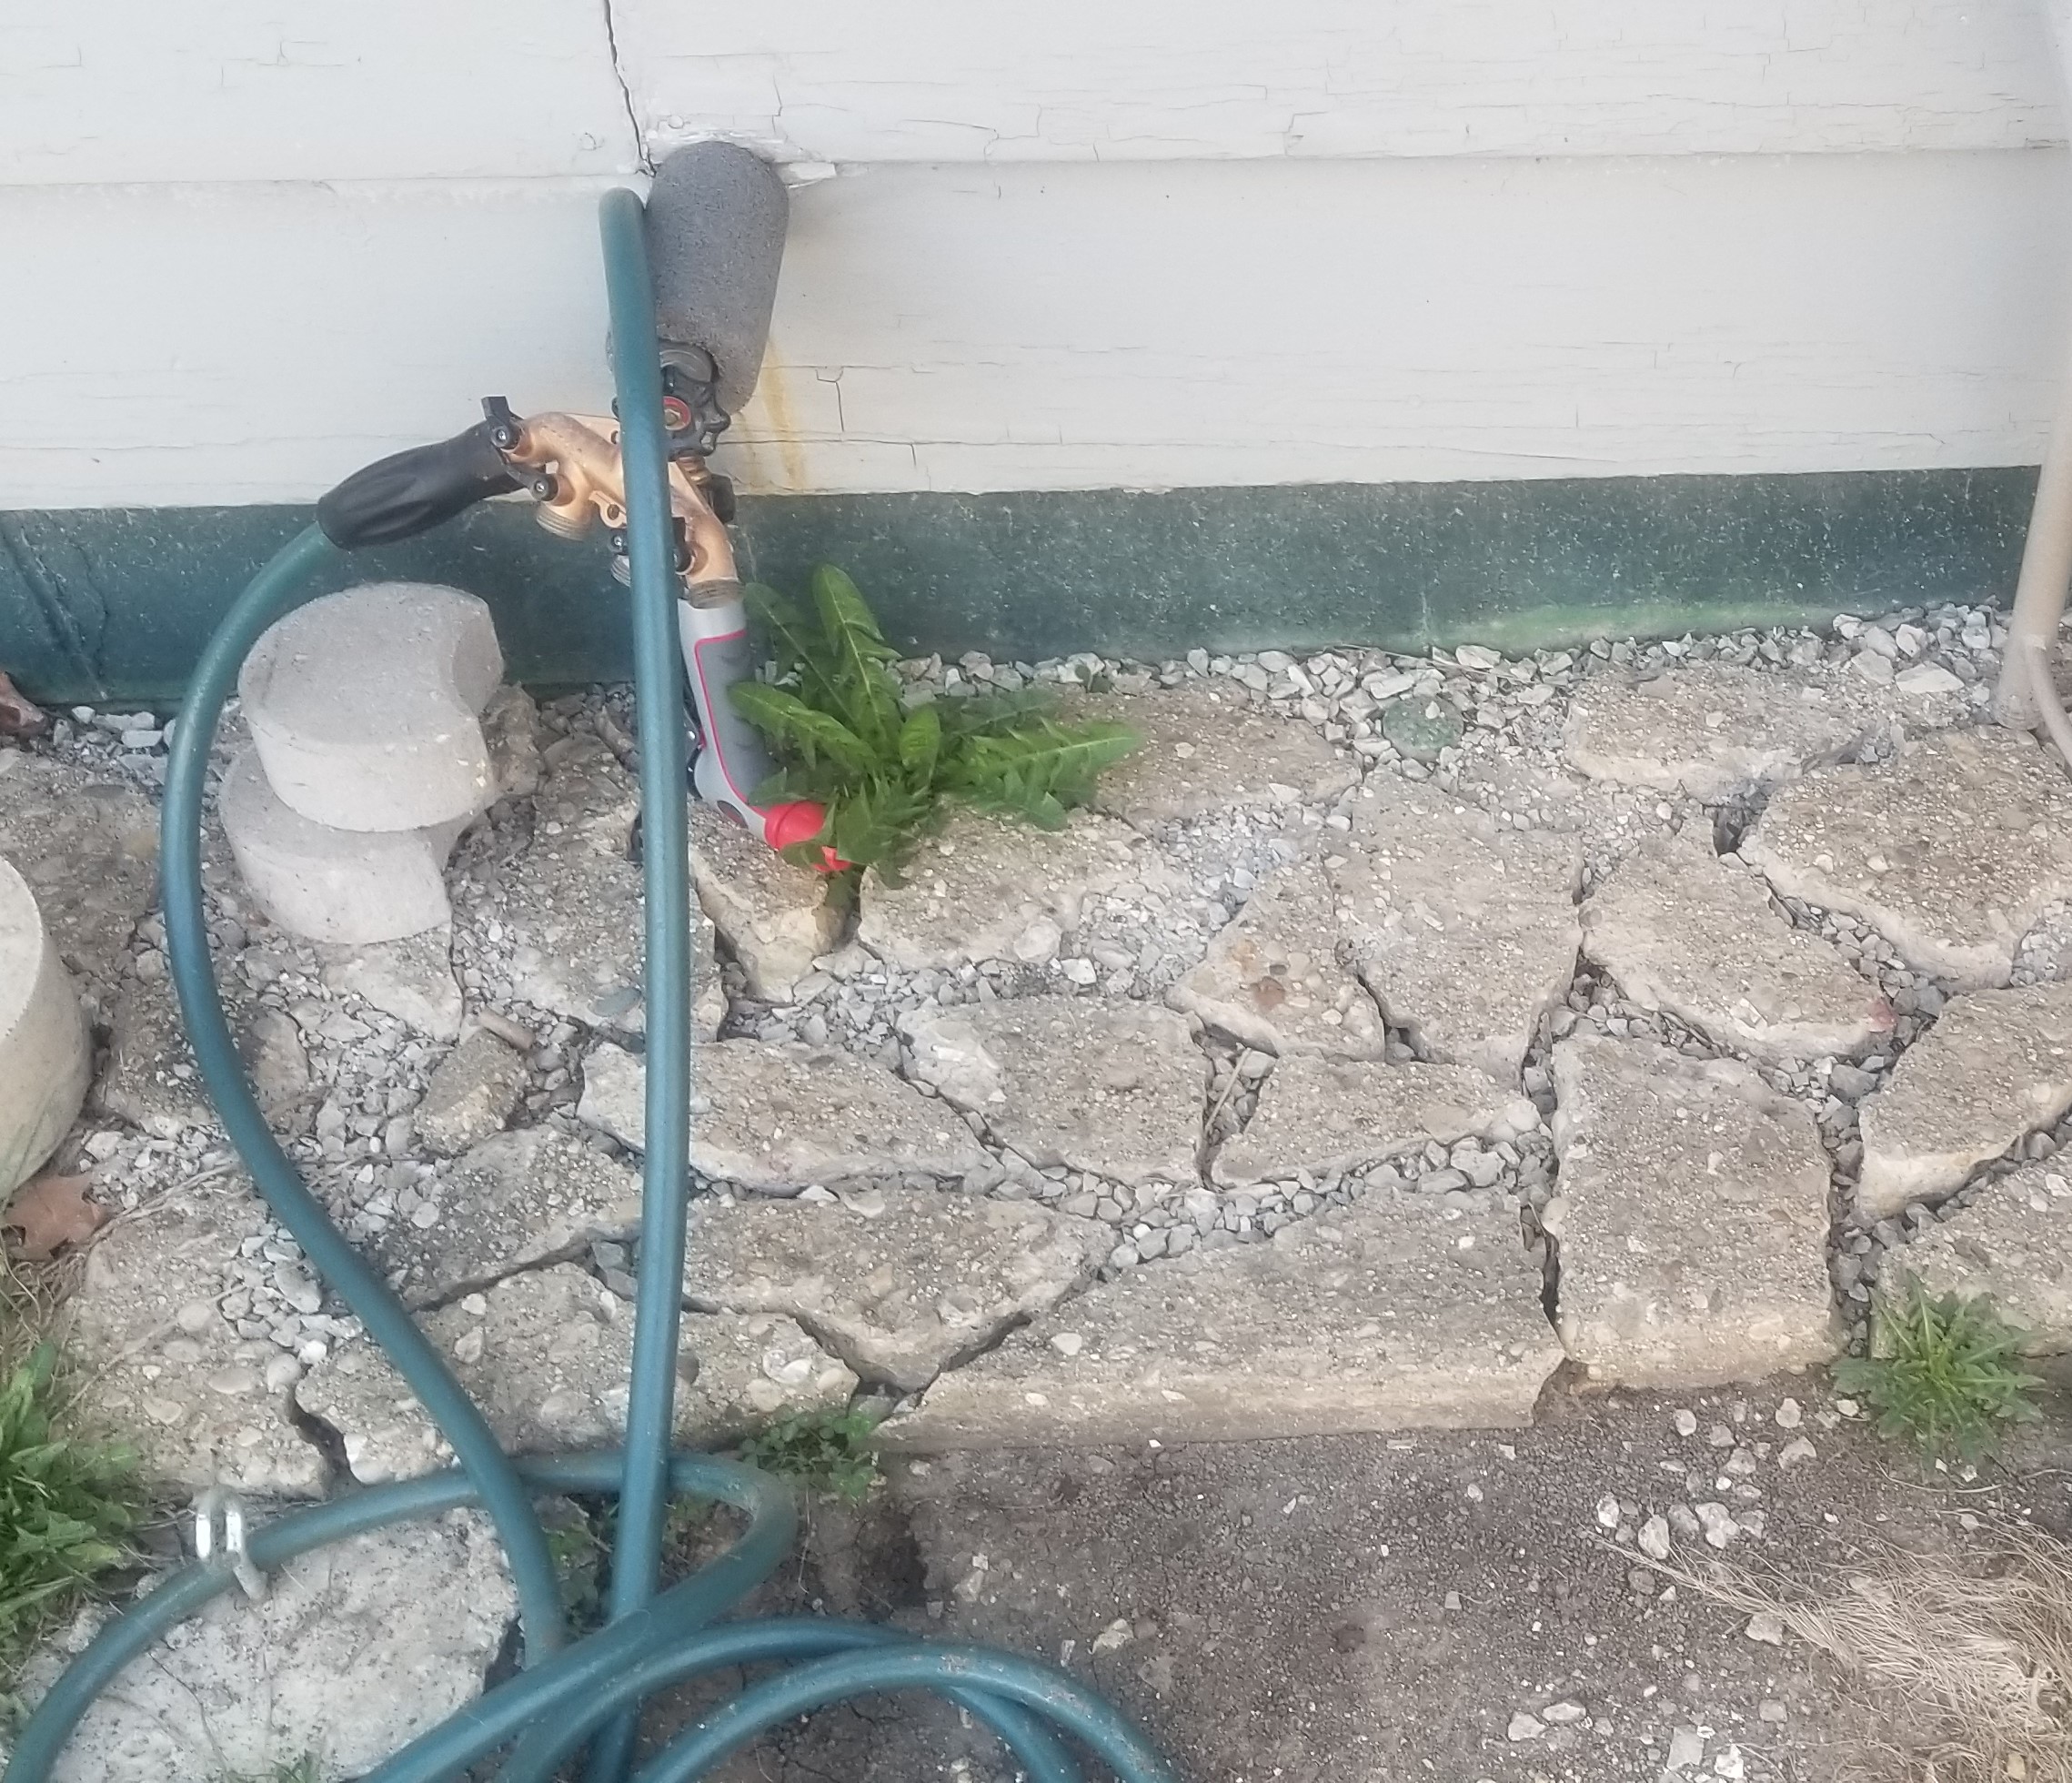
For a few years, I had a pile of soil in that place. This soil had come from along the back of the house, when we put in stone as a barrier to weeds. There weren’t many weeds as it was back then because the soil was dry thanks to the eaves keeping most of the rain off of the space. Or so I thought. Wherever I used the soil, the plants suffered. The space under where the pile once sat barely supports weeds. A previous owner must have sprayed the area with a weed killer like Round-up to keep plants from growing against the house.
Repurposed the old sidewalk pieces when we replaced it.
Maybe that’s what gave me cancer. Who knows?
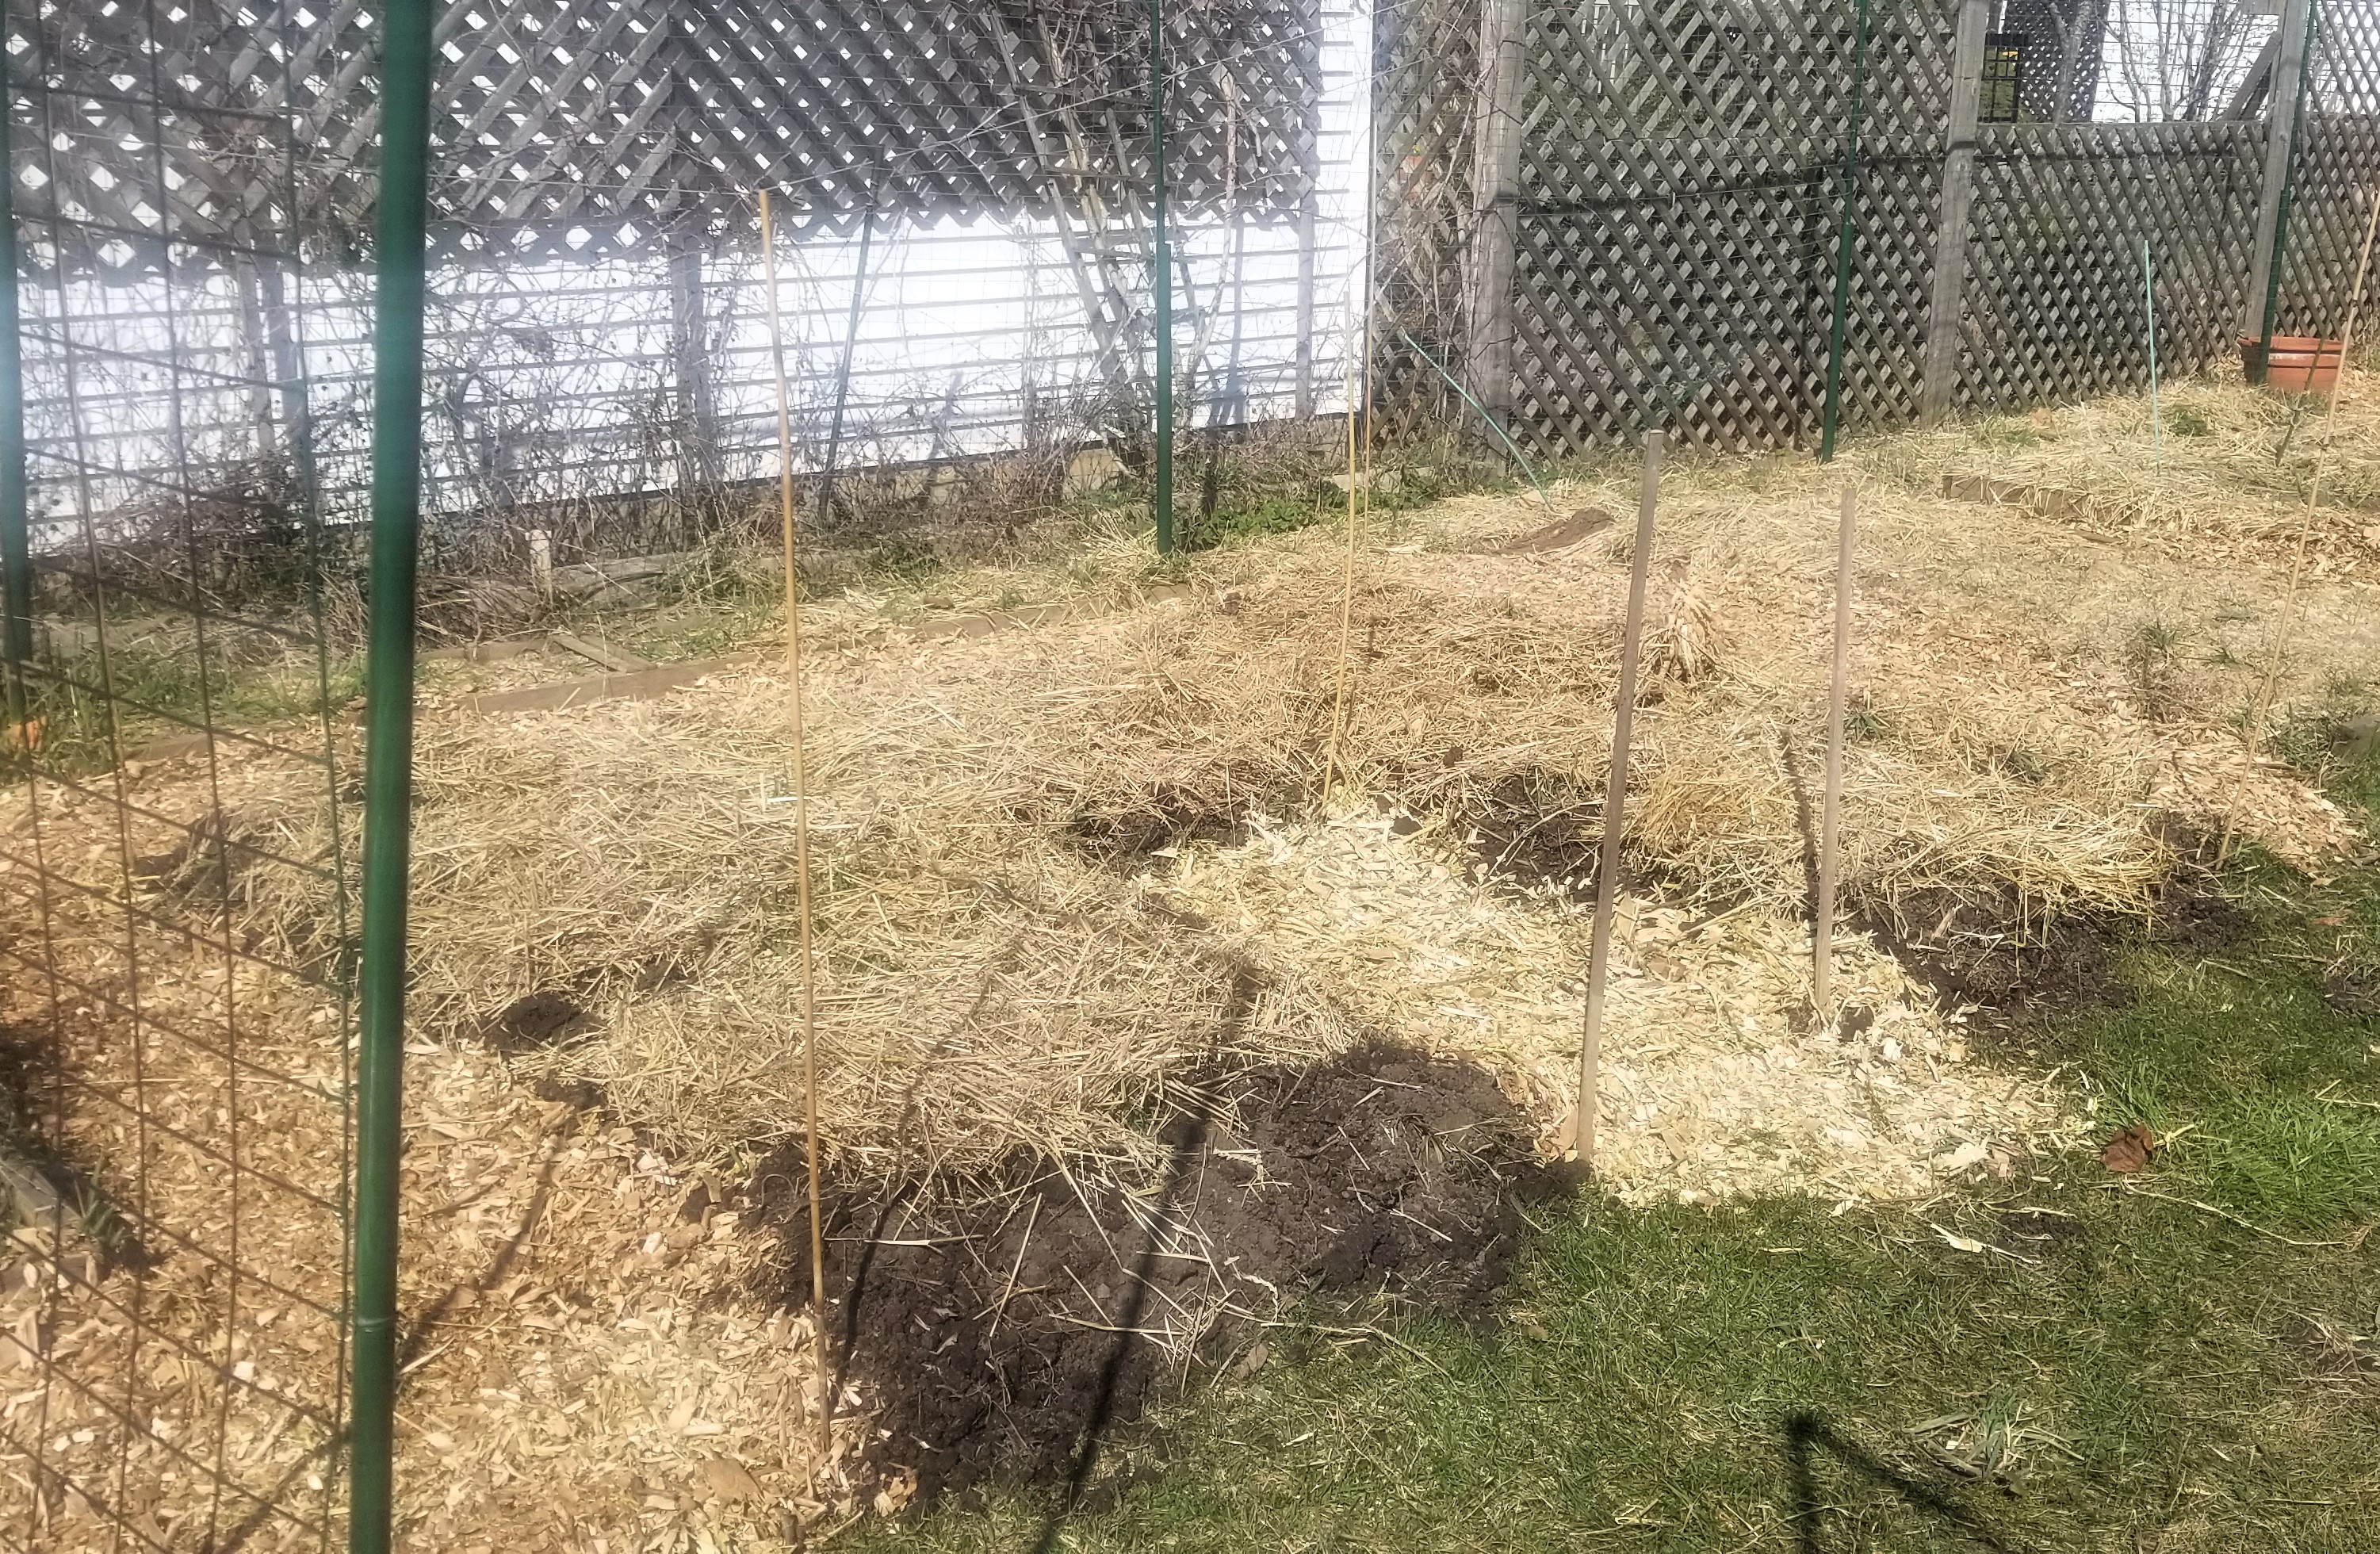
Plants growing against wooden clapboards are a bad idea. They promote mold and invite insects into your home (and in one instance a frog – the bat was a different story entirely). So, keeping a clear space between your wood exterior and plants is a good idea. The prior owner seems to have taken a chemical route, though. Which, to me, is a bad idea. I think I’ve managed to supplement the beds, where I used the dirt, enough to mitigate the problem. However, I am left with a barely fertile four by ten section at the back of the property.
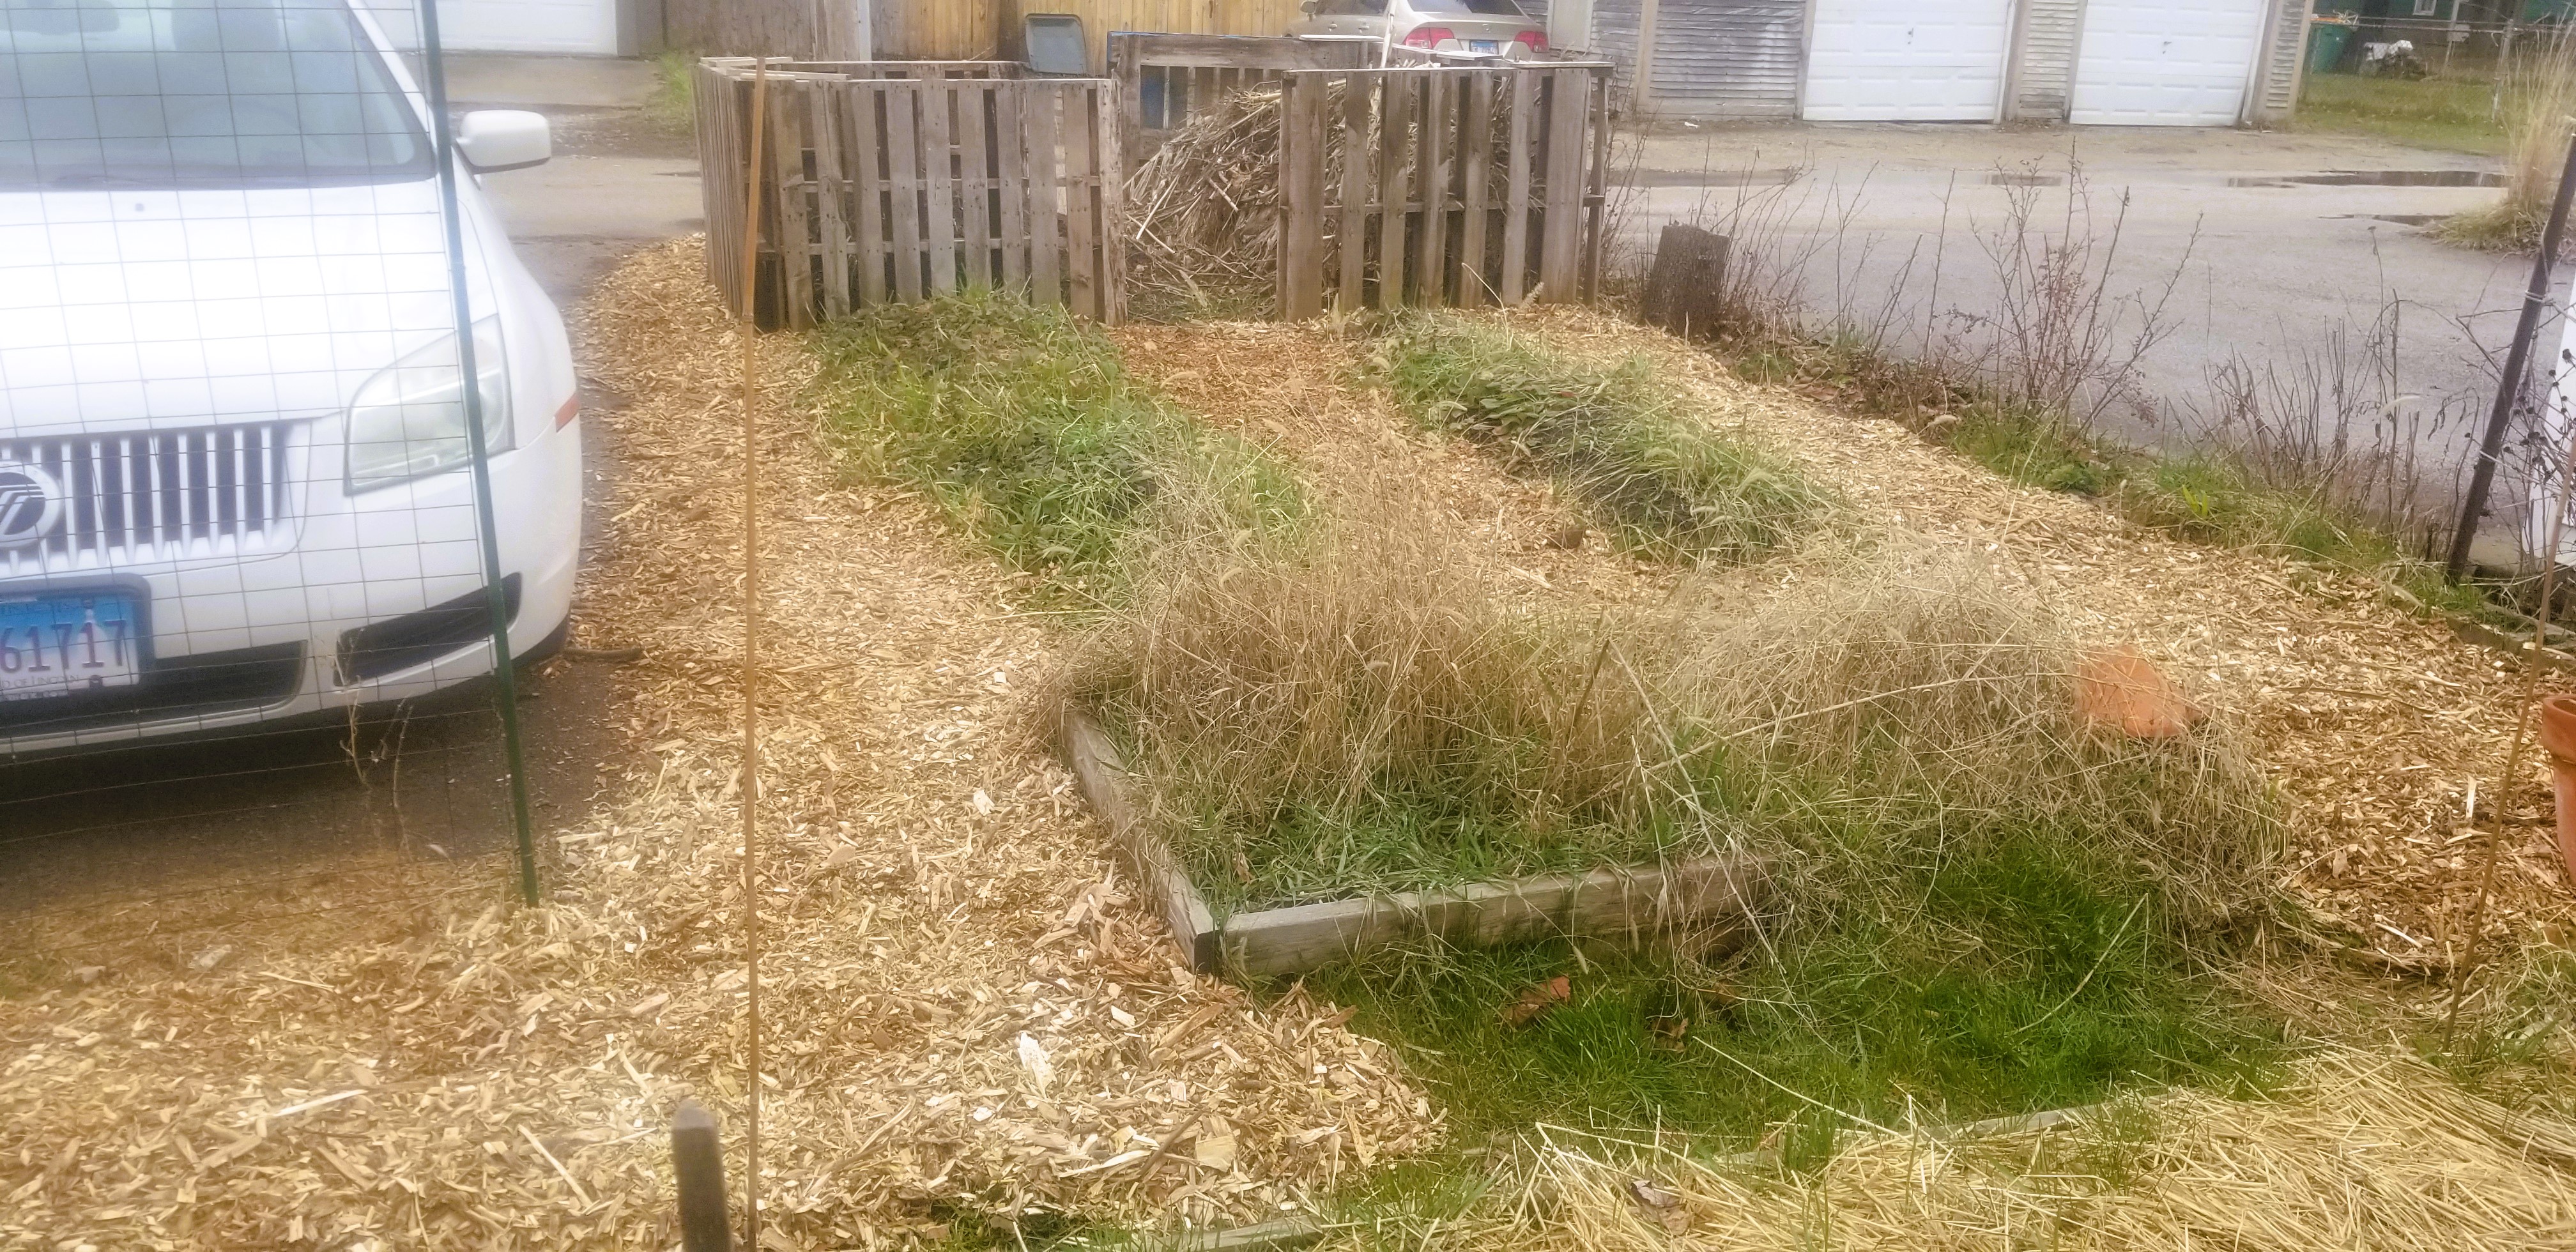
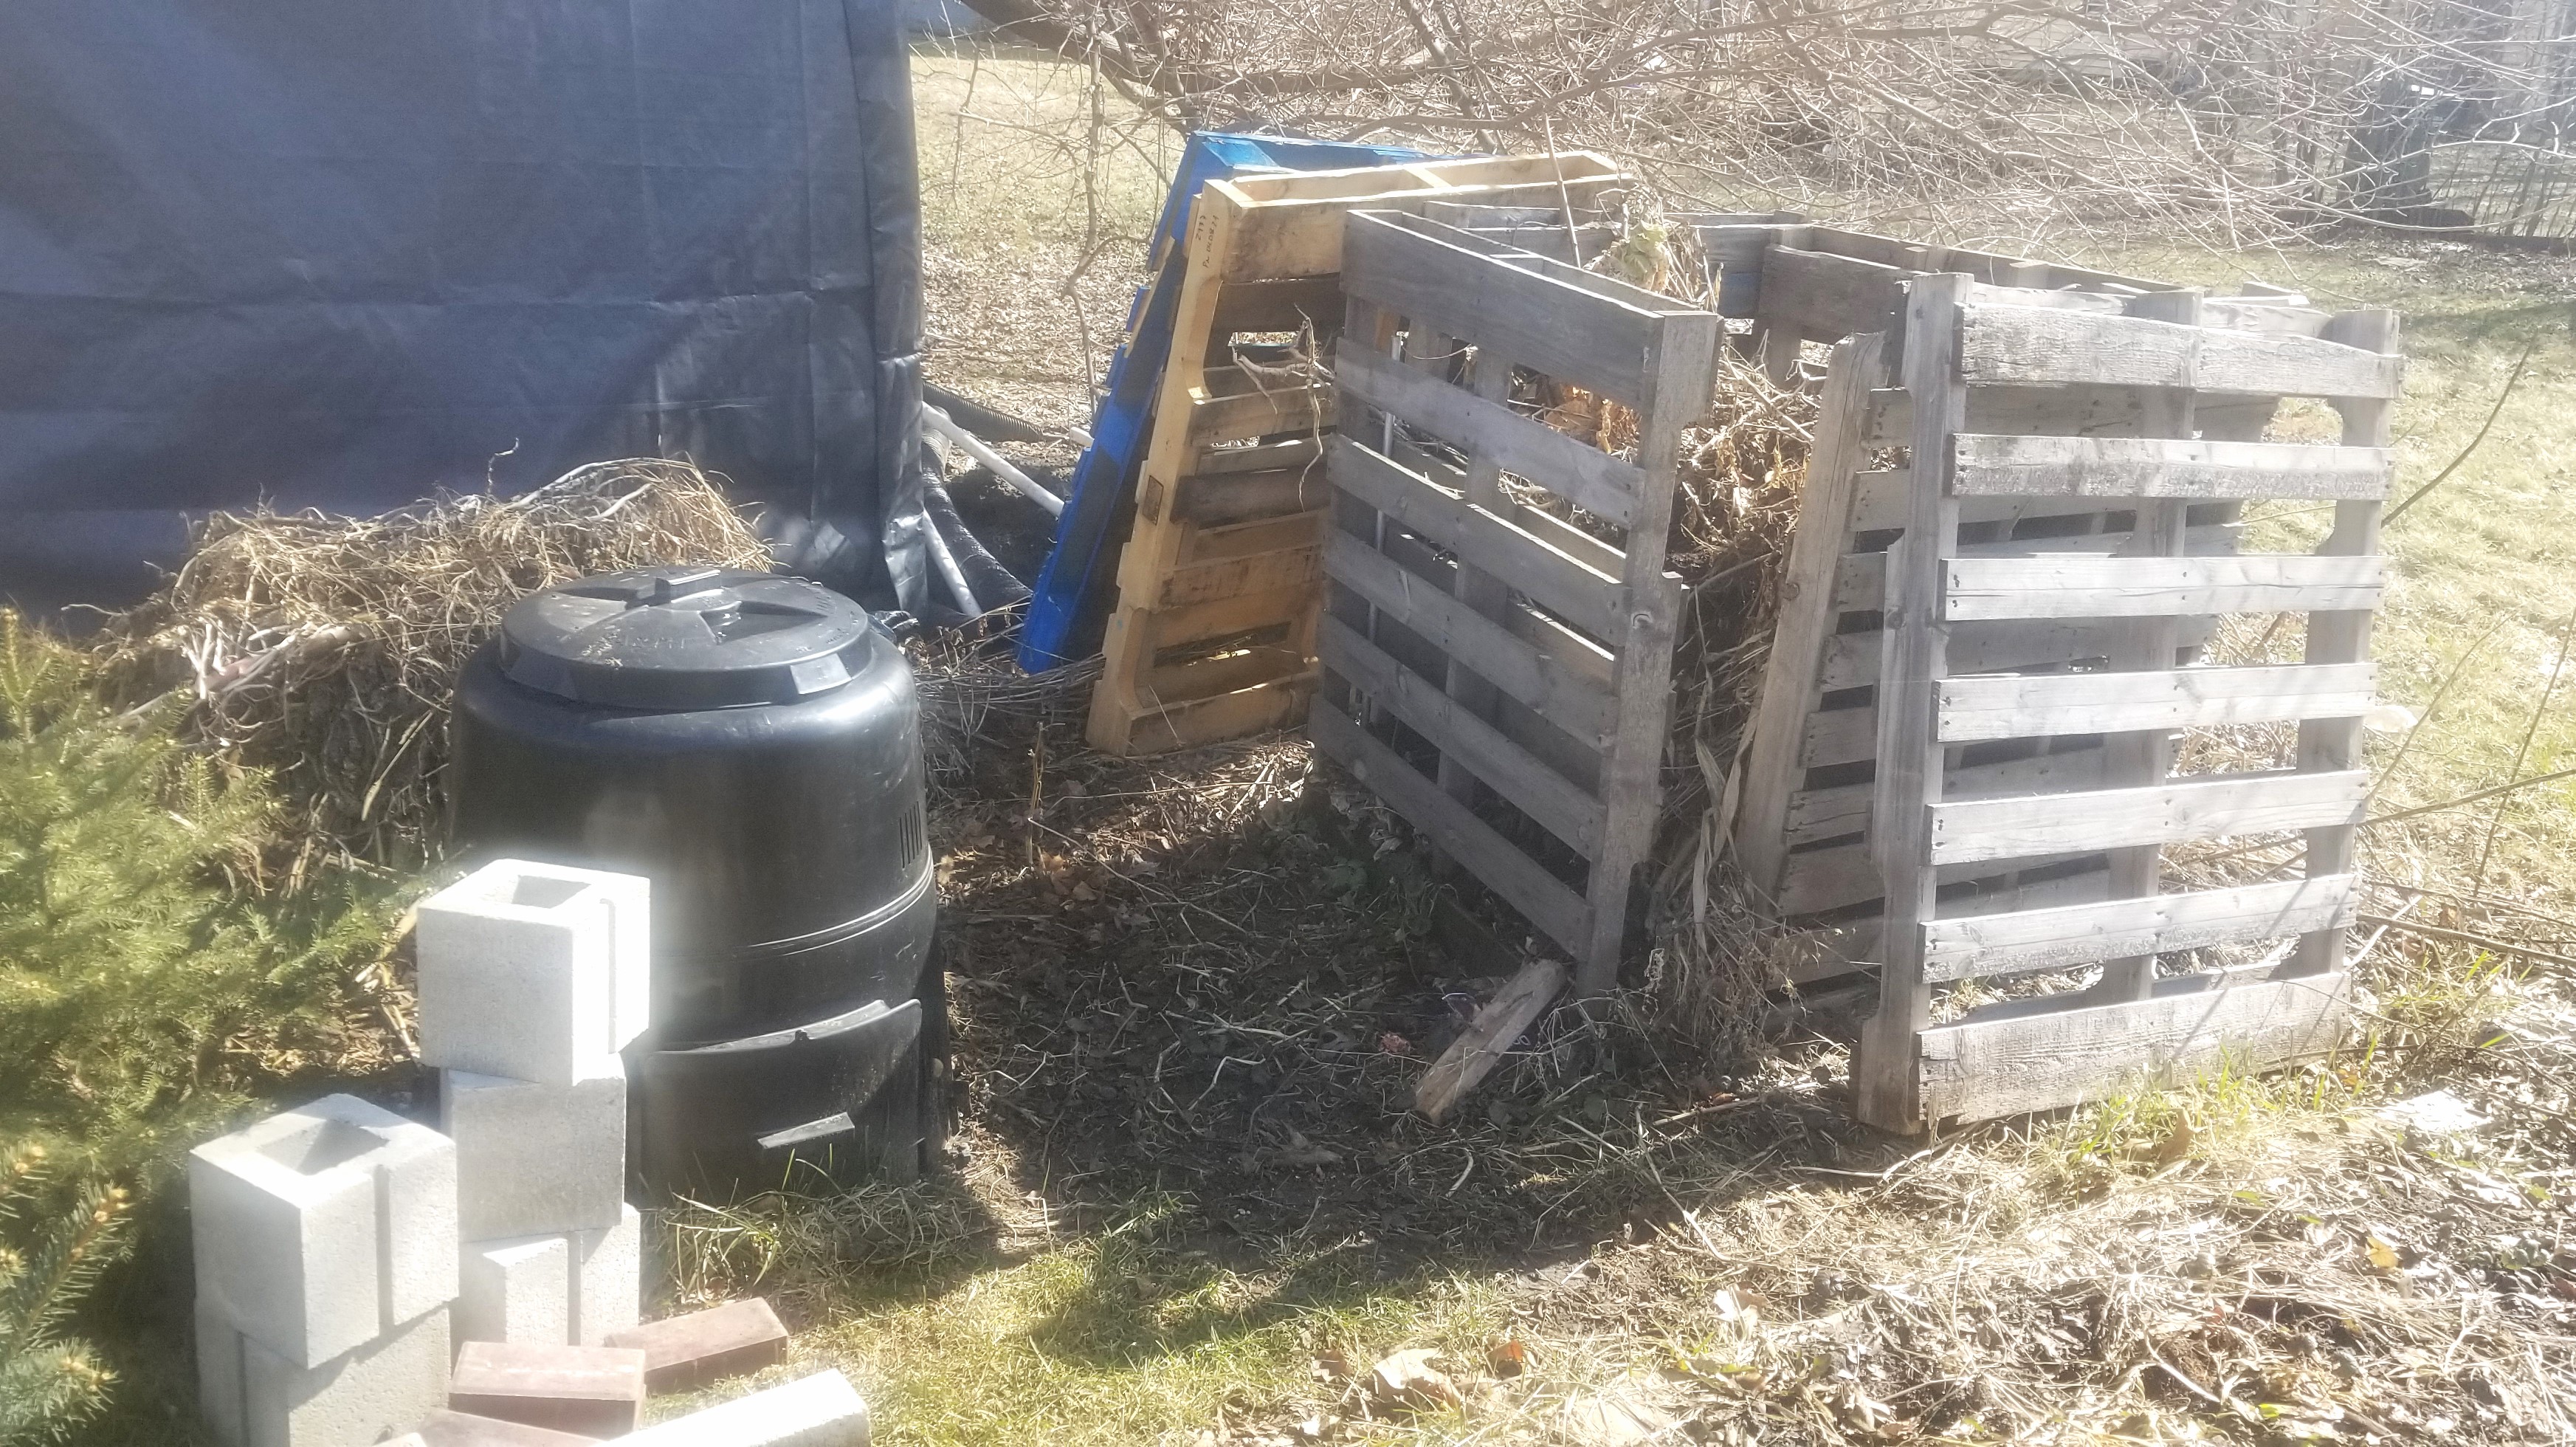
Solution: Choose another space for the raspberries and relocate the compost bins over the poor dirt. I hope the nutrients and organics will leach downward and rescue the soil over time. Currently, this is the best use of the area.
The wood for the strawberry bed is so far gone I am going to rebuild it – and add another while I’m at it! The prior bed was three by eight. This year I am going to have two mounds, which will each be three by ten. We’re more than doubling our strawberry space and plants. The wood from the old bed and a couple of small beds will be buried under brand new garden mix we’ll have trucked in, similar to a hügelkultur mound. The boards are already falling apart. I pulled most of the old nails out by hand.
The fate of wooden garden beds
I ordered three types of strawberries, two everbearing and one June producer, to go with whatever of the Junebearers survived in our old setup. The strawberry varieties are Tristar (everbearing), Eversweet (everbearing), and Earliglow (Junebearer). These come in 25(ish) packs and, as I mentioned above, were cheaper than the garden center. The actual numbers were 24 Eversweet, 28 Earliglow, and 24 Tristar. Beth rescued 10 Junebearers from the old bed. We never knew what variety these were as the neighbor gifted them to us a few years ago. I asked her the other day. She doesn’t remember. She’s had them for a long time. No worries. Eighty-six strawberries should work nicely for us.
The strawberry roots were no shorter than six inches long and numerous per crown. Unfortunately, for whatever reason (warm warehouse, delayed delivery, etc.) the strawberries began breaking dormancy in the package, requiring that I pot them similar to heeling in a bareroot tree, for two reasons. One, it’s still too chilly. I need to keep them in the greenhouse. Two, I won’t have the beds completed for a few weeks yet, when the budget allows delivery of five more yards of garden mix (top soil plus compost). We’ll mix the Junebearers in with the everbearers, which will each get their own hill. In the meantime, they are doing nicely in small pots.
Happy strawberries
I bought two types of raspberries; Anne (golden raspberry) and Prelude (red raspberry). Both of these varieties produce on first year and two-year-old canes, meaning we should get some this year. Each was a three pack, giving me six raspberry plants. The raspberries remained dormant during shipping, thankfully, and weather conditions allowed us to put these hardier plants in the ground, (they just look like sticks at the moment). We located them as a hedge along the southern edge of the property, although not so close to the property line that a fence would constrict them.
Not much to look at yetThe raspberry hedgerow (to be)
Whenever I pick the gold ones, I will think of my mother. Our neighbor, Mrs. Peterson (the only name by which I ever knew her), had a bush along our common fence and the agreement was we could have whatever came through to our side. On many a bright, summer morning, mom would take a bowl and go out to harvest. Every time, she would return with an empty bowl.
She ate them as fast as she picked them.
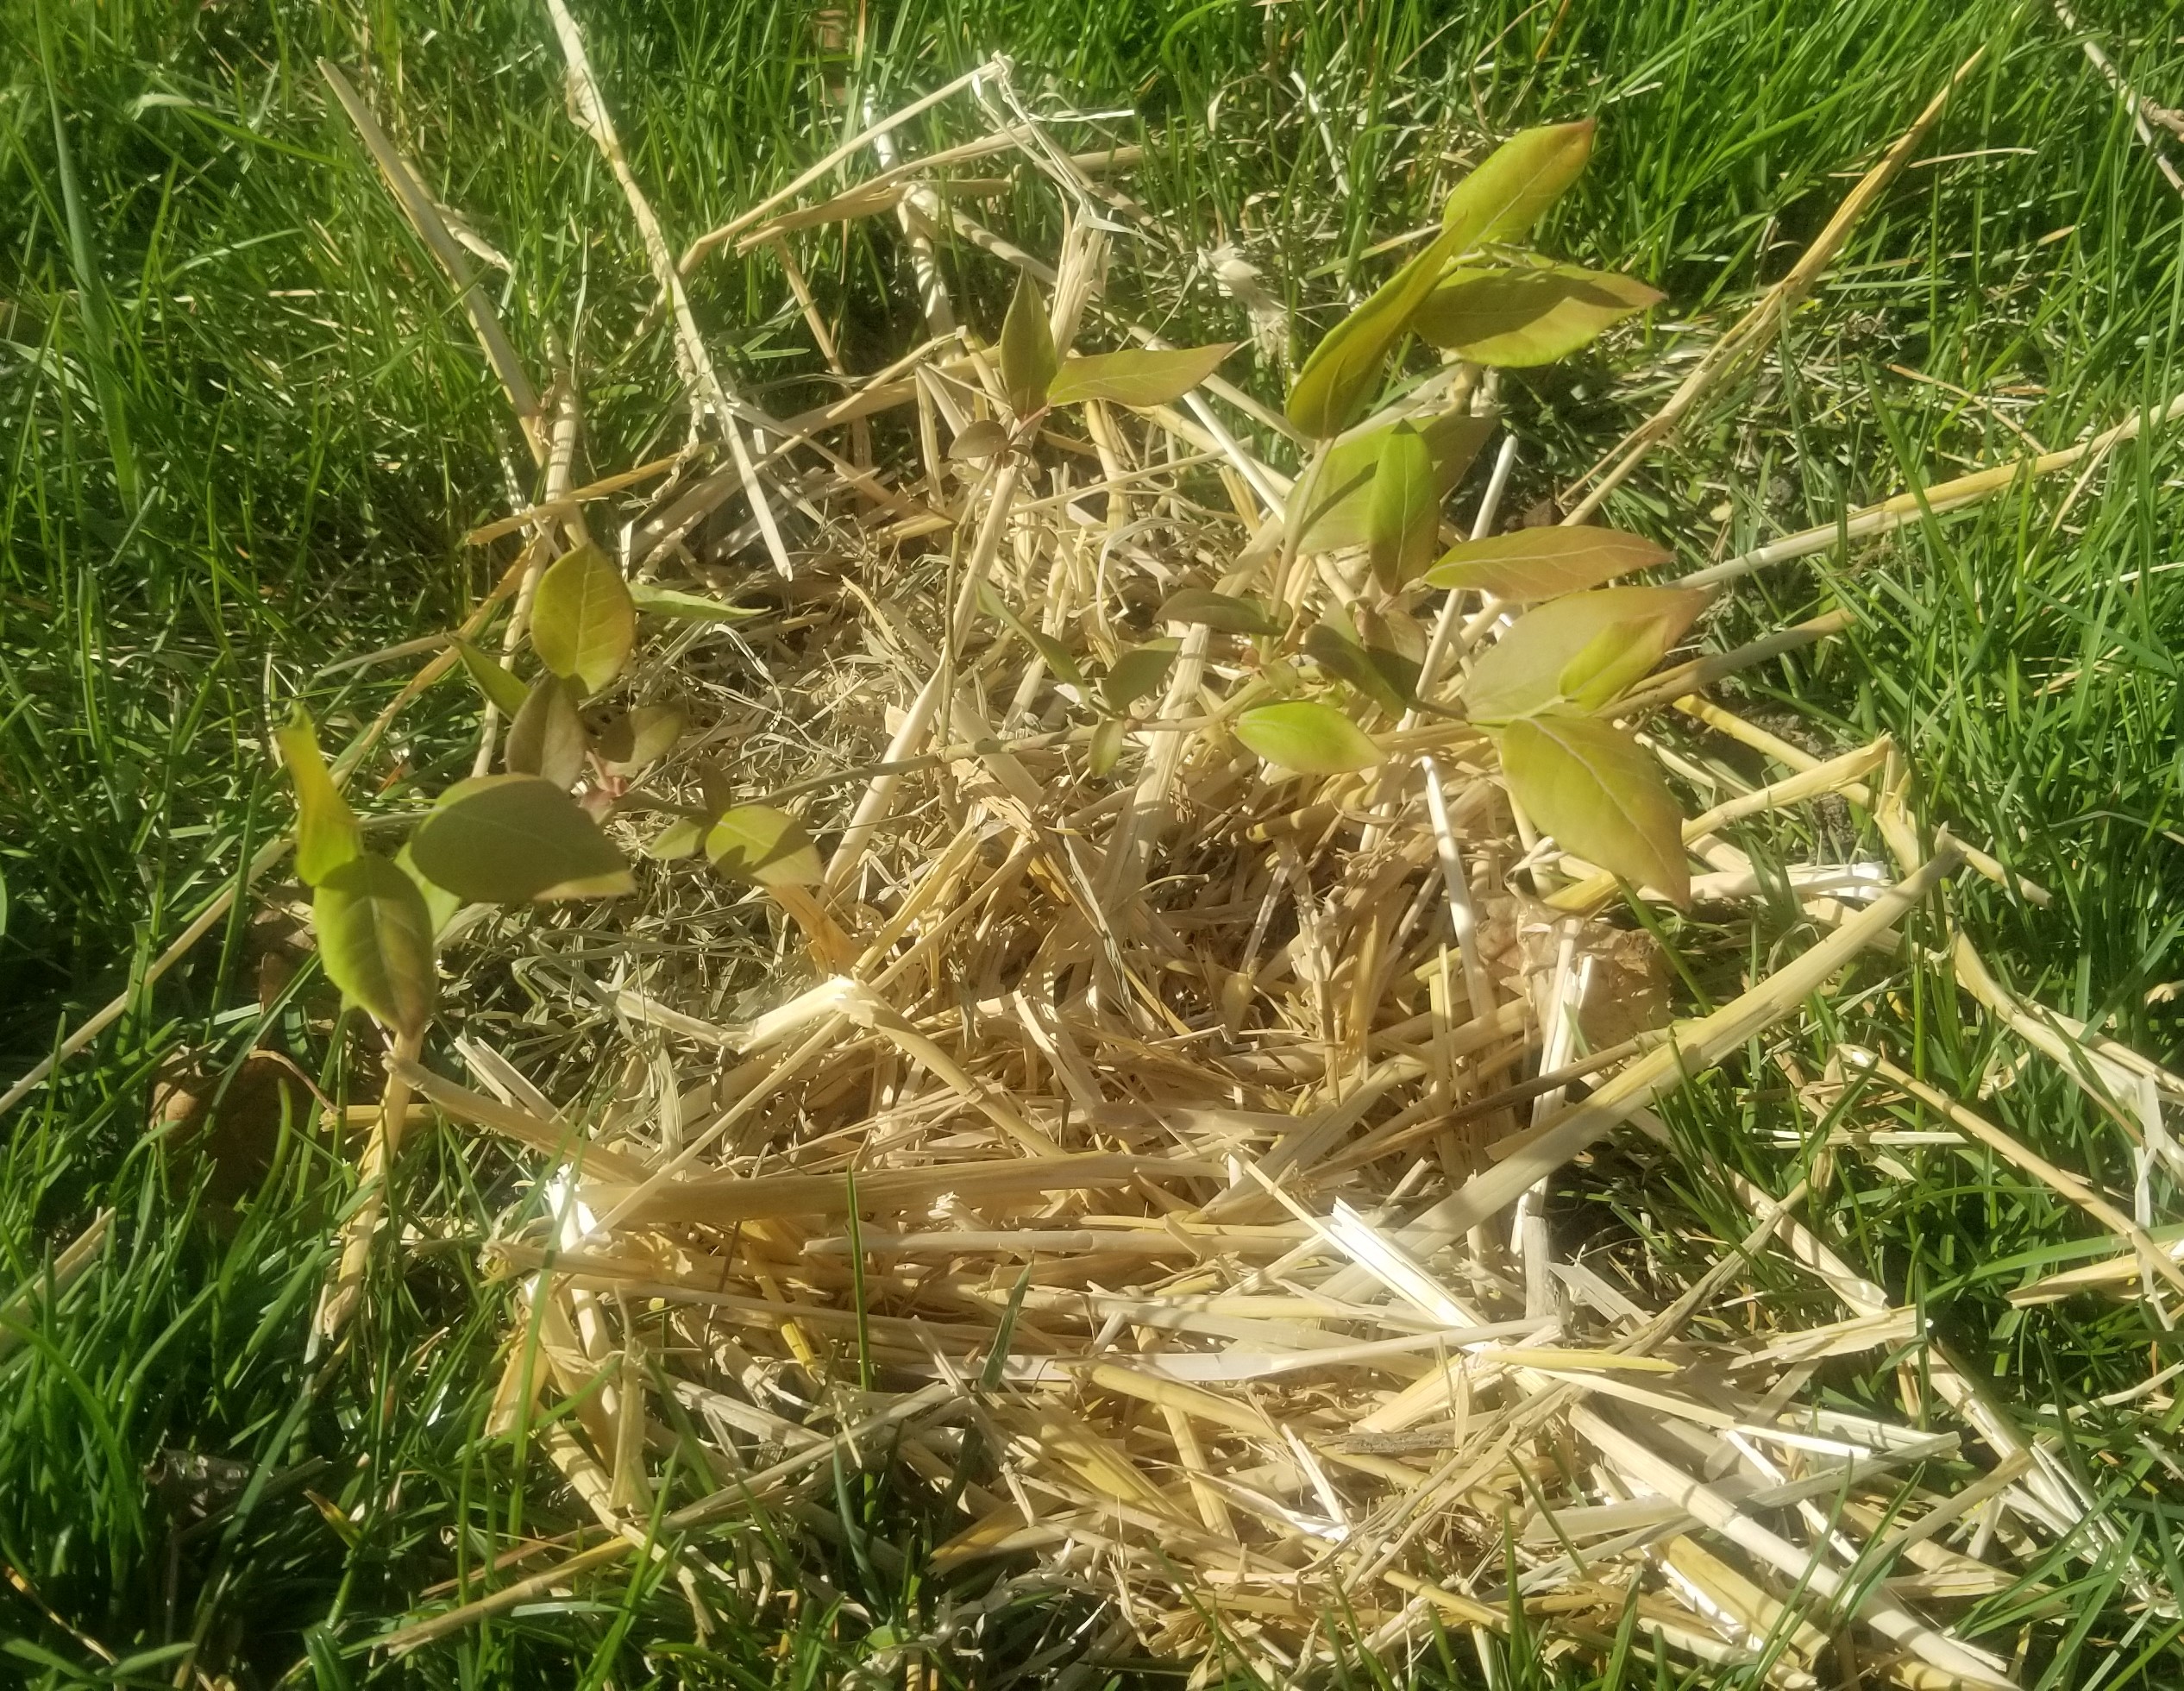
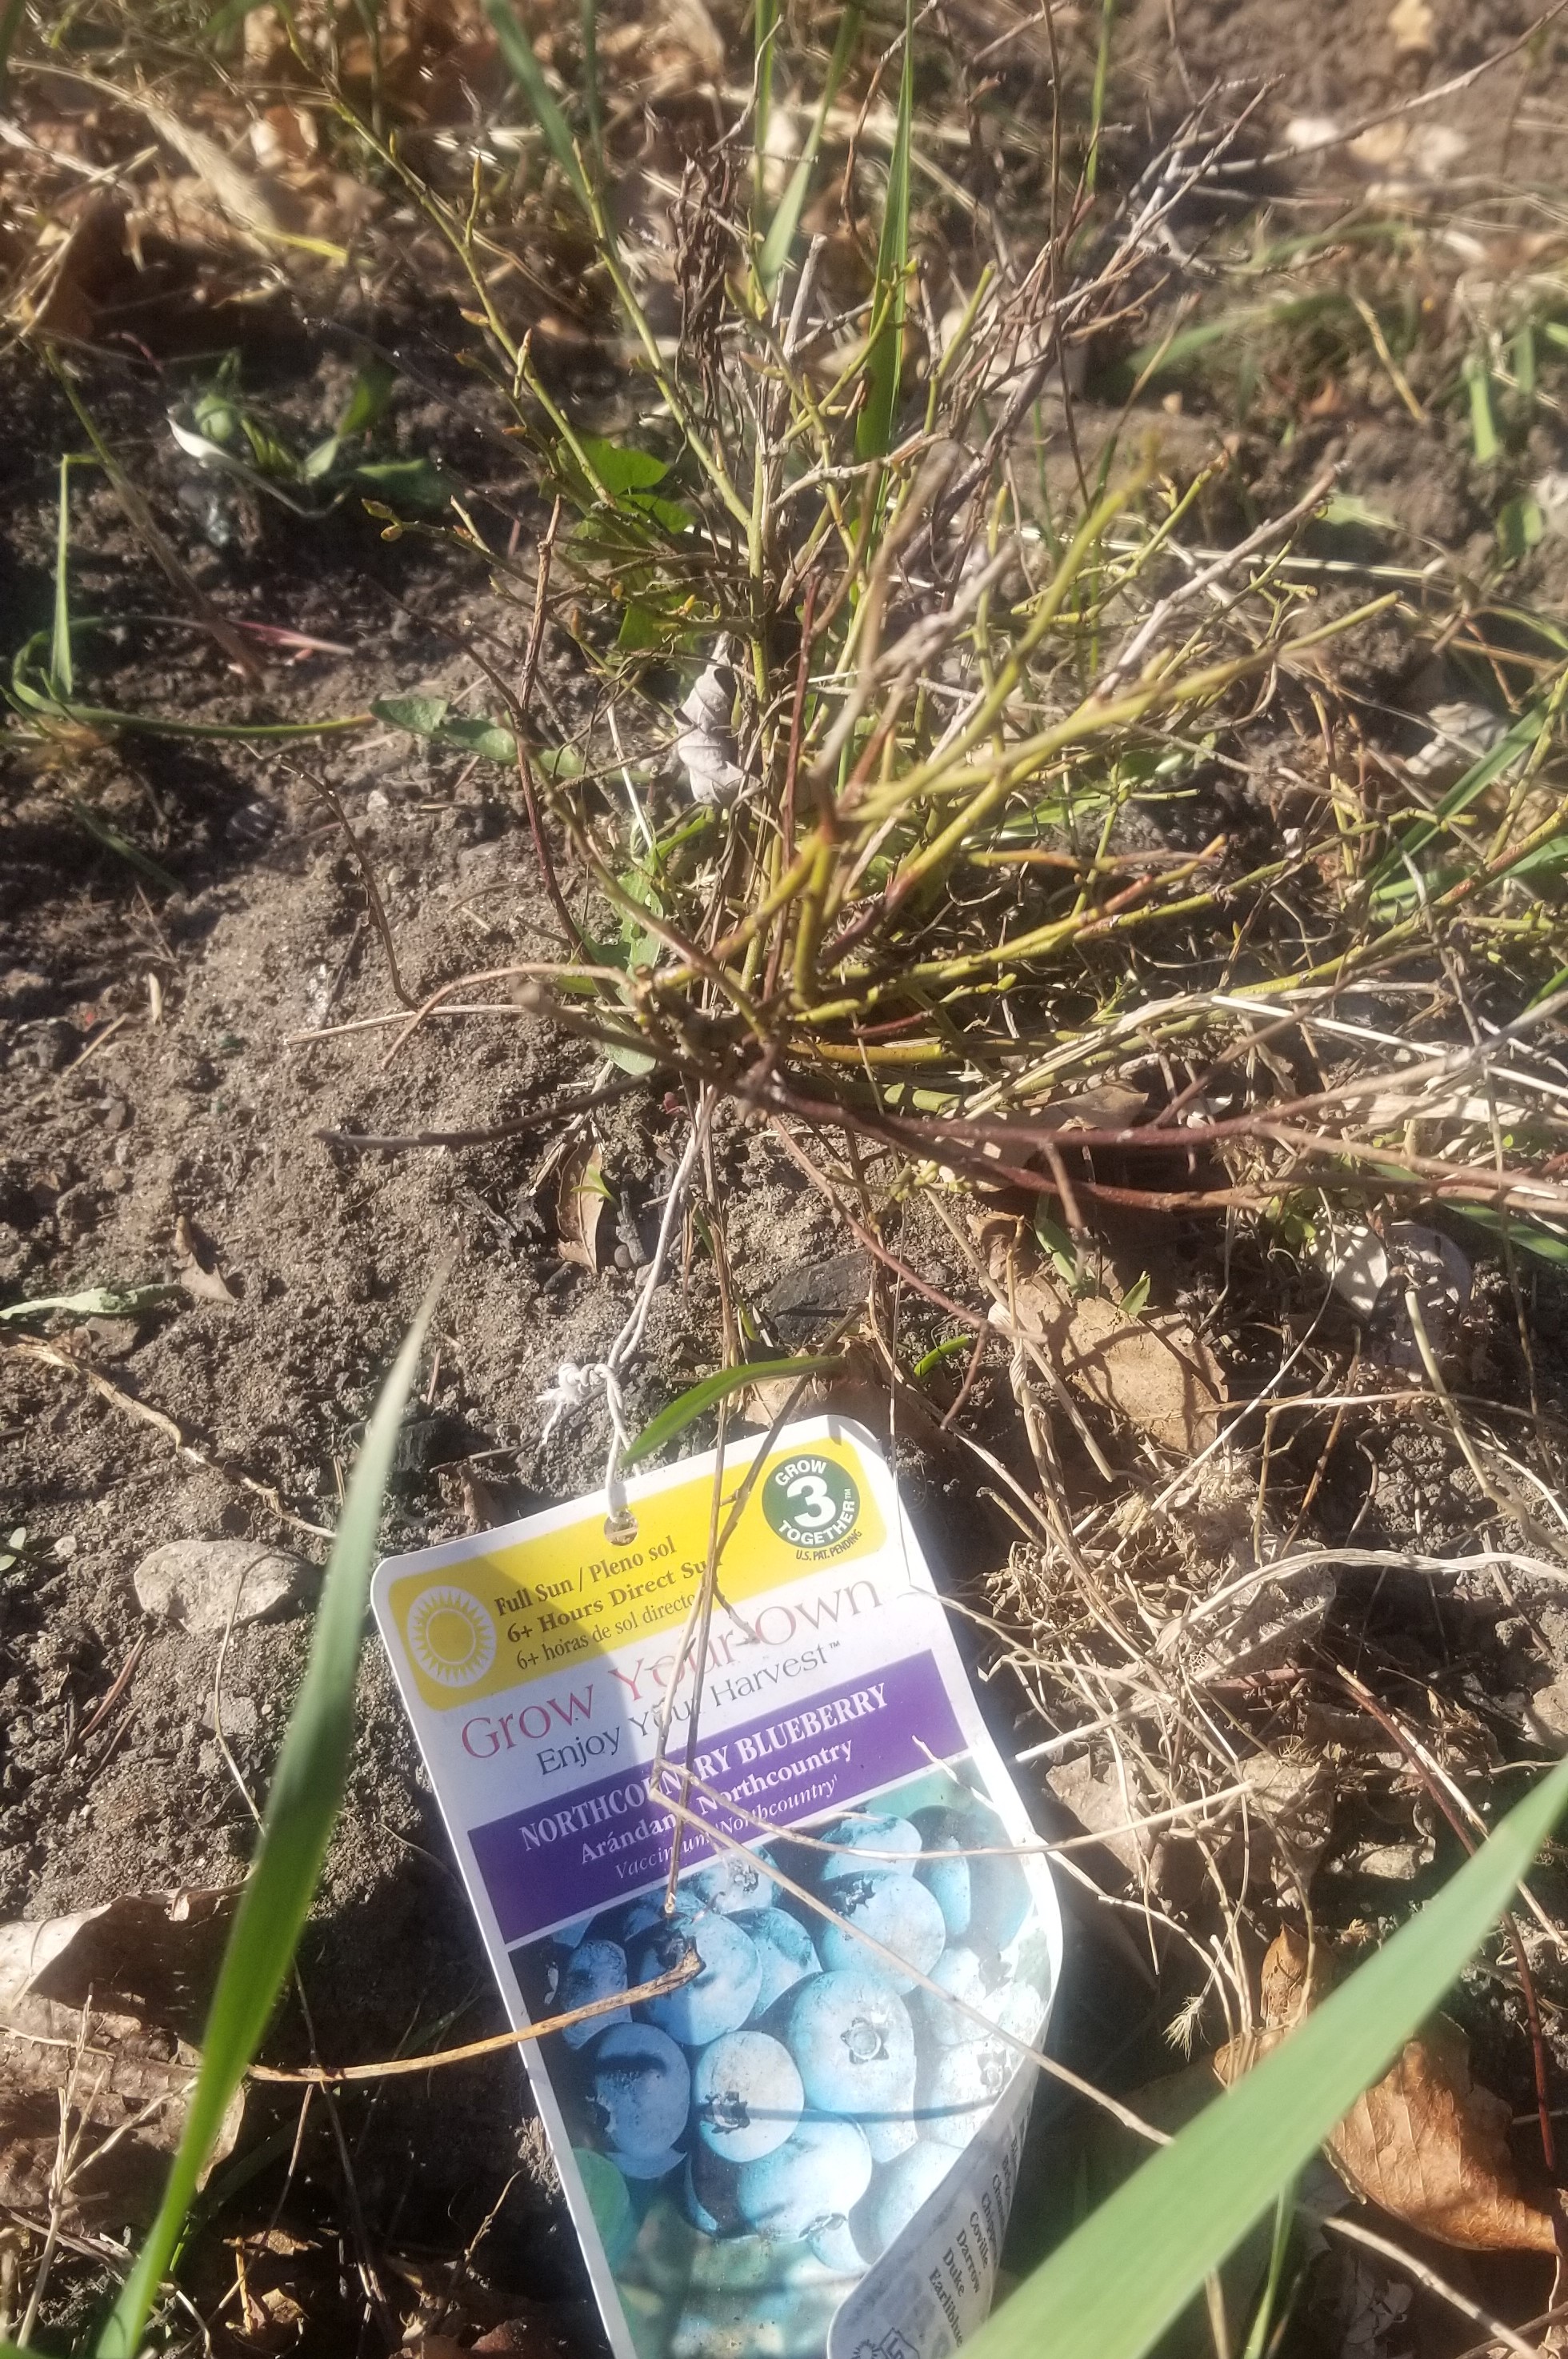
I also purchased three Jersey blueberries from my garden center and one of my Northcountry plants may have survived the wild mini-meadow the back section became. Eventually I expect to have nine or ten blueberries of different types. I only have room for three new ones and the survivor currently, because the rest will go where the temporary greenhouse sits. The Jerseys were already in leaf as they had been kept indoor. I hardened them off and then put them in the ground as well. They may not produce much this year or next, although you really want to let them develop their root systems at first by plucking off the flowers to put the plant’s energy into making roots for a couple of years.
One of the new blueberries. The leaves are reddish because of the cooler nighttime temps.Not budded yet, but a lot of green in the stems.
Lastly, I purchased two concord grape vines to replace the ones that failed over the last couple of seasons. My illness interfered with replacing them last year as well as keeping the roman chamomile under them weeded. And removing the tree that decided to grow up along one of the posts. And keeping the wasps from eating the bunches of grapes. Cleaning that area up and repairing a broken wire are on this month’s schedule. Our trellis is four, coated wires running through posts of an incorrectly placed fence (18 inches inside the property line). A dog apparently ran into and broke the bottom line. We know this because it happened when there was almost a foot on snow on the ground and the footprints went up to it, stopped, and circled around the post after it bounced off the wire. Goofy dog.
Grapes awaiting planting
I have a hundred mesh bags to tie around the bunches as they form this year. The wasps can find something else. I guess now I know why grapes come treated with neonicotinoids. Tying bags around your grapes would be impractical for commercial growing operations, and people who supply to home gardeners still act as though you’re a commercial enterprise. Simply look at their distance spacing instructions. You don’t really need to plant your corn in rows three feet apart unless you’re cultivating with a tractor.
In the fall, we’ll add more fruit trees; peach, fig, and cherry, probably. We have room and plans for two more, though I haven’t decided what yet. Apples, pears, and the three I just mentioned are things we eat now. The final two will be additions to our diet. We have some sampling to do before we choose.
In a few years, perhaps even next year, I will be harvesting enough berries to freeze for the winter months as well as to eat fresh in the season. The trees will begin producing in a couple of years as well. I’ll be getting a freeze dryer to preserve that harvest. Fruit filled yogurt and parfaits. Tarts and pies, cobblers and crisps. Muffins and shortbreads. Jams and glazes. It’s coming.
It feels like it’s been years since I last started seeds for my garden. I know it’s actually only been a little over a year. It just doesn’t seem that way. Six months of chemo made everything I’d done before feel like it had been in the distant past. It’s a very odd disconnect within my mind.
Anyway…
A quick tip to start: To make seeding simpler, I don’t try to fill the six-packs or pots in their trays with a trowel, spilling who knows how much over the sides. I plant so many seeds, twelve trays worth to start, I find it easier to simply dump the bags of starter mix into a large plastic bucket and then scoop it up directly into the six-packs or pots. No muss. No fuss.
The easy way to fill six-packs and pots.The mix I used this year.
This year I’m using the six by eight, poly greenhouse I’ve had for years and hadn’t set up, mainly for needing time to decide where to put it. But also, because we didn’t have an electric outlet to the backyard for several years. I knew I would need power for heating it. I still won’t have water directly in it, but I’ll manage carrying a few gallons in each day, if that often, until it’s warm enough to run a hose from the outside spigot in a week or so.
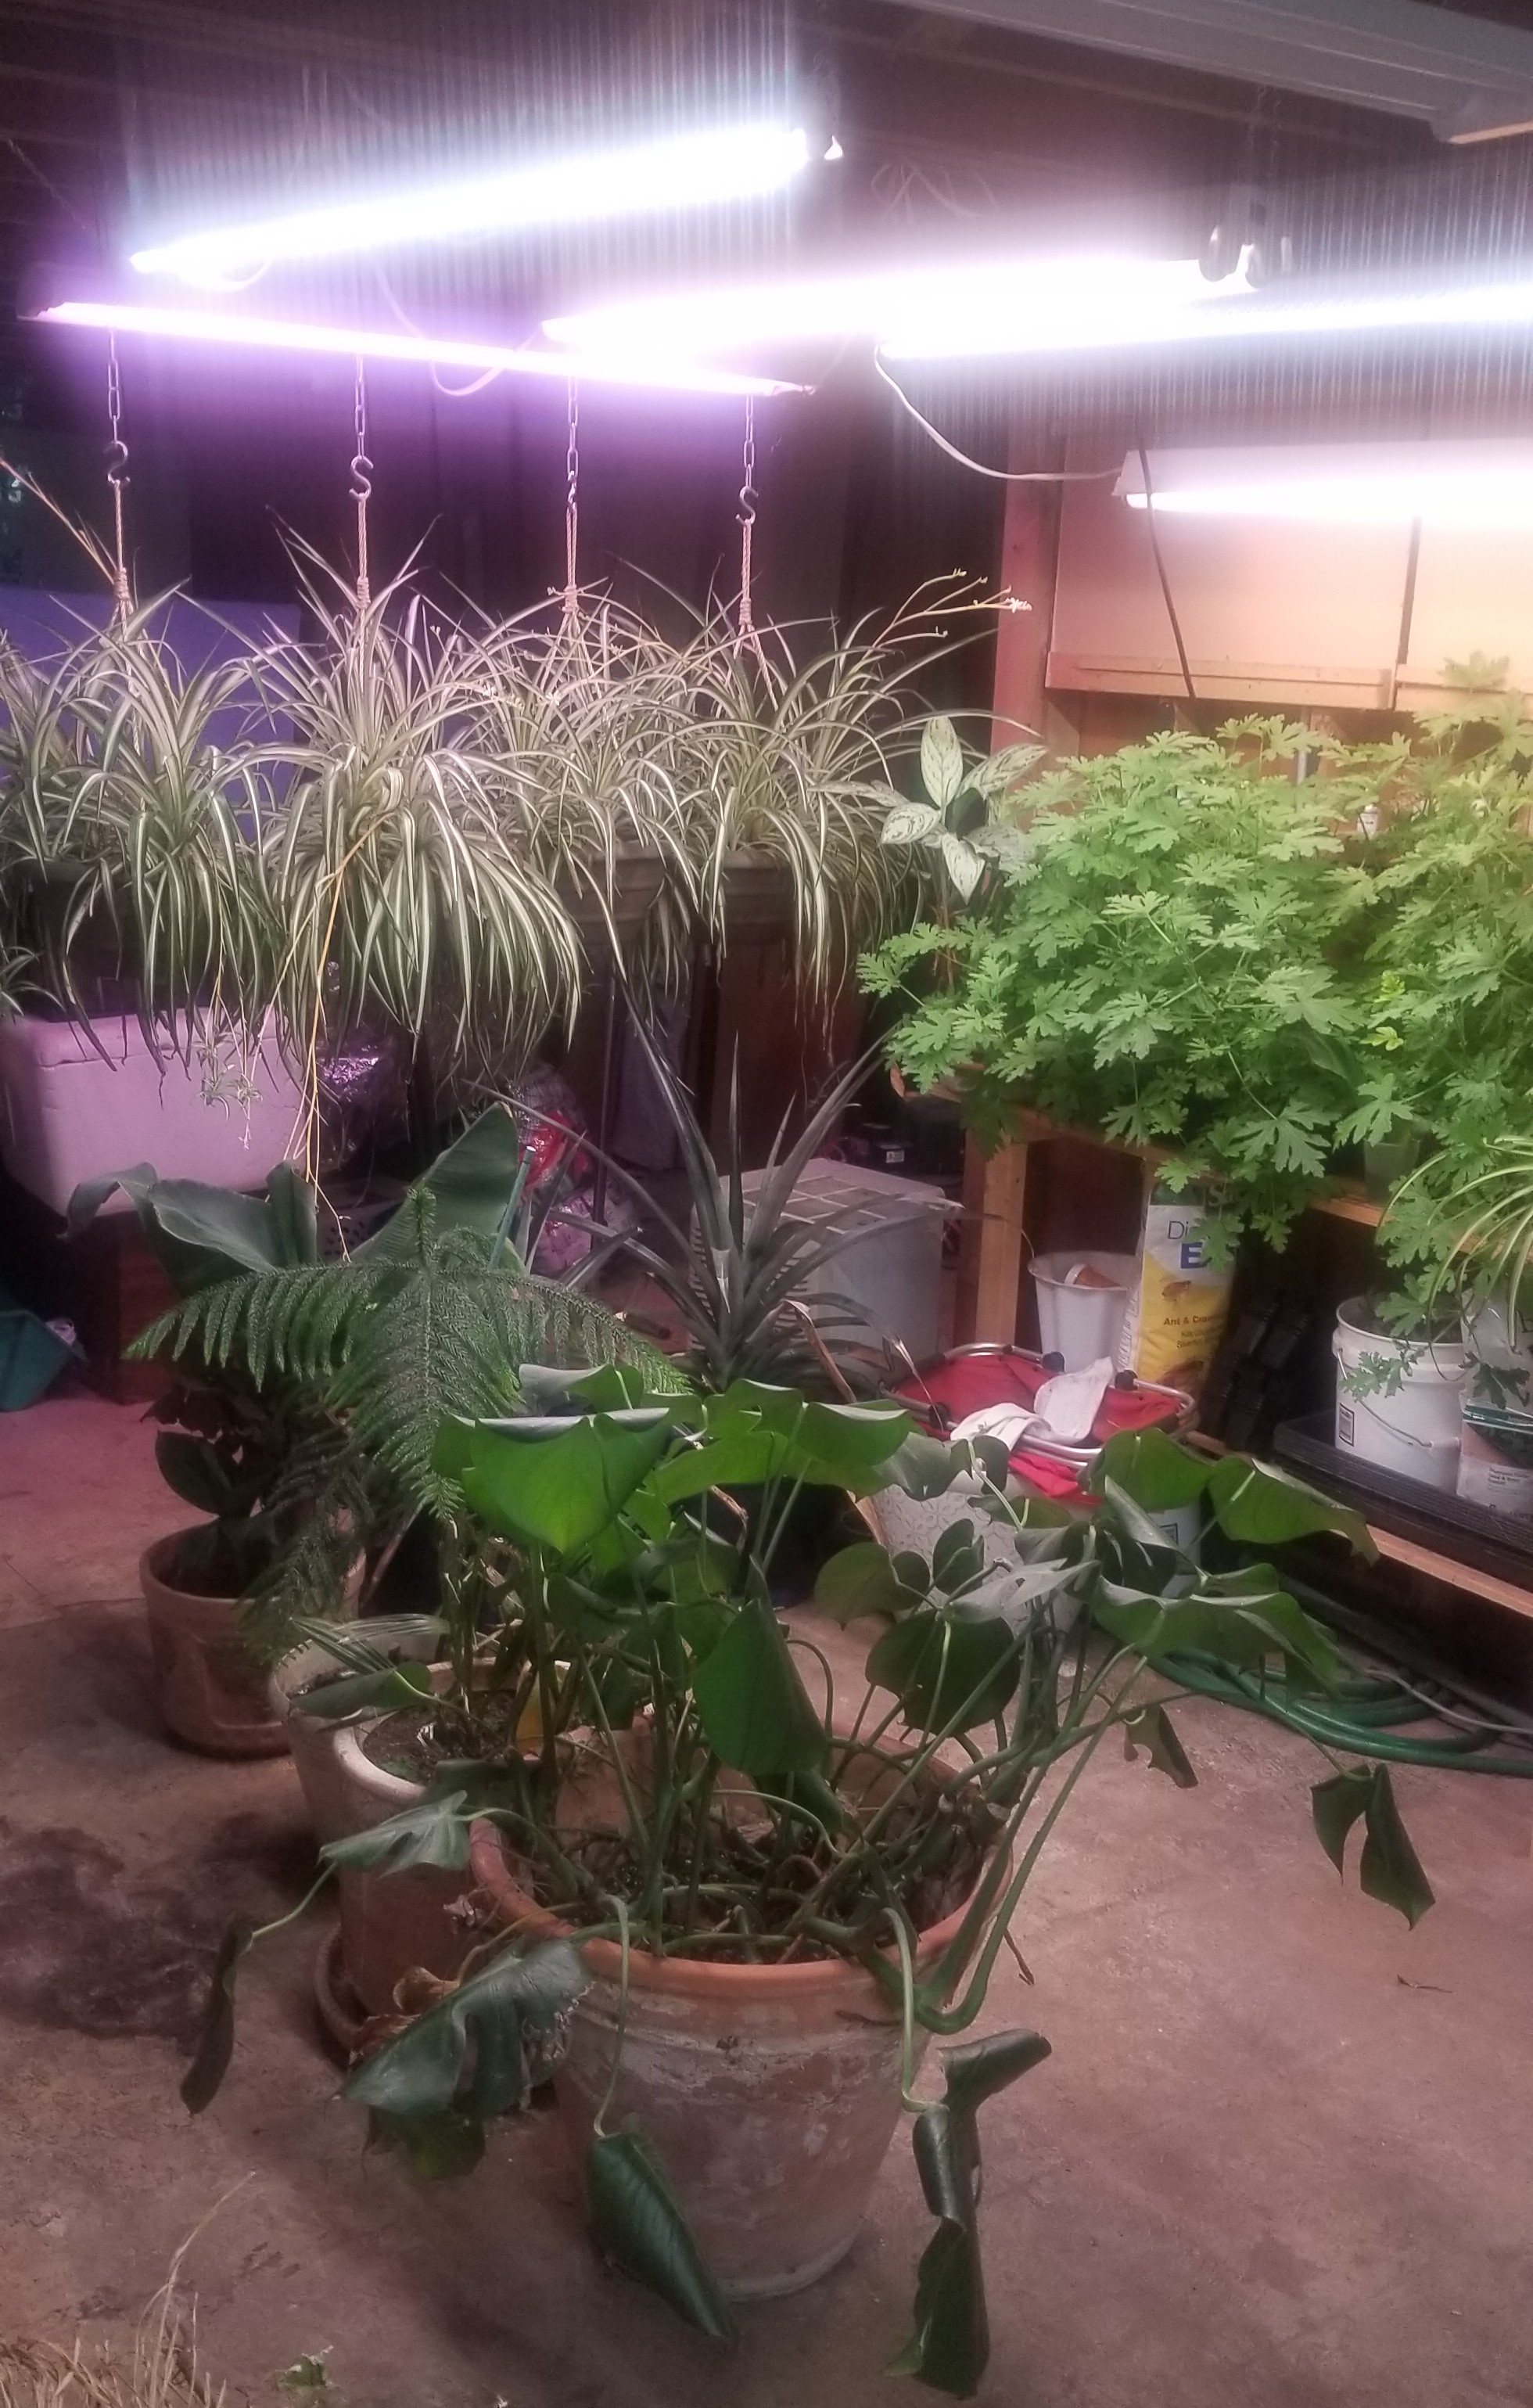
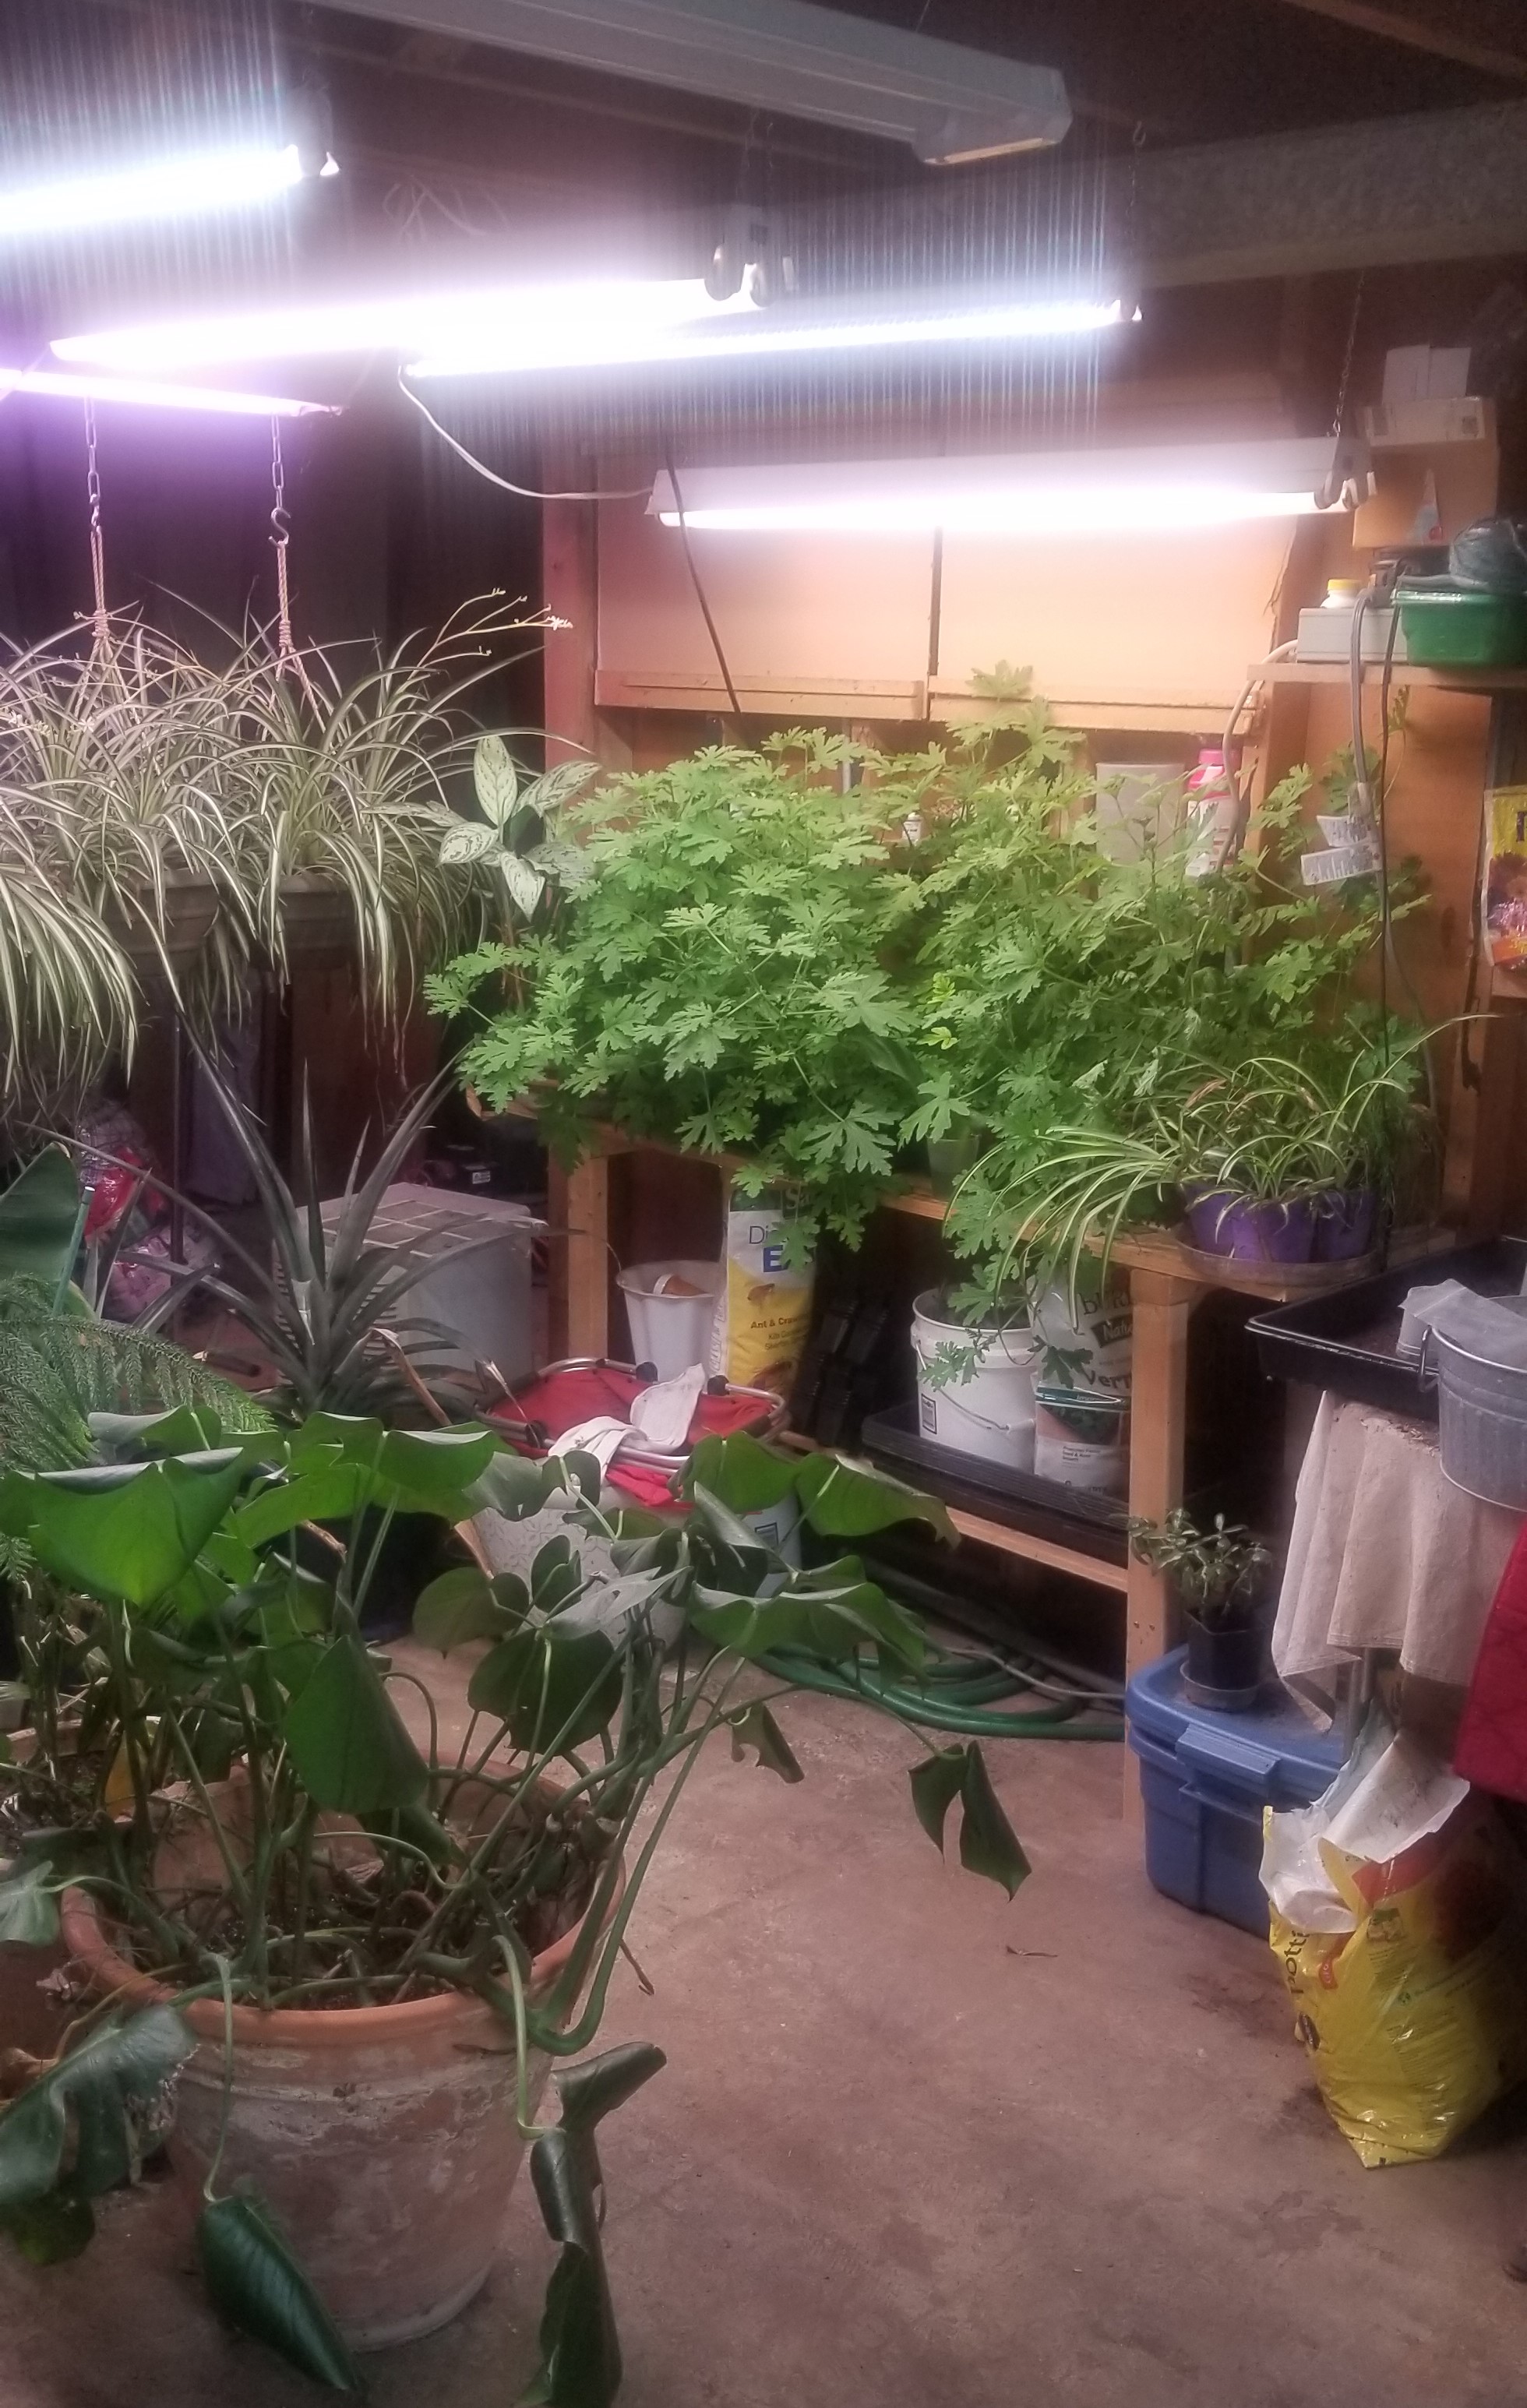
This larger greenhouse is part of the garden expansion in three ways. One, not so obvious, it allows me to use the space in the basement, where I started seeds before, to overwinter the increasing number of tropical plants I put out in the yard and gazebo over the summer. These will eventually include ginger and turmeric as well as miniature citrus trees. Second, the obvious factor, it’s larger. I’m increasing my capacity from ten trays before to twenty this year, and next year I’ll add an 8 foot long by 2 foot wide by 18 inch deep bed. Third, which will be enhanced by some modifications we’ll make over the summer (like the bed), it allows me to grow year-round. Next winter I’ll be harvesting fresh lettuce, greens, carrots, and possibly even tomatoes and peppers while the snow falls. Plus, I’ll be able to grow items which require a warmer or longer season, like sweet potatoes, cumin, and Brussels sprouts. There won’t be an off season anymore.
Most of the tropicals so far.The tropicals include newly started spider plants. Don’t even know where these are going yet.
I learned a lesson last year. I had a pair of mini-greenhouses set out; the kind with four shelves and a heavy plastic cover you can buy for around $30. To keep them from freezing overnight, I used my seedling mats. What I hadn’t anticipated (due to lack of experience with this setup) was how hot the trays would get on a cool but sunny day. I ended up cooking several of my onion seedlings accidentally.
Of course, nothing says using a larger greenhouse will make that potential problem go away. Even before we had the wind mostly blocked from sweeping under the front and back panels and sucking out the heat (see my last post Growing the Growing), the structure maintained a temperature close to 70°, when it was a sunny 39° outside. No wonder my seedlings cooked. The mats raise a tray’s temperature by at least 10° and as much as 20°. The top trays heated up to 80°, possibly 90°!
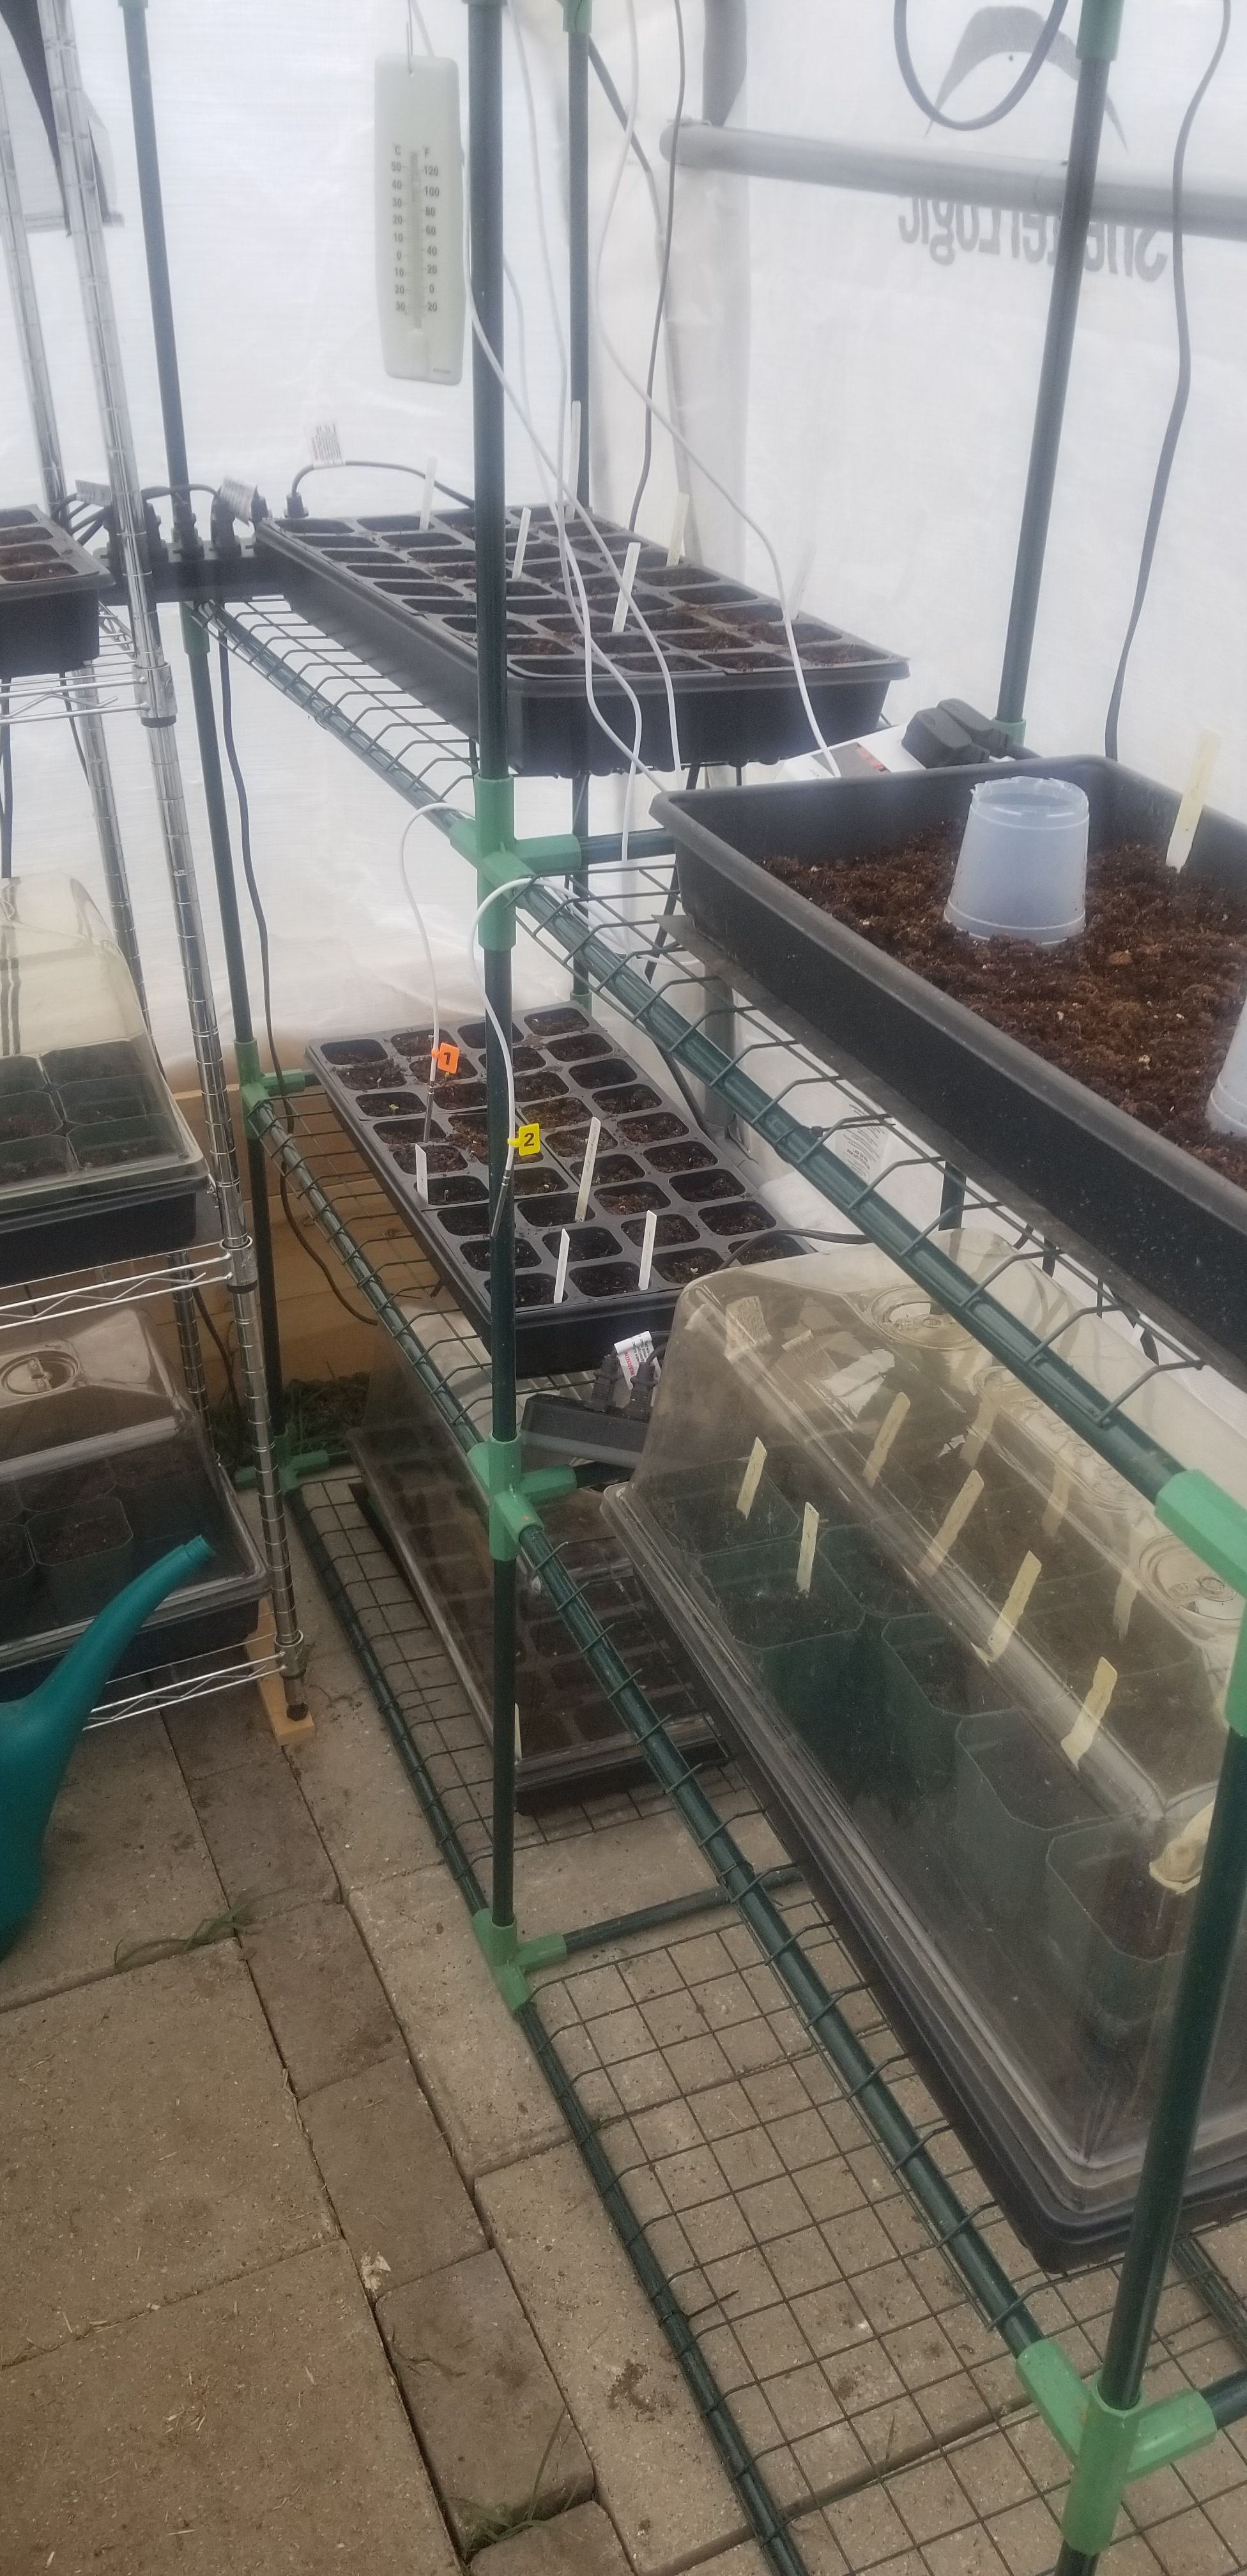
To prevent overheating the trays this year, I purchased a terrarium heat controller. This device turns on and off depending upon the ambient temperature. I’ve programmed it to turn on when the temperature drops to around 62° and to turn back off, when it reaches 67°. This will keep the soil (hopefully) in a viable range for seedlings.
The controller cost less than $40 delivered.The yellow and orange tags are the temperature sensors for the heat controller.
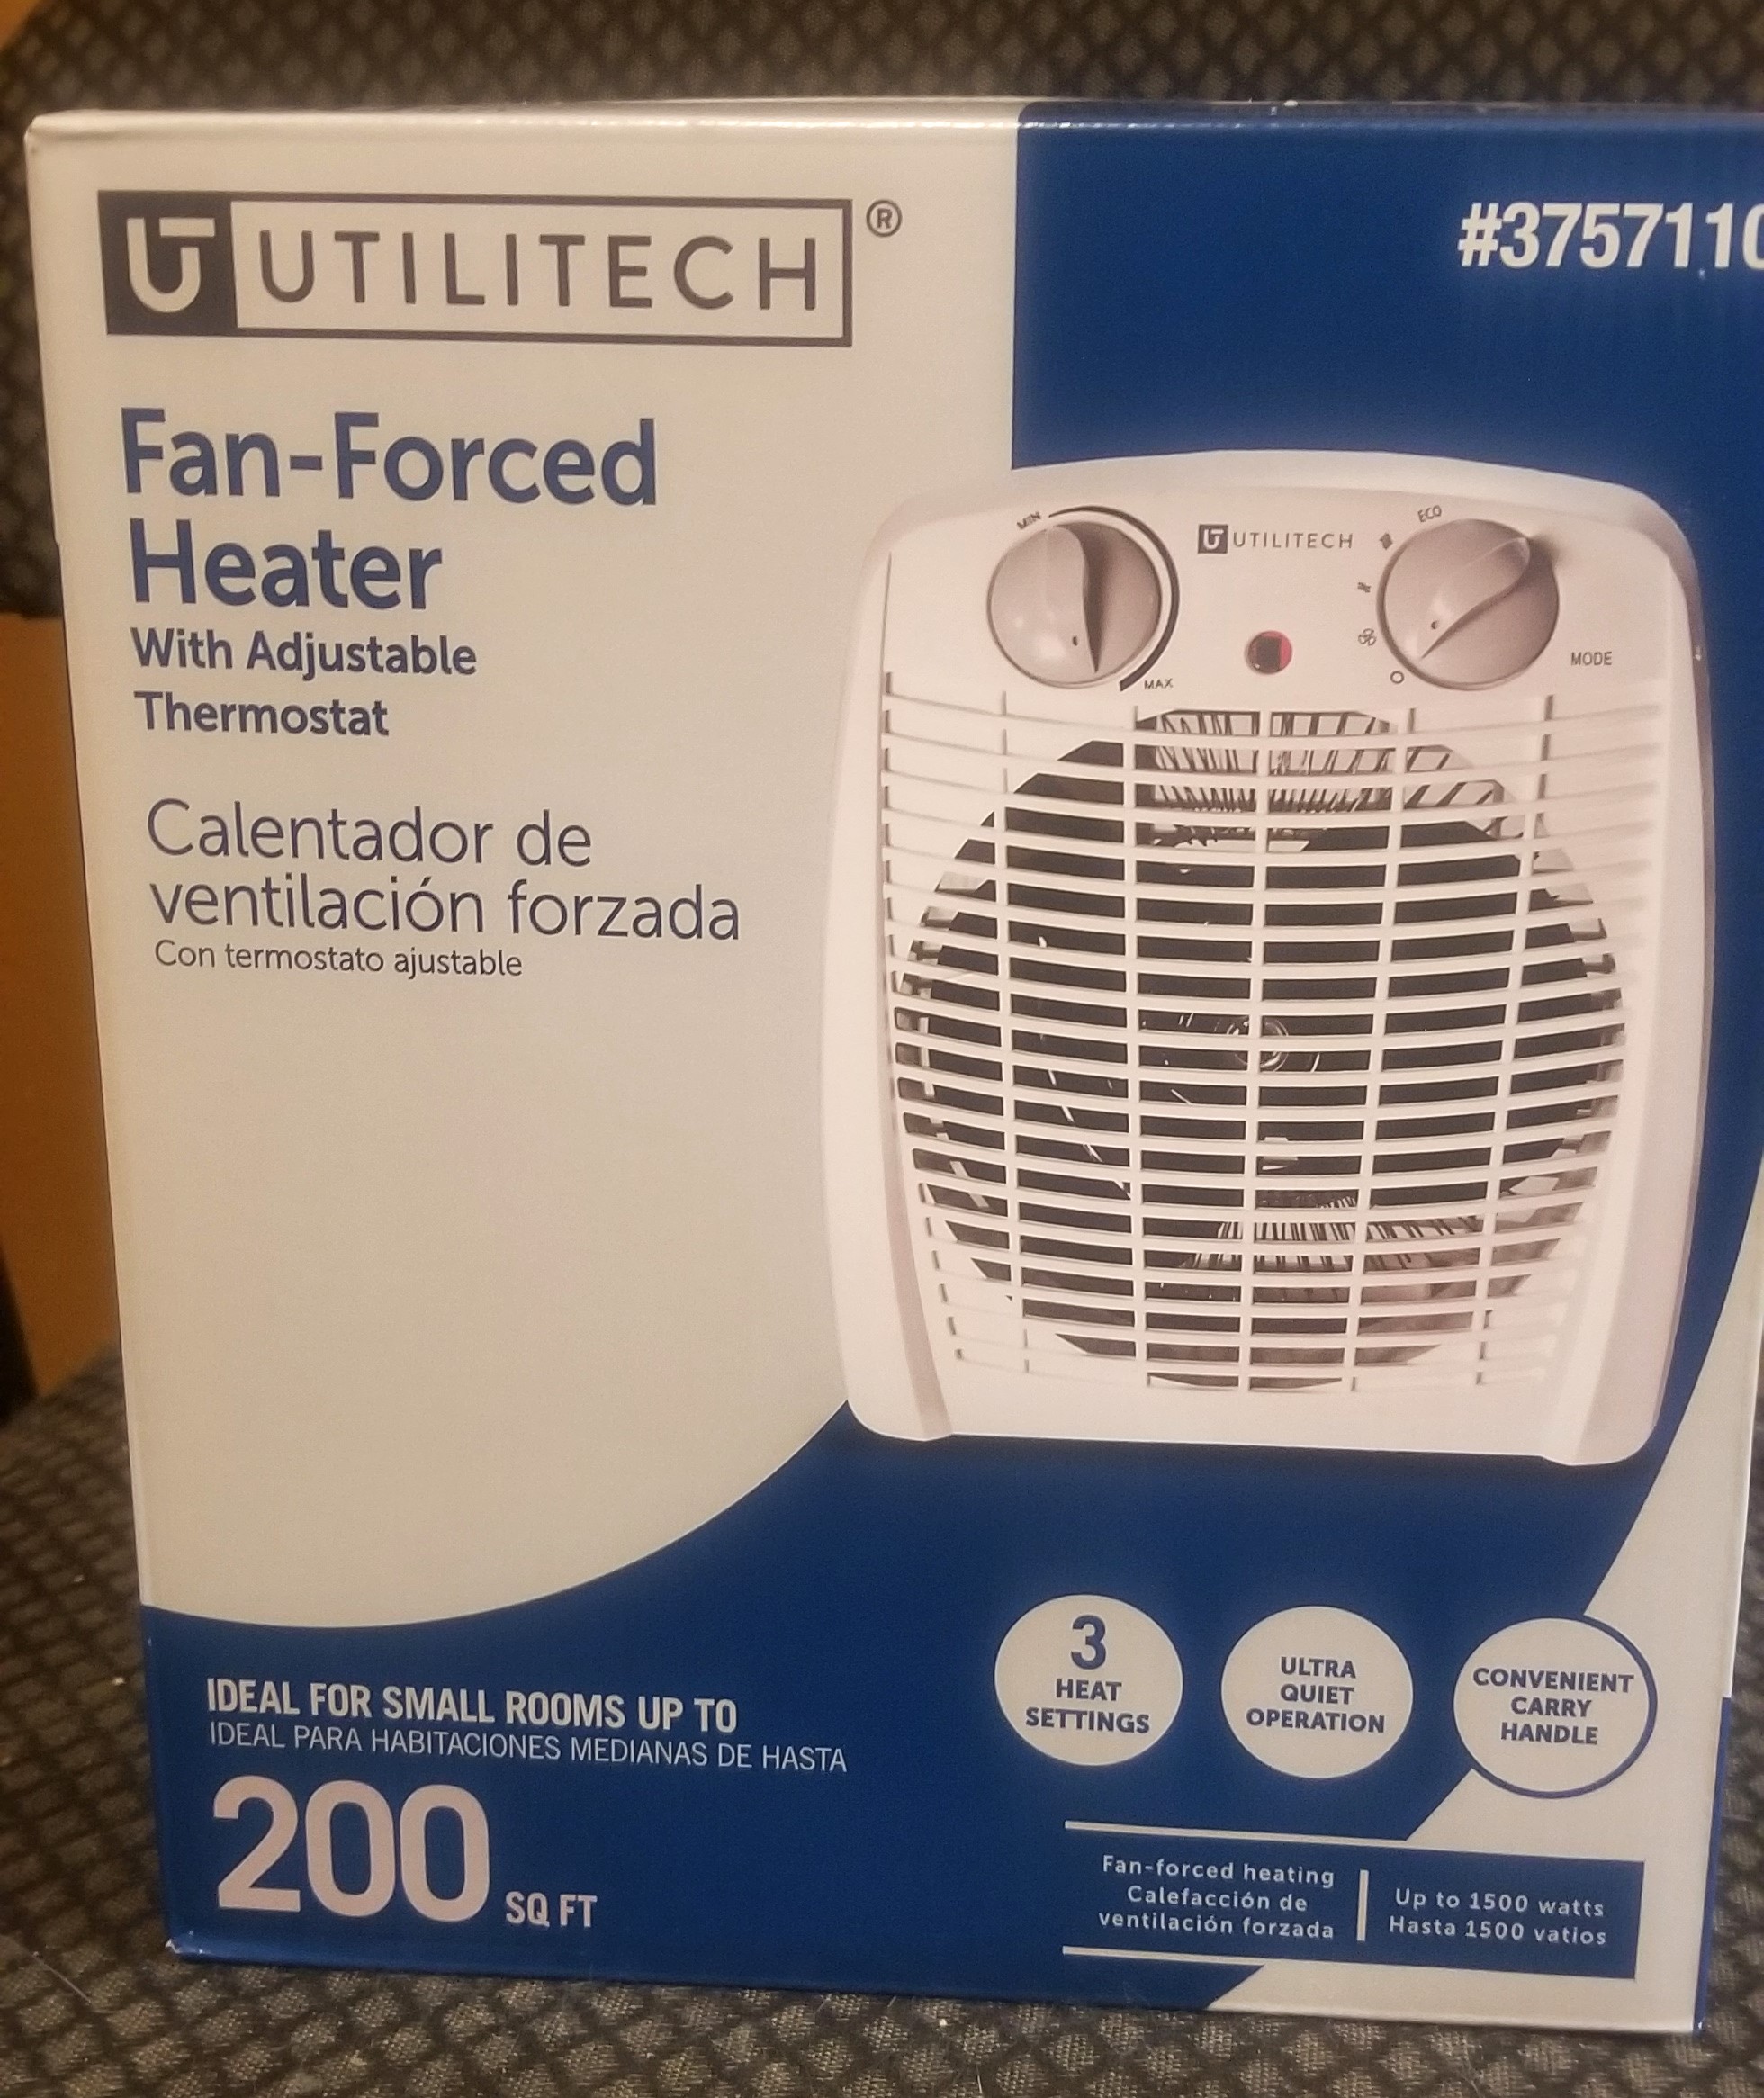
I also have a small, fan-forced heater in the greenhouse to try to keep a workable ambient temperature. As it is, without this heater, the temperature inside is still as nice as 50° on a cloudy, breezy 36° day. To monitor how well (or not) it’s doing during the critical time – overnight – I’m using a Bluetooth enabled temperature and humidity monitor. It’s designed for indoor use and it will be, technically, indoors within the greenhouse. I can keep an eye on the temperature from inside, as well as review data from the last week.
Small but mighty heater.Inside on a sunny day around 40 outside.I can check the temp from my house. Under $20.With the device on the floor, I always know the coldest temperature.
The first night it dropped to 30° outside, while maintaining 47.5° inside the greenhouse at the floor, where I set the gauge. In the morning, outside was 34° and before the sun hit the structure, it was 50° at the greenhouse floor thanks to the wind dying down. Heat rises, so the upper shelves were warmer, plus everything was on a heating mat and so perfectly fine. The only problem, I discovered, is the heater’s thermostat is not sensitive enough to trigger shutting off. It was still cranking as the greenhouse hit 80° around 1pm. I have another controller on the way to handle it. I’ll program it to shut off when the temperature hits 65° and switch a fan on when it’s above 70°. In the meantime, I’m monitoring the temperature and turning the heater on and off manually as needed.
Some plants, of course, like cooler temps to start. We’ll use the mats to start our broccoli and other cabbage family varieties, then move them off of the mats once they’ve grown true leaves. Cabbage family plants can handle if it drops into a cooler range, which is possible near the outer walls and lower shelves. Onions also need a period of cooler temps, as well as a certain length of daylight to form bulbs. I’ll move these from the mats to unheated trays as they grow larger.
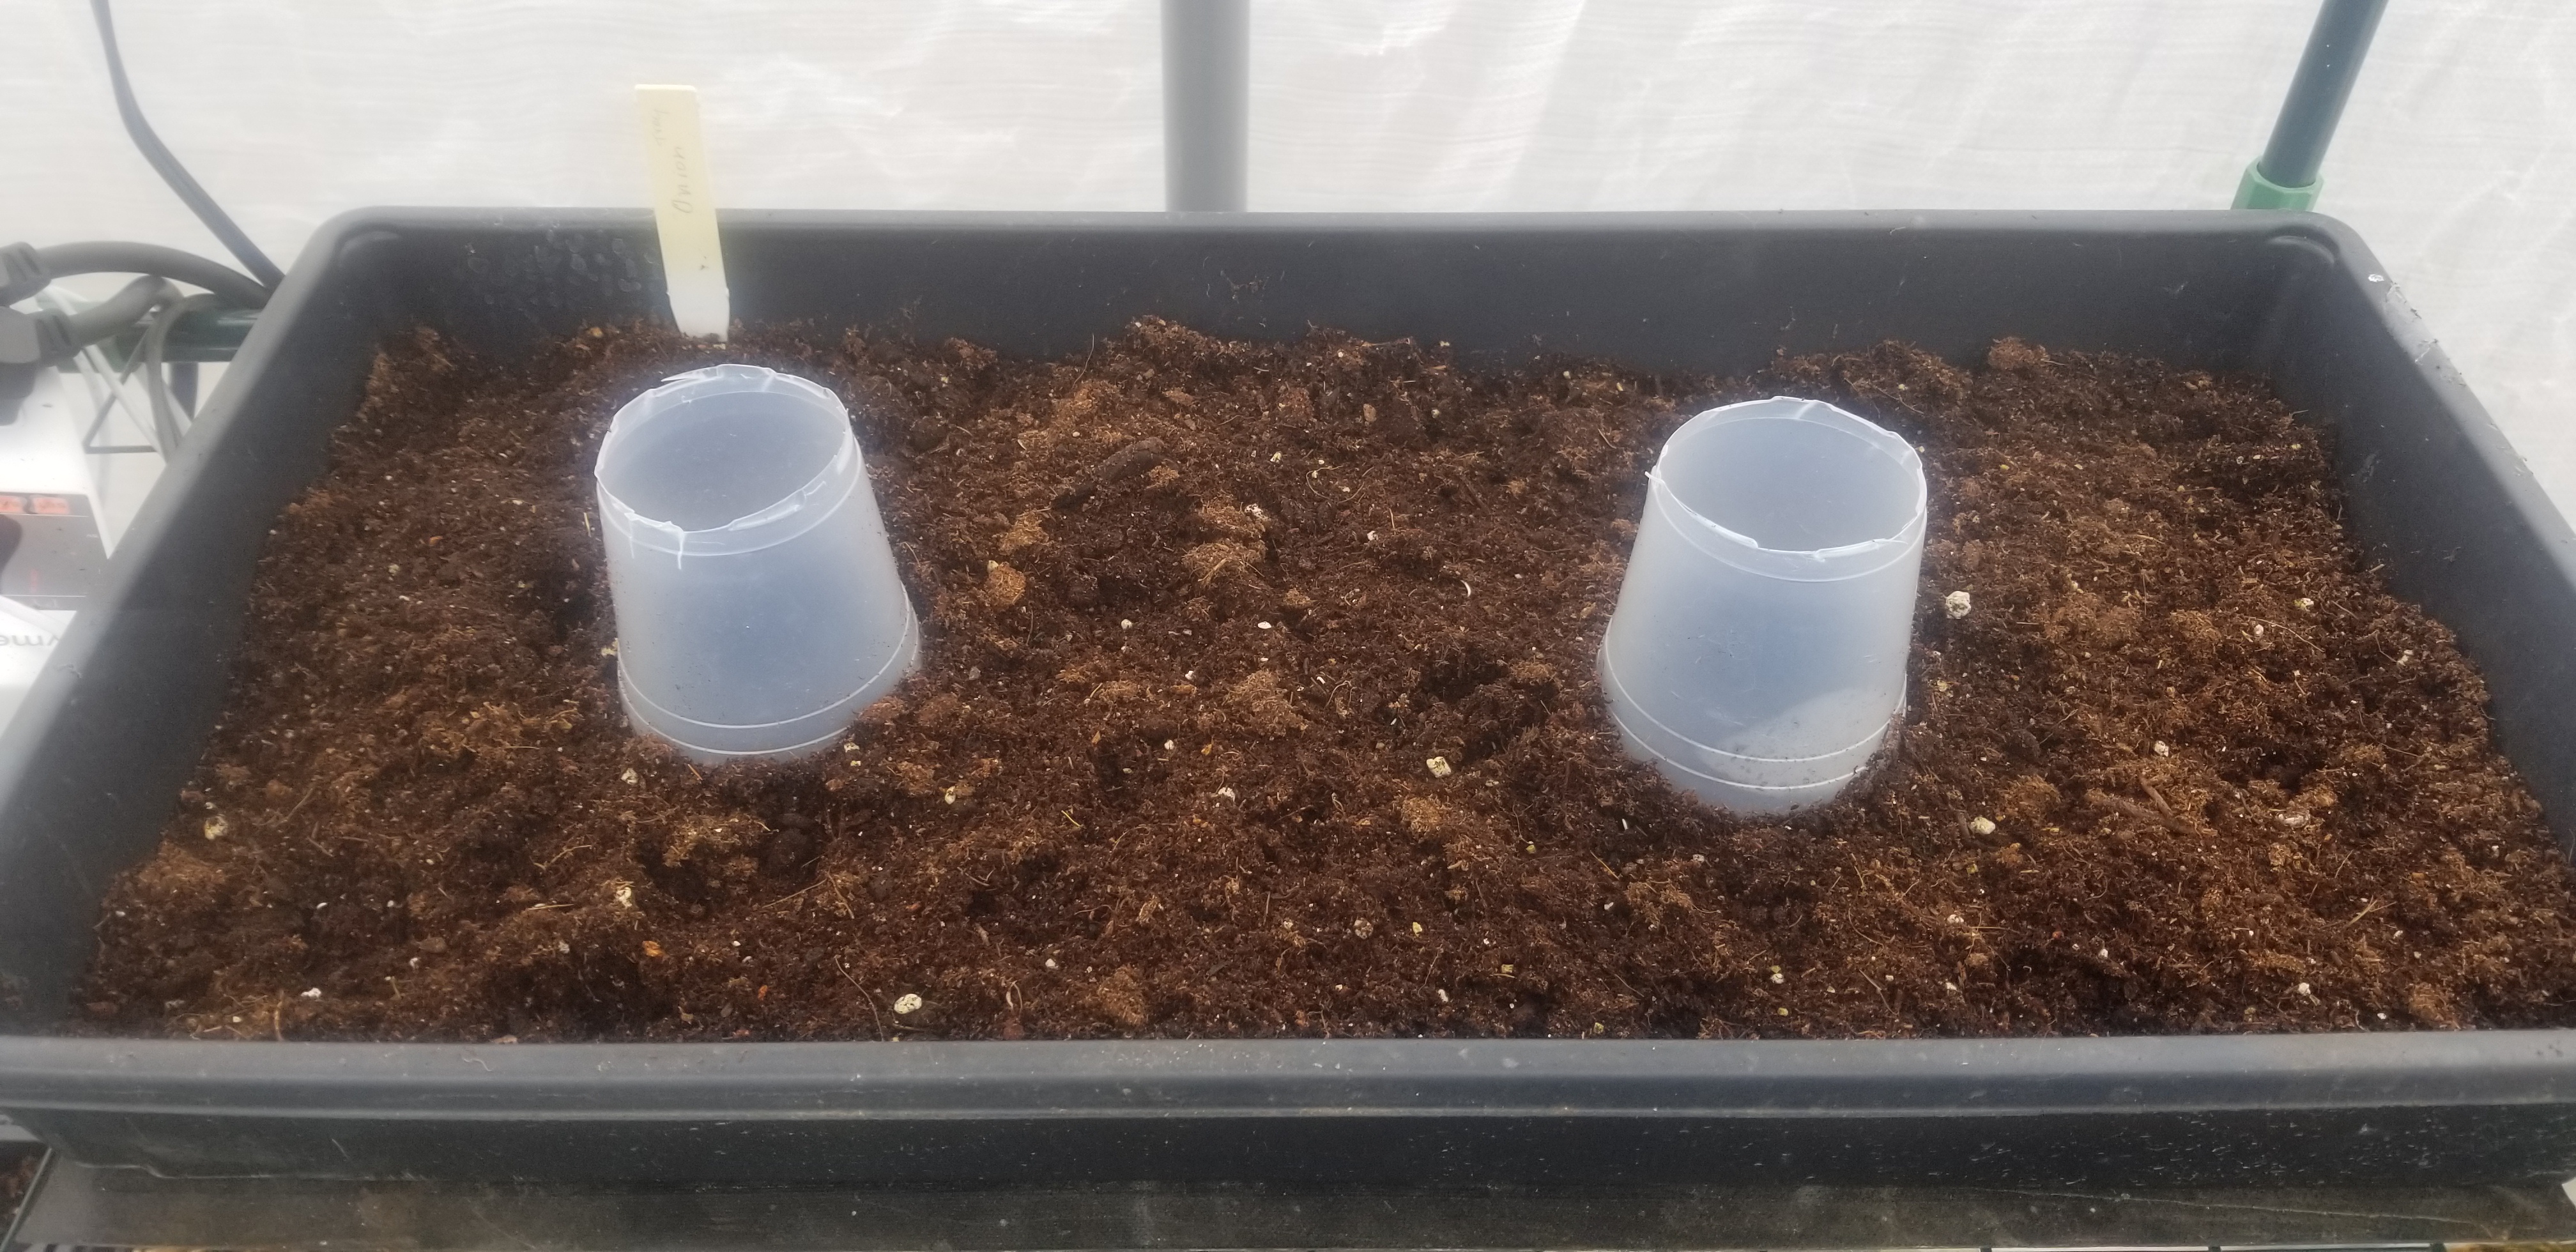
Onions, celery, carrots, lavender and other seeds have notoriously low germination rates. Lavender is 20% at best for even the top-quality seed. Because I only need 18 celery plants, I started them in six-packs. I can resow and thin those until I get my 18. Onions and lavender, I’m looking to get as many as I can manage. Rather than tie up dozens of six-packs and flats, most of which won’t see germination, I spread the seeds out over a tray filled shallowly with starter mix. To be able to water from the bottom, I cut the bottoms from two plastic cups and set them, inverted, into the trays. Water poured gently into the cups will spread out under the medium, floating it for a while, but not breaking it up and disturbing the new roots of sprouting seeds. As these seedlings reach a certain size, I’ll move them individually into six-packs. I’ve done this before with high success.
Inverted cups for bottom watering the scattered seeds.
I’ll be making seed tapes for carrots and lettuce. This will allow me to use less seed because they will be correctly spaced, eliminating the need to thin them. I shopped for seed tape online and came up empty. I guess it’s not a widely used technique anymore. Then again, they are easy to make out of newspaper. A seed tape is simply a strip of paper, usually half an inch wide and as long as you need, on which the seeds are attached at the proper spacing. To make this easier, I laid out grids on my little work table for three and four-inch spacing. I’m using USA Today because they have been using soy-based inks, including colors, since the 1990’s. To link strips together and fix the seeds in the desired spots, I’m using an edible glue designed for use in cake decorating. If you can eat it, I’m assuming it’s safe for use in the garden.
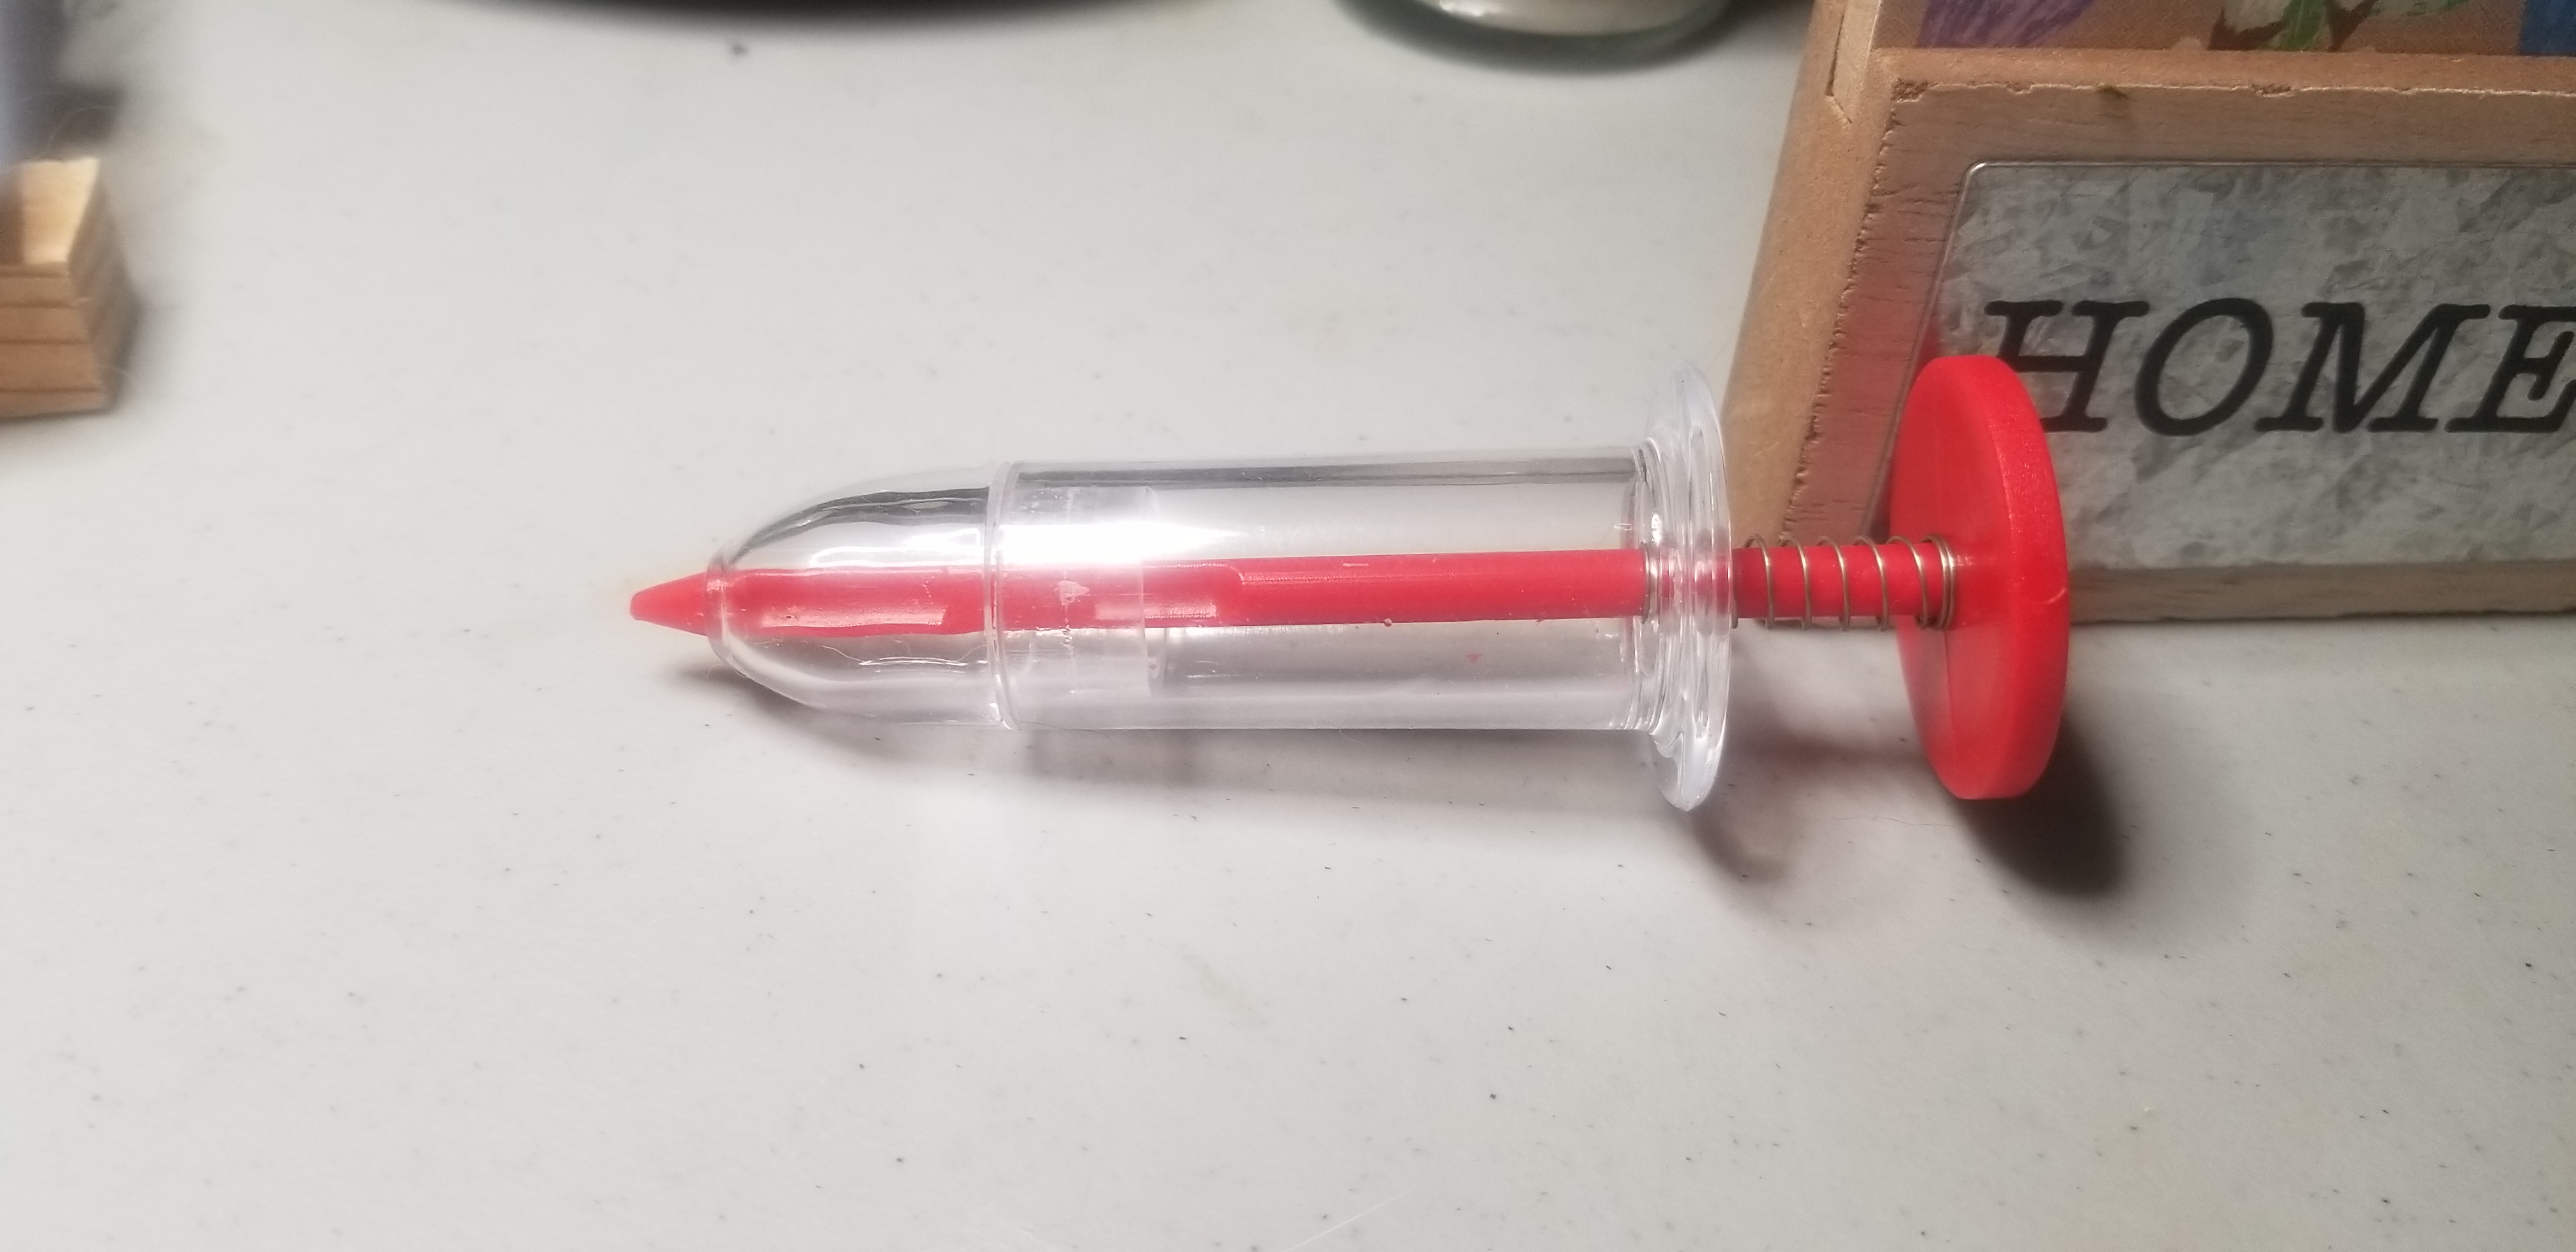
The real problem with small seed is handling them. I have seen people recommending using tweezers, which is not all that easy either. Instead, I’ve invested a whopping (sarcastic keyboard) $7 in a device which is designed to control how many seeds you drop. It’s like a hypodermic, but plastic and with a slot in the plunger that is meant to allow only a couple of seeds at a time to be dispensed. I’m thinking it may take some practice. More on that, when I make the seed tapes.
This is supposed to allow me to drop one or two tiny seeds at a time.
One negative to an outdoor, poly greenhouse is its inability to trap heat as well as a glass greenhouse. This has to do with the energy wavelengths of light and radiated heat. Light waves are shorter than radiated heat waves. Light waves pass easily through glass while the longer radiated waves don’t. The heat will still dissipate through the glass, but not as quickly as the light energy poured in. That’s how a greenhouse retains heat; not so much for a poly greenhouse, however, especially if it’s not airtight.
Because of this inherent drawback, I needed to start my seeds a week later than planned as we were experiencing a cooler start to March than normal. We had too many overnight lows in the teens for me to feel comfortable relying on the heater and mats. A week isn’t that bad though. Especially given the forecast from there had no more below freezing overnight lows and the first daytime highs in the 50s. The first day the greenhouse was up to 70° by 11am and over 80° by 1pm! I have a feeling the heater and mats won’t be running much, if at all, during the daytime.
When we planted, it was a sunny 40° day. Inside the greenhouse, I was sweating with just a T-shirt. We had cold water, which we went through quickly. After planting, it felt good to step outside without a jacket on so we could cool off. It was as though the poly covering magnified the sun hitting us through it.
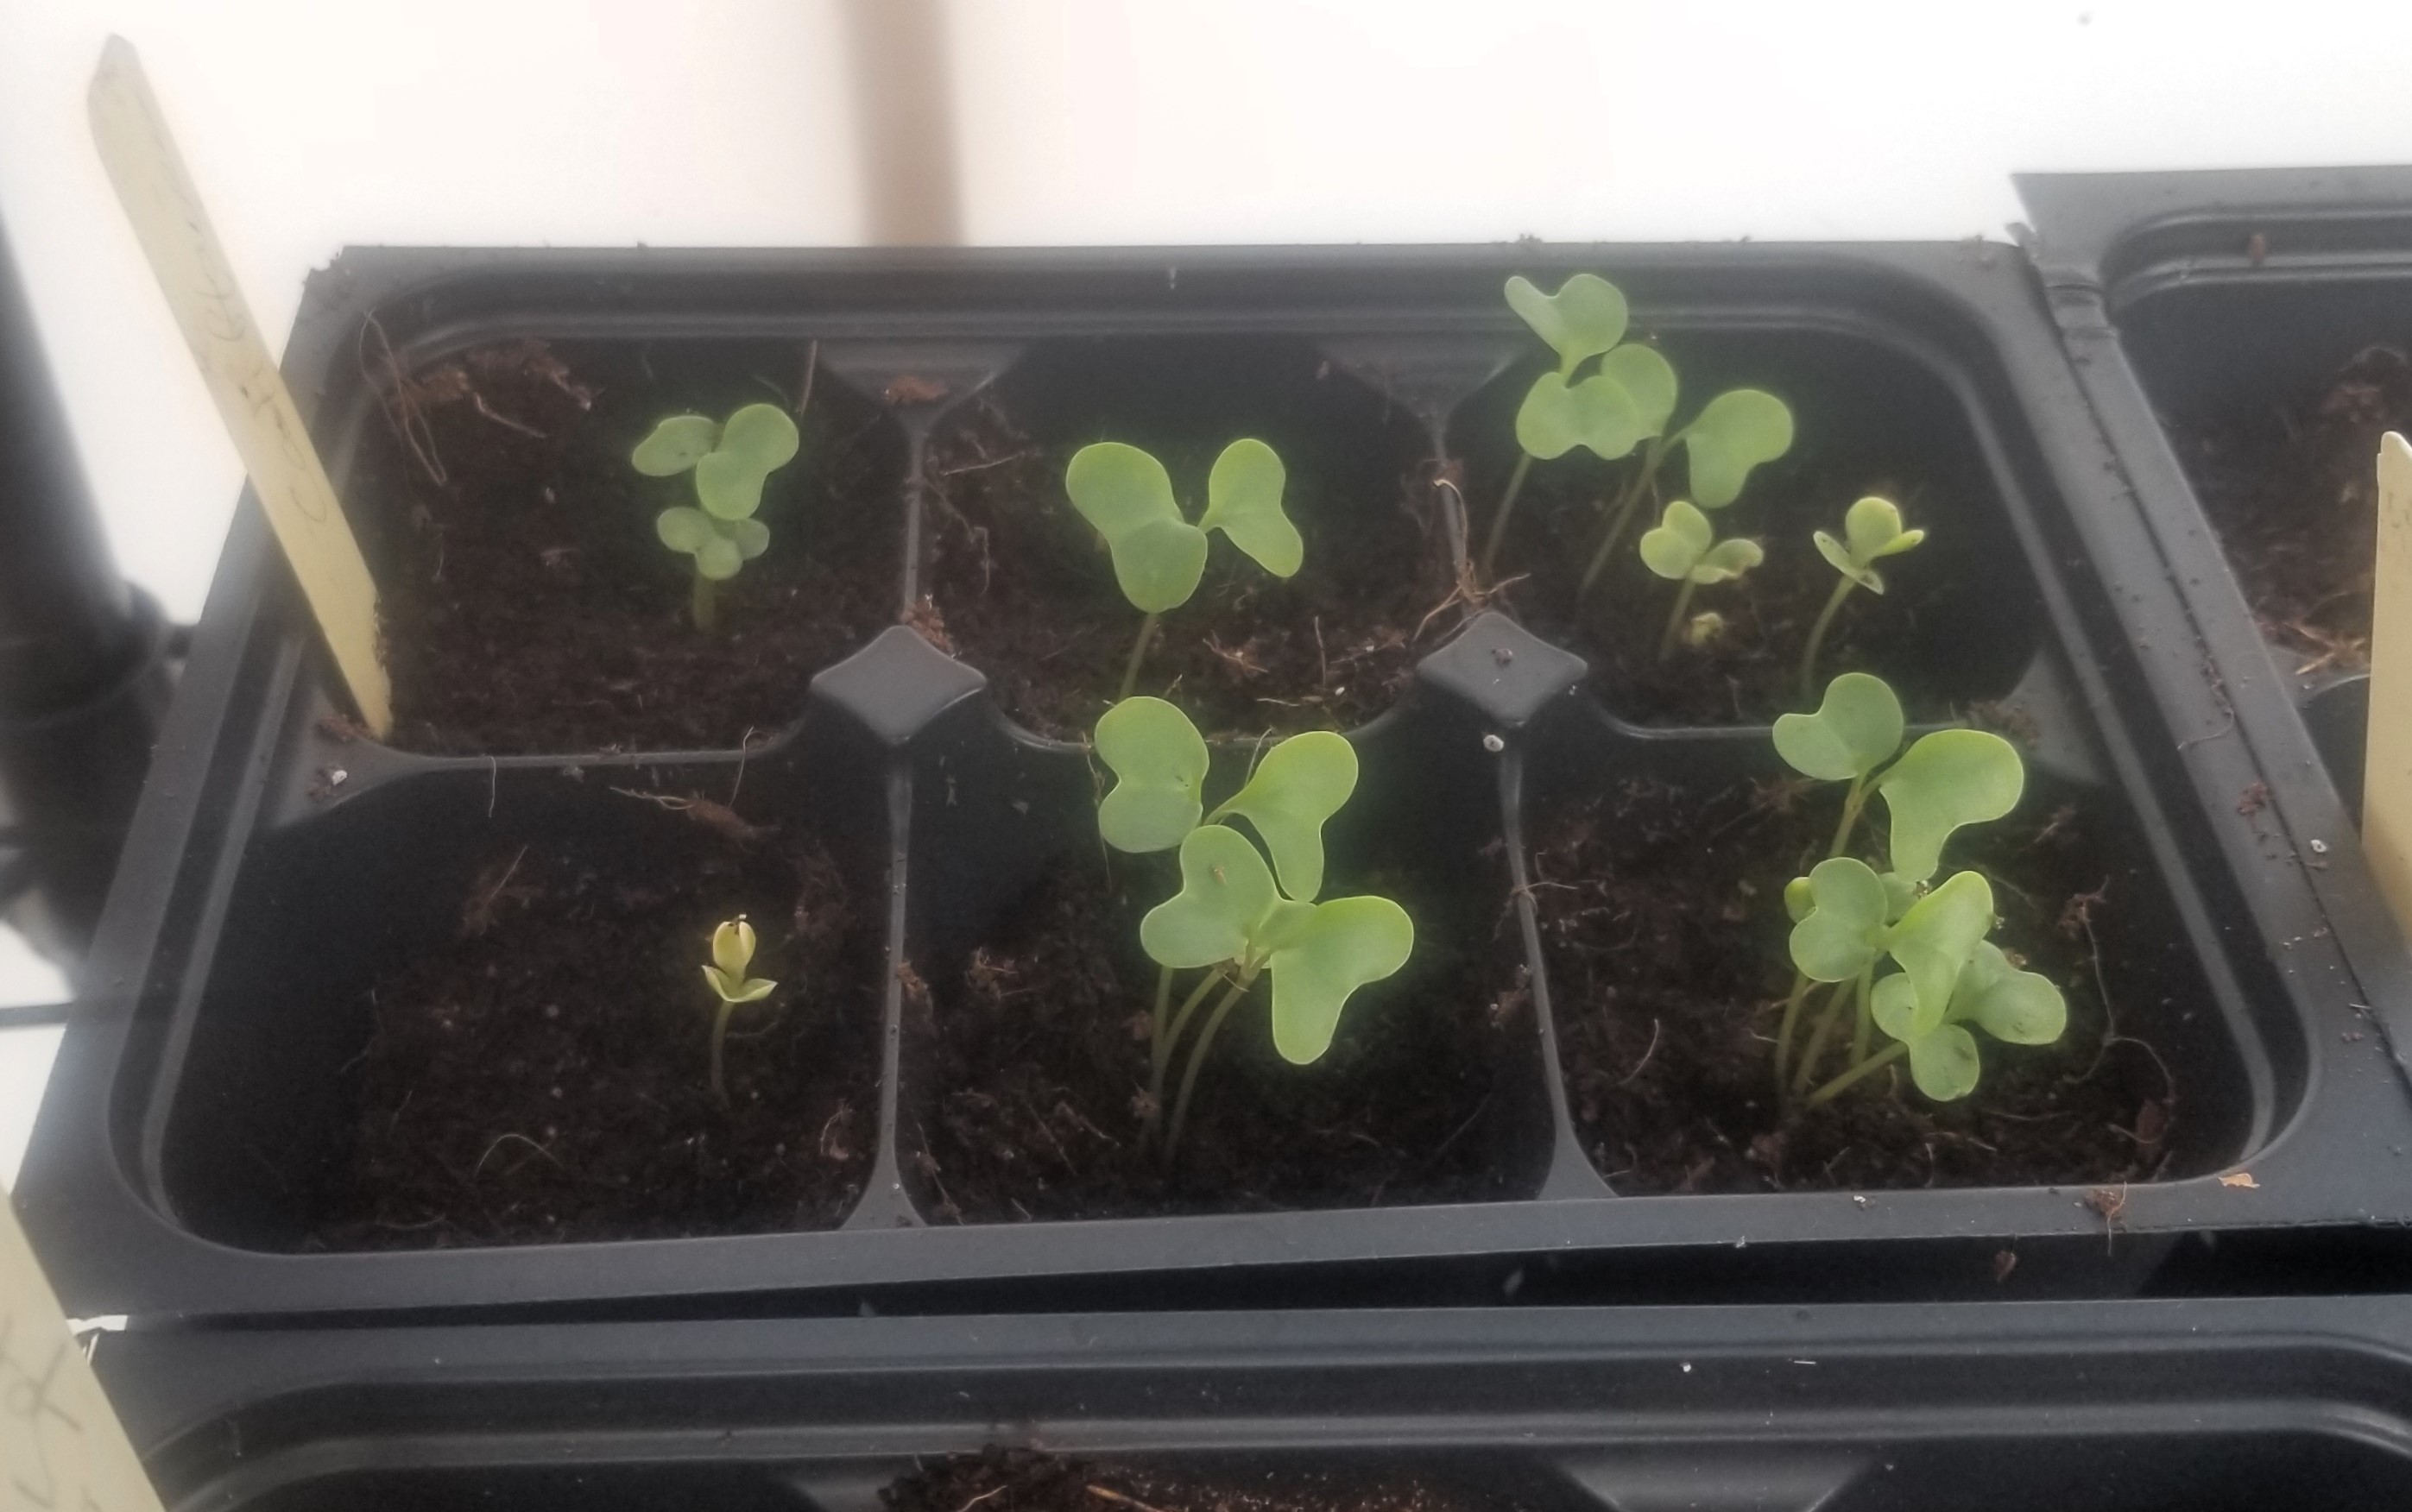
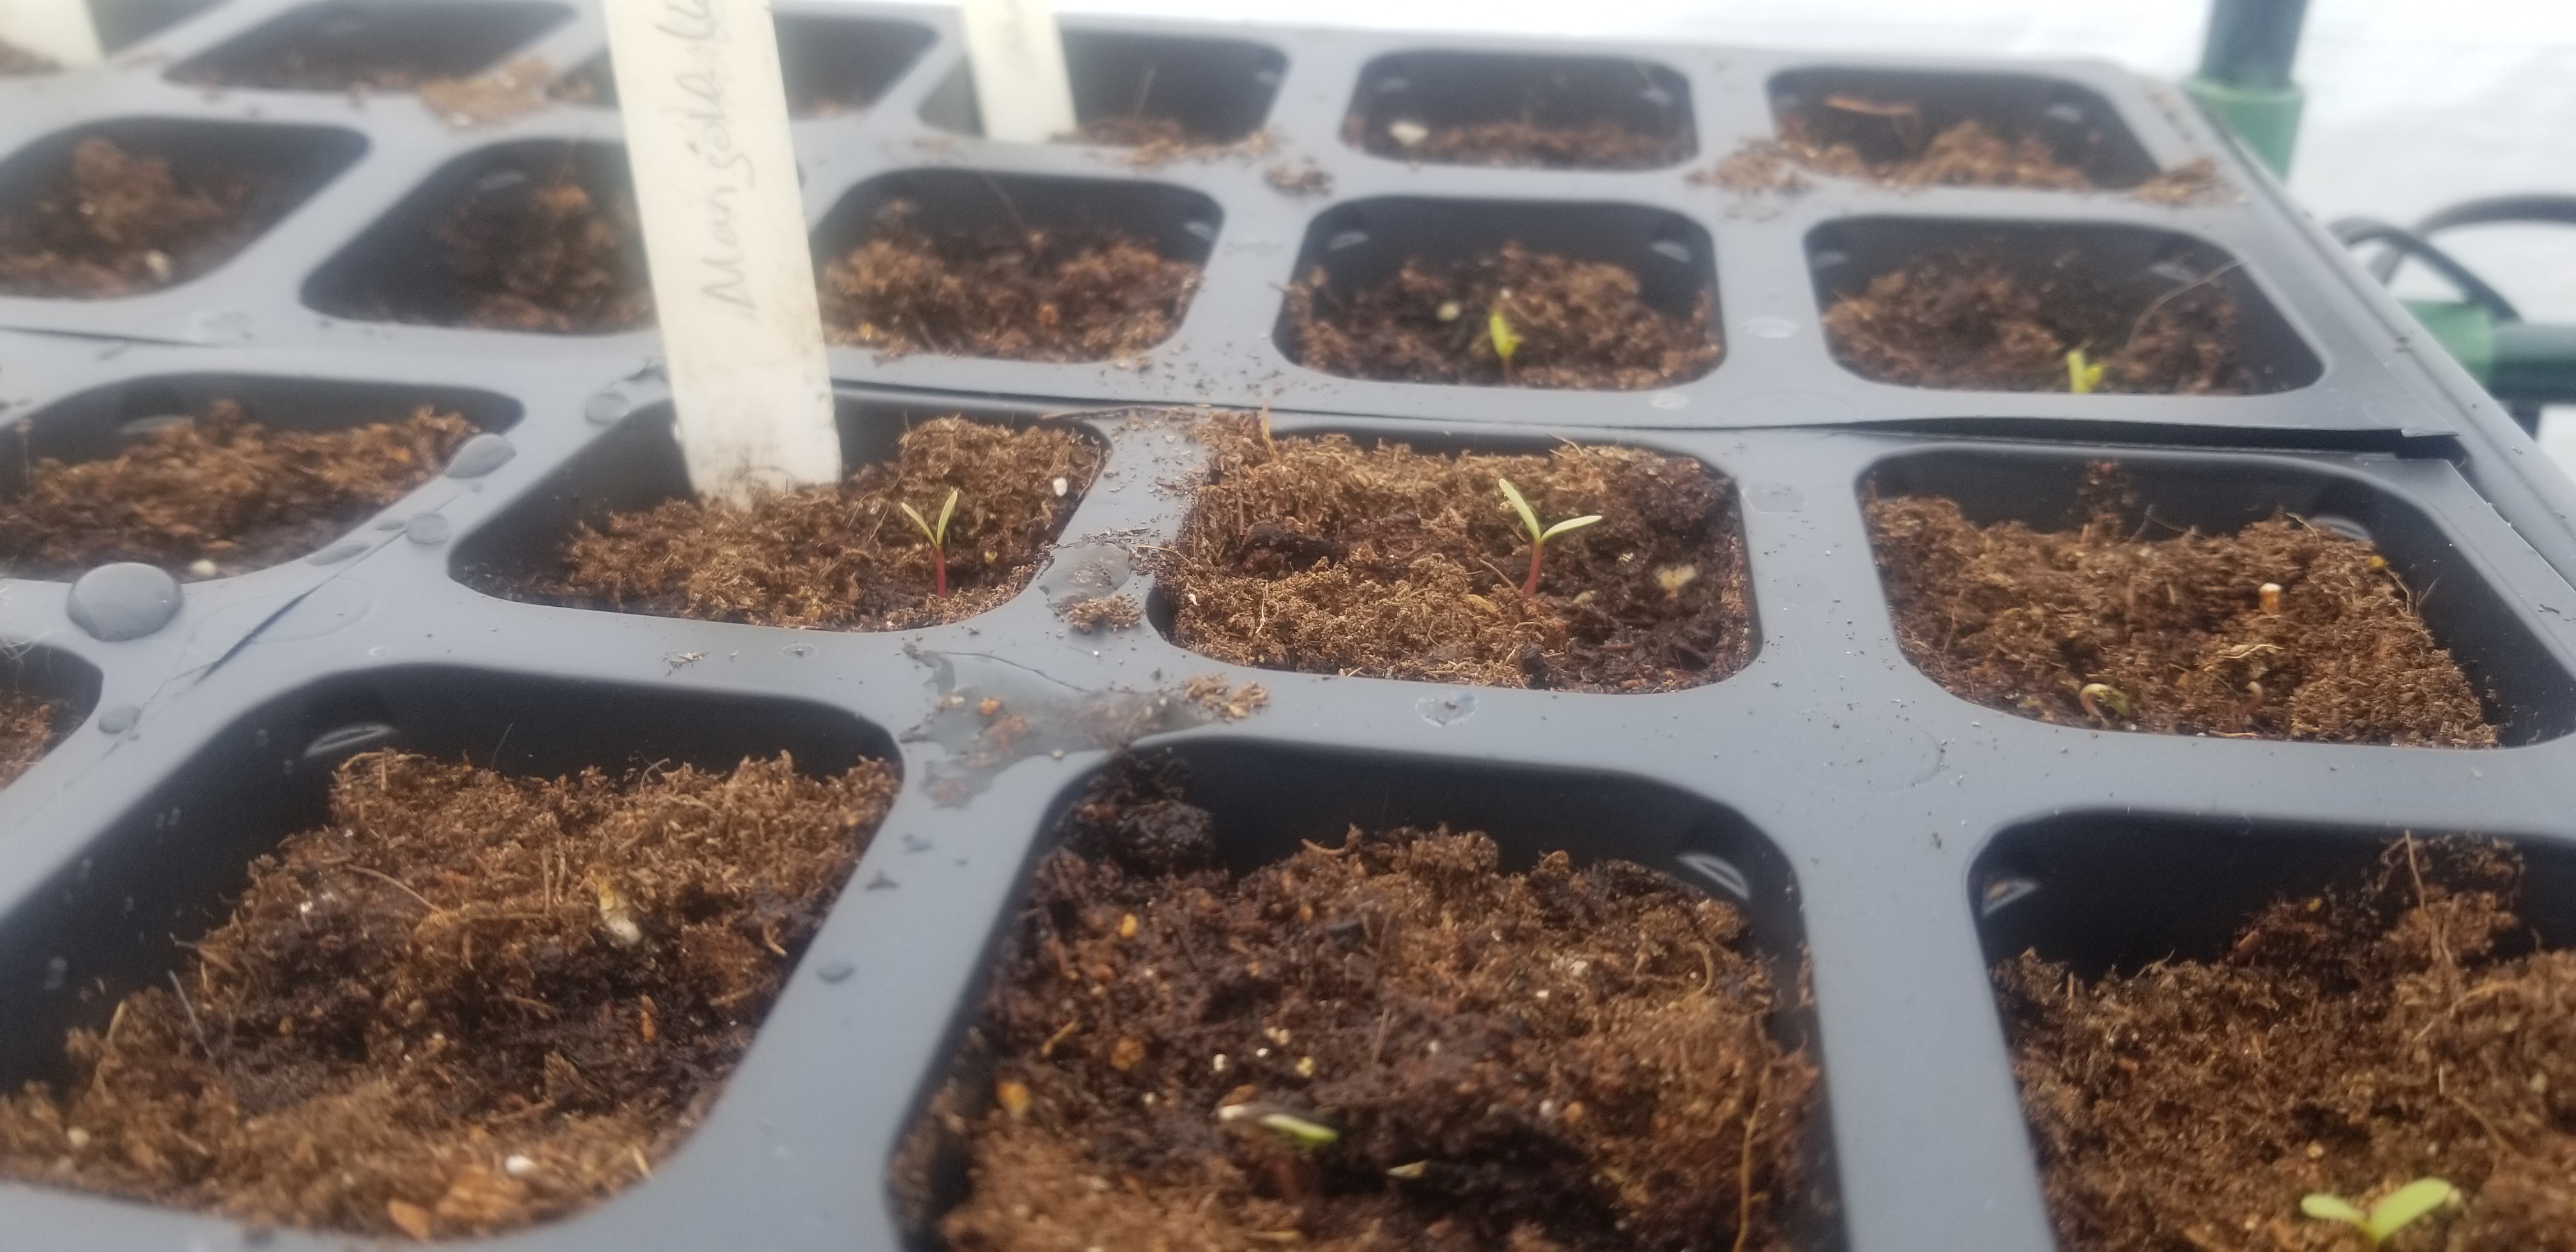
Still, I was worried the structure still wouldn’t do the job; that the temperatures would fluctuate too much or get too cold overnight, or that the cloudy weather would inhibit germination. Relief and joy greeted me with the first sprouts only 5 days after sowing. The marigolds and zinnia had already popped up. (Great big smiley emoji!) Broccoli, red cabbage, and tomatillo sprouted the next day.
First sprouts of our first outdoor greenhouse. Marigolds.
And, forecasts being forecasts, the outlook changed. They’re now warning about a late March winter storm with up to seven inches of snow possible for tomorrow. Another test is on the way, I guess. Mother Nature may be finicky. But Old Man Winter is a downright curmudgeon. Crimanitely, the baseball season starts in six days! I’ll have the heater cranking all day and put covers on the lower trays to ward off any wind that does get through.
Really? I mean, really? The baseball season starts next week.
Typical me; in the week we had to wait before planting, I organized my labels by tray and quantity of each variety I wanted to start. This saved me (and my daughter who did most of the seeding) from finding myself needing to juggle what was in which tray to keep types mostly grouped together. This really wasn’t necessary, but it allowed me to burn off some of my impatience while I waited on proper weather conditions. I don’t know about you, but I get sooooo antsy right before planting time. Maybe that will be relieved with a year-round greenhouse. I’ll be able to tell you next year.
And now to get back to posting about our hyperactive garden instead of my illness (which continues to fall into the background). As you may recall, I use the term micro-farming for our garden because of the size and intensity we employ in our efforts to be as self-sustaining as possible. Well, it’s getting bigger still and this is just part one of my posts about it.
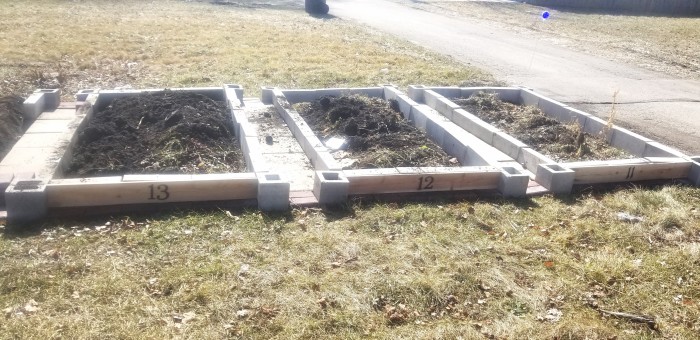
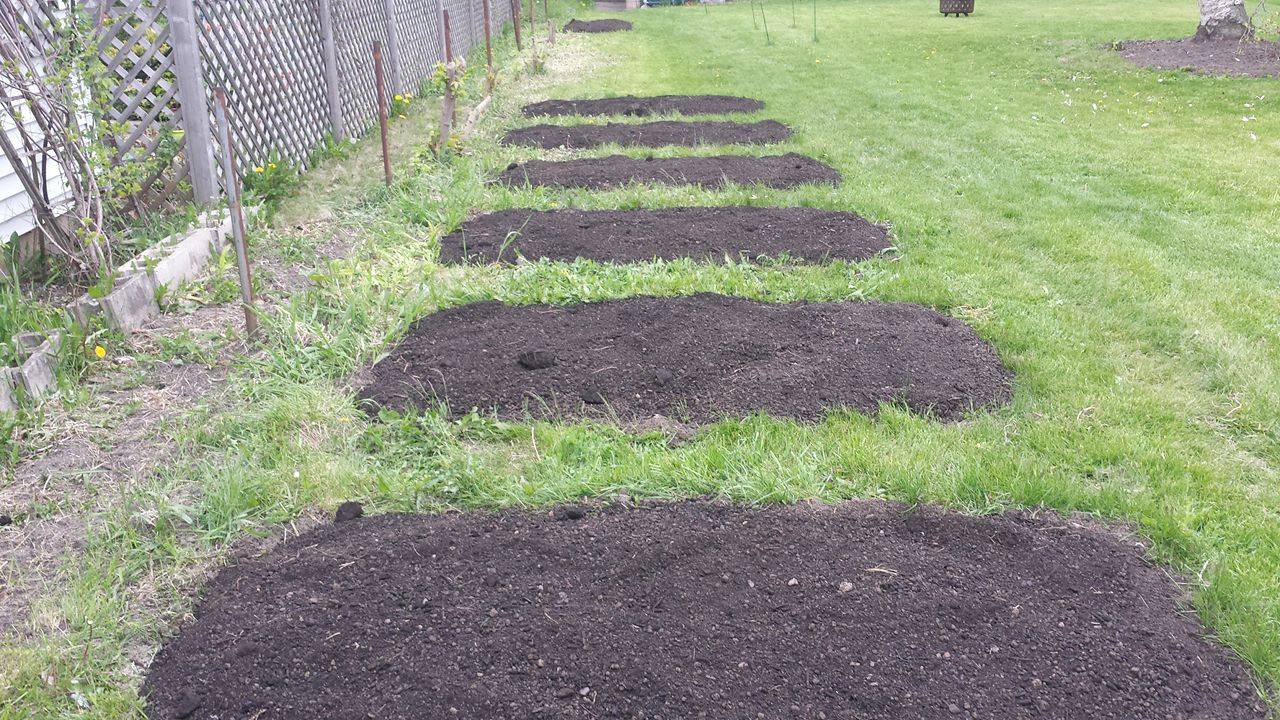
Last season, I began adding five more beds but only managed two and a couple of mounds from my cancer and chemo driven lack of energy. This February I took advantage of the milder weather to get the first four dug in and laid out as planned. I’ll get the fifth when the weather goes back to being mild, which I expect to be soon given I saw the first robin of the year hopping around in my front yard this morning.
Beds 11 to 13Beds 13 and 14
Last year’s beds turned out to be out of place once I dug away the grass which was creeping over the alley pavement. I set the first bed to be about an inch inside the actual edge of the pavement and worked back from there. I happily discovered a multitude of worms in the soil I needed to move to shift the beds and mounds of soil.
Bed 11 Laid Out
I also splurged on delivery of the stones rather than lugging them myself over multiple trips. This is a lot of weight to haul. The pavers for the walkways are 36 pounds each and the concrete blocks for the sides are a minimum of 35 pounds each.
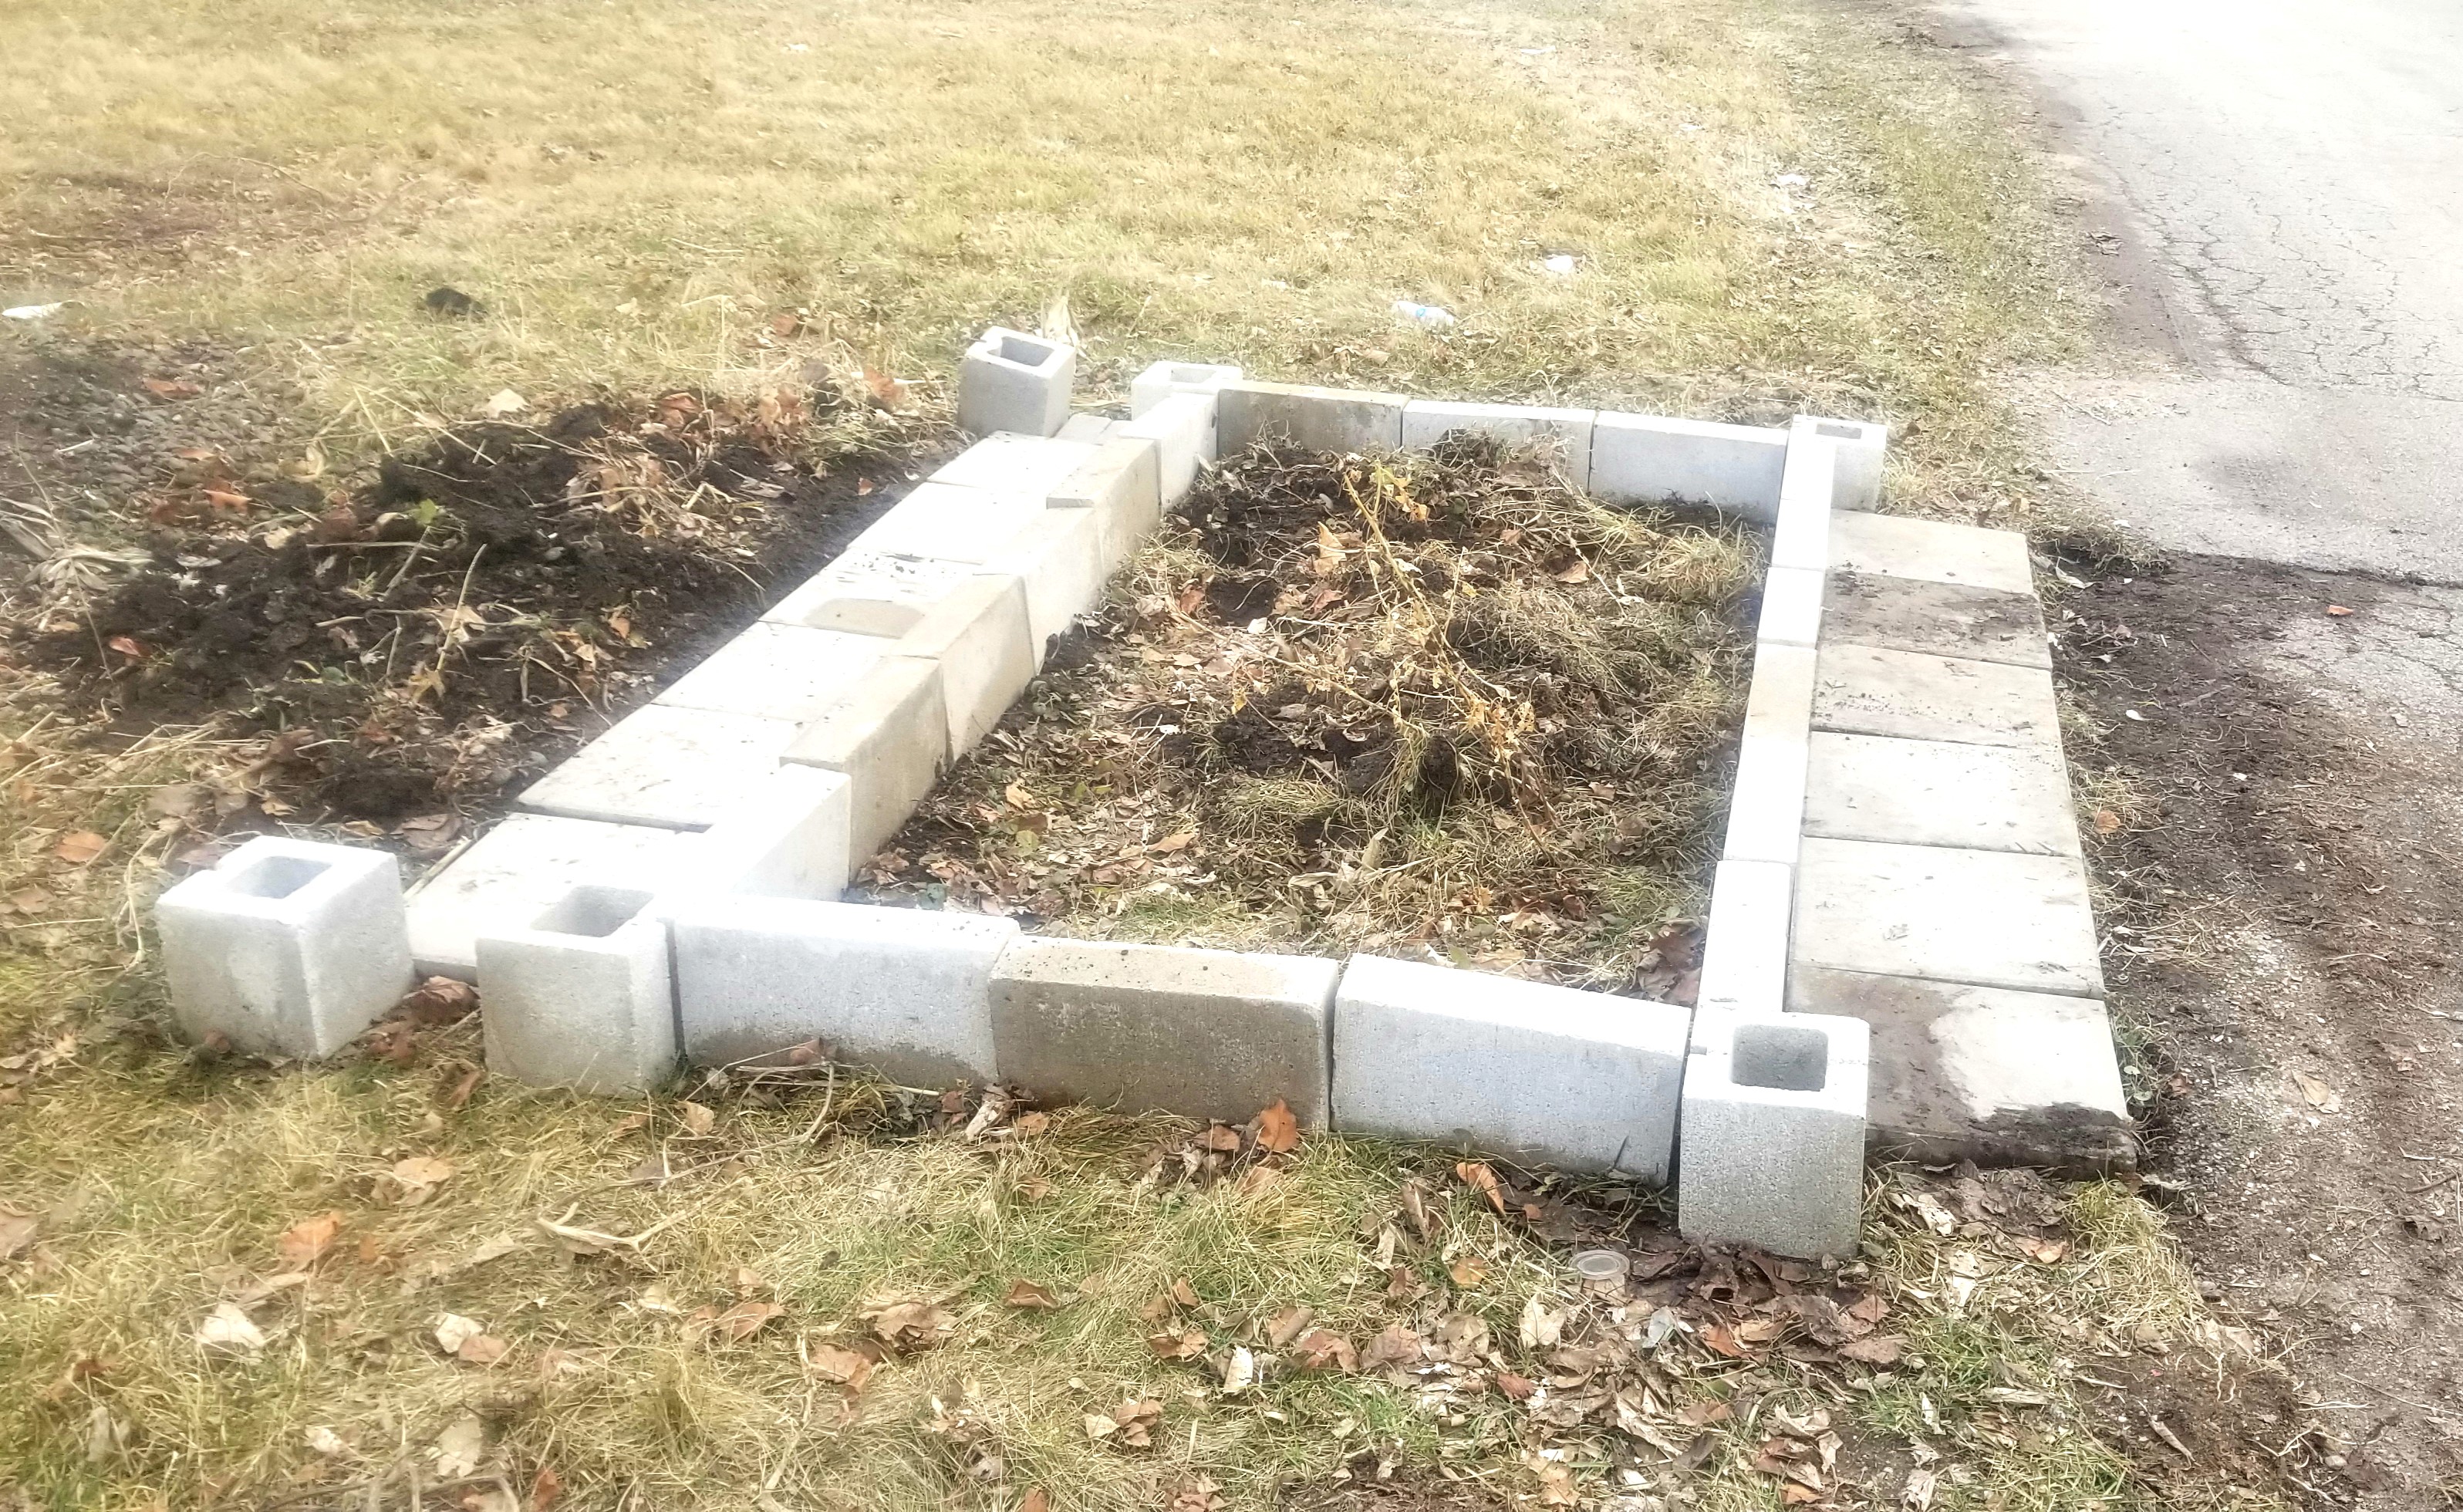
New beds. Assembly required.
The half cinder blocks at the corners will be used as flower pots to hold marigolds and other pest repelling plants. There is a debate on the safety of using cinder blocks for garden beds because blocks were once (still?) made using toxic fly ash, which leached their toxins into your soil and theoretically poisoned your soil. This is not a worry for me because I’m using concrete and cement for the walls, not cinder blocks, and what I plant in these half blocks, which don’t touch the garden soil by design, is all ornamentals.
The numbering was made easy because fence boards are the right thickness and width. We just had to cut them to length. The scrap will become flower boxes.
The pallet the stone came on will become part of a second composter. I currently have enough pallets to create the first three sides. I’ll get a fourth pallet later in the year, when we redo our first three, original beds at the end of the season. With two composters, I can let material break down over two years.
Future second composter
Why stone, you may ask? Because I don’t want to be burdened with repairing wood beds every year. Three of my current ones fell apart last year. One of the others is only fine because we repaired it the year before. The fact I’m turning 65 this year also matters given I will eventually begin to slow down so lowest maintenance possible is best. Over this and the next season, we intend to convert all of the beds to stone.
Won’t the sun bake the stone and cook the soil in the beds? Yes and no. Yes, early in the season when warming the soil is a welcome thing. No, once the plants have begun to grow and shade the sides and the walkways. Last year, with the two I managed to get started, the Alma peppers all but blocked the walkways.
What about grass and weeds growing up between the blocks? No worries. I dug them out and added them to the beds. They’ll compost under the new soil I’m bringing in at planting time. What few manage to poke through will be easily weed whacked out of existence.
I’m confident these beds will work out fine.
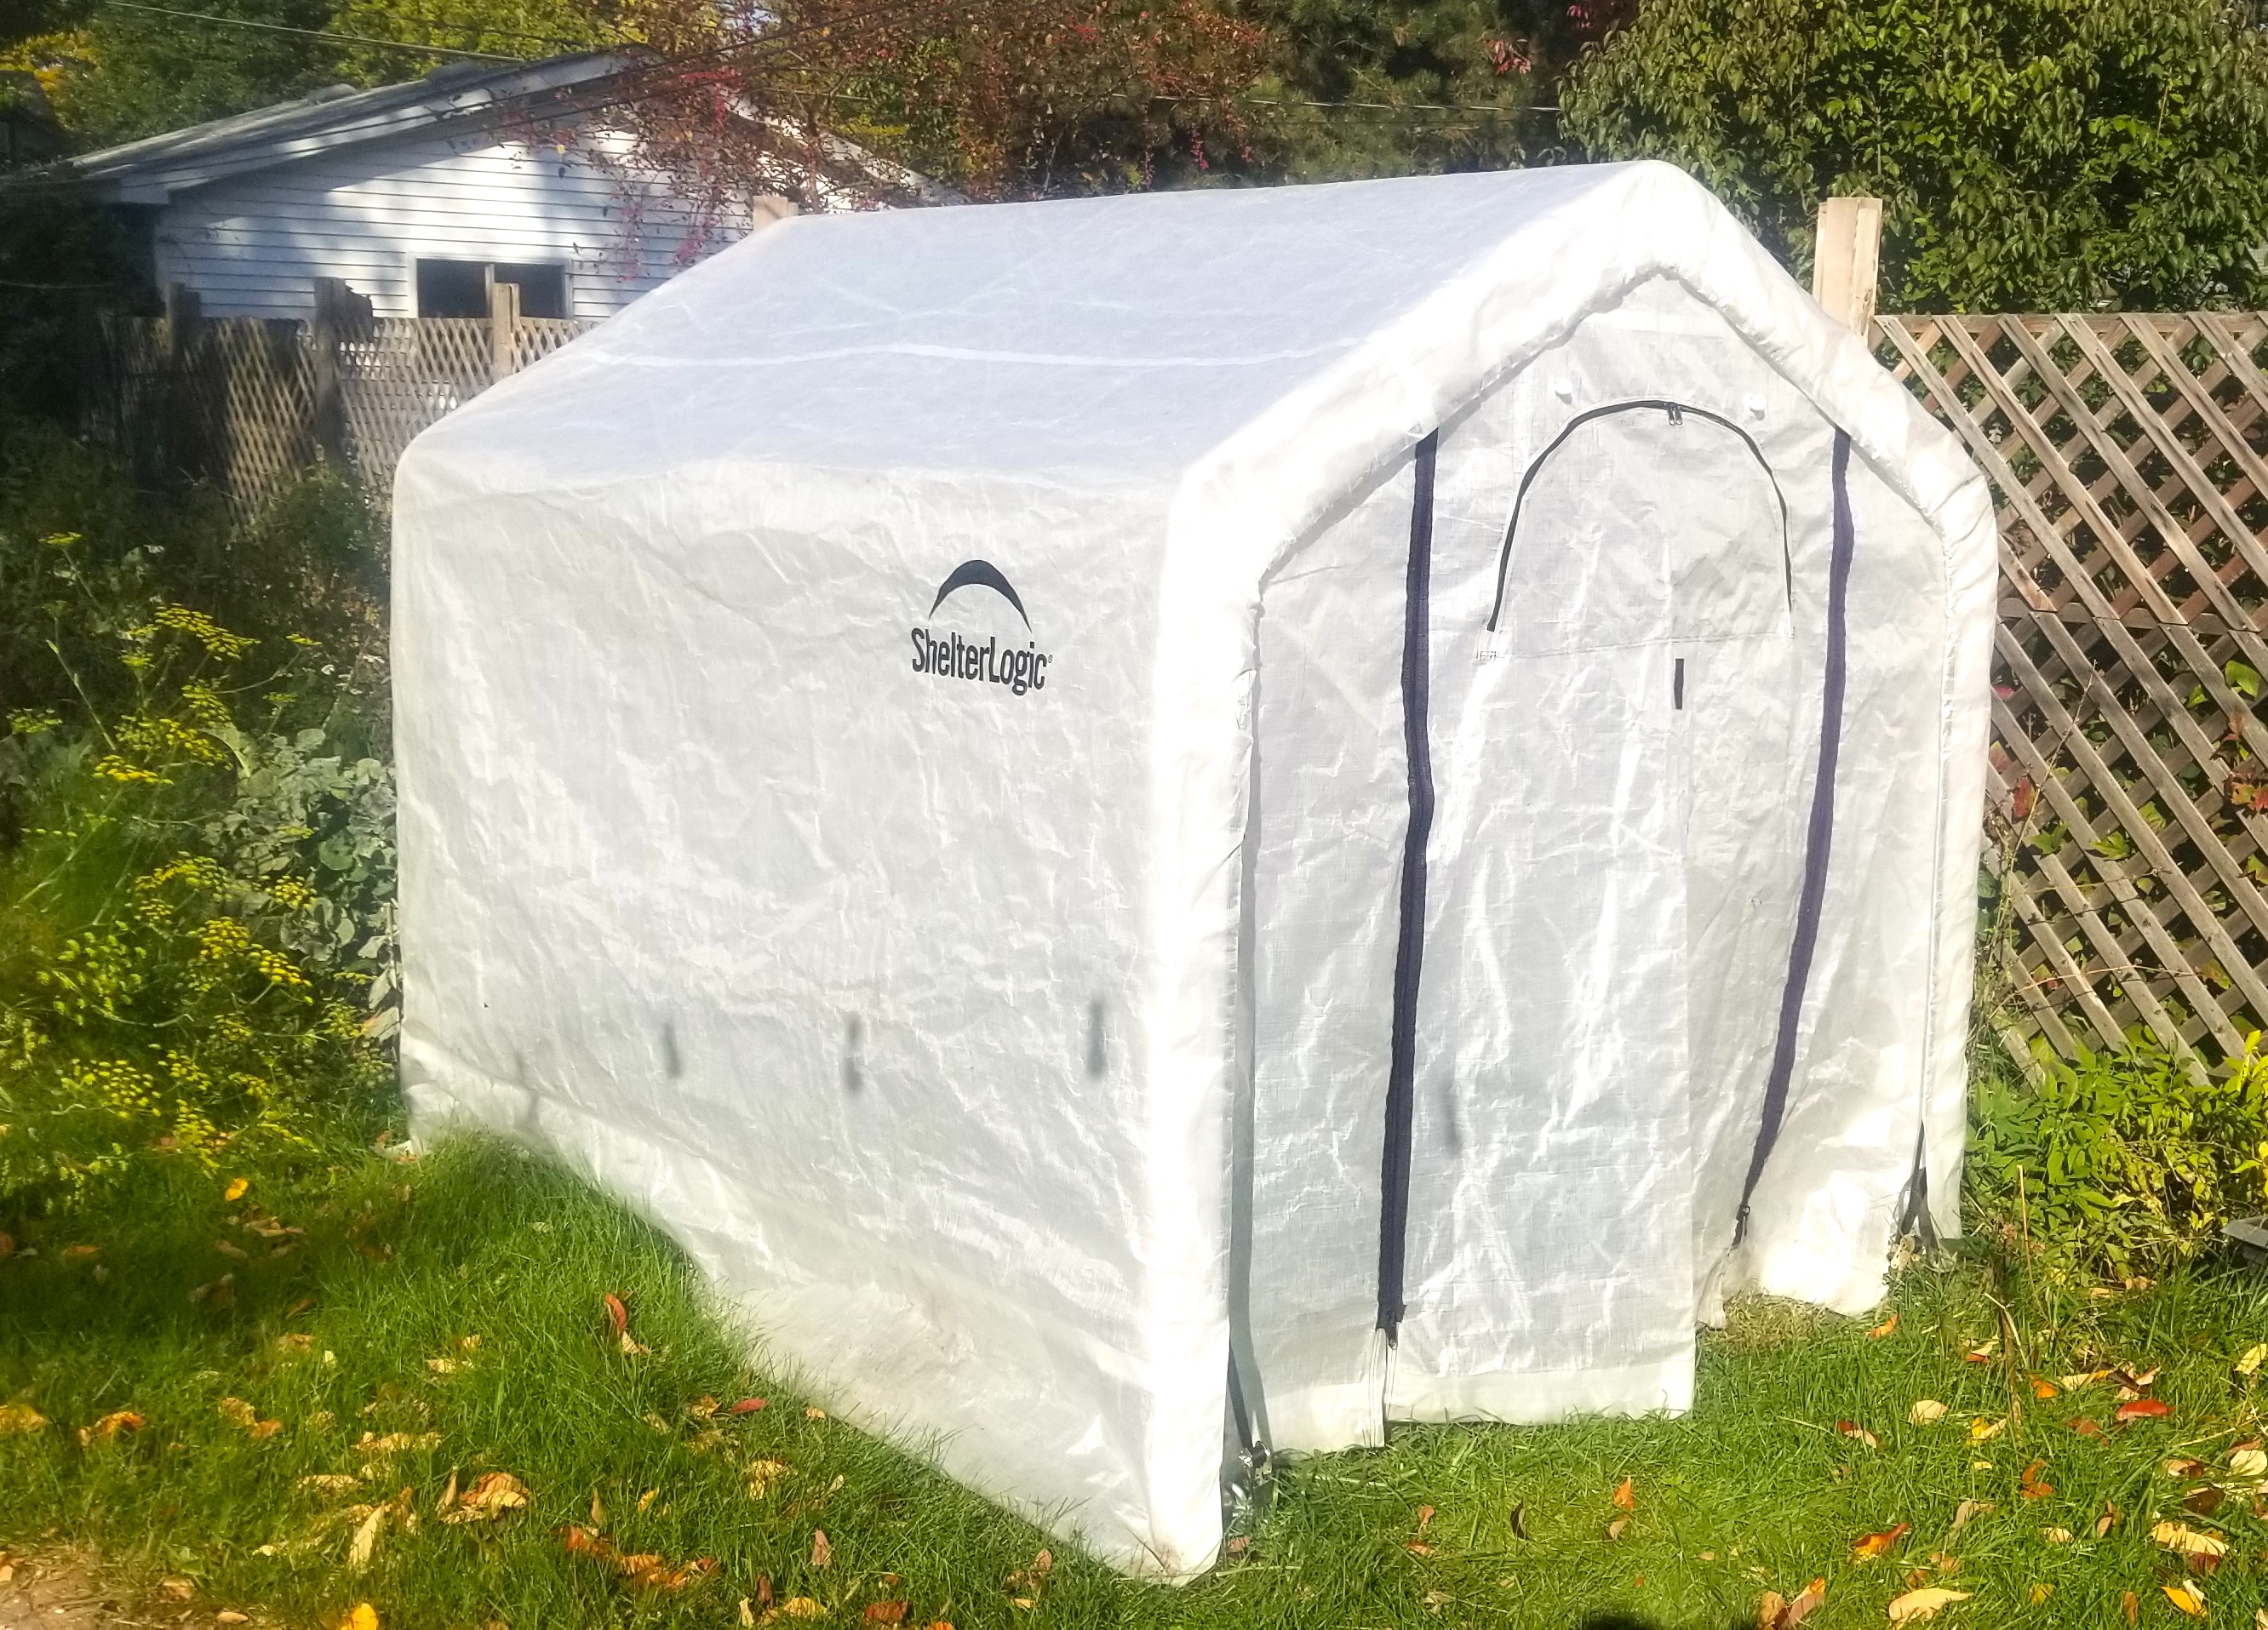
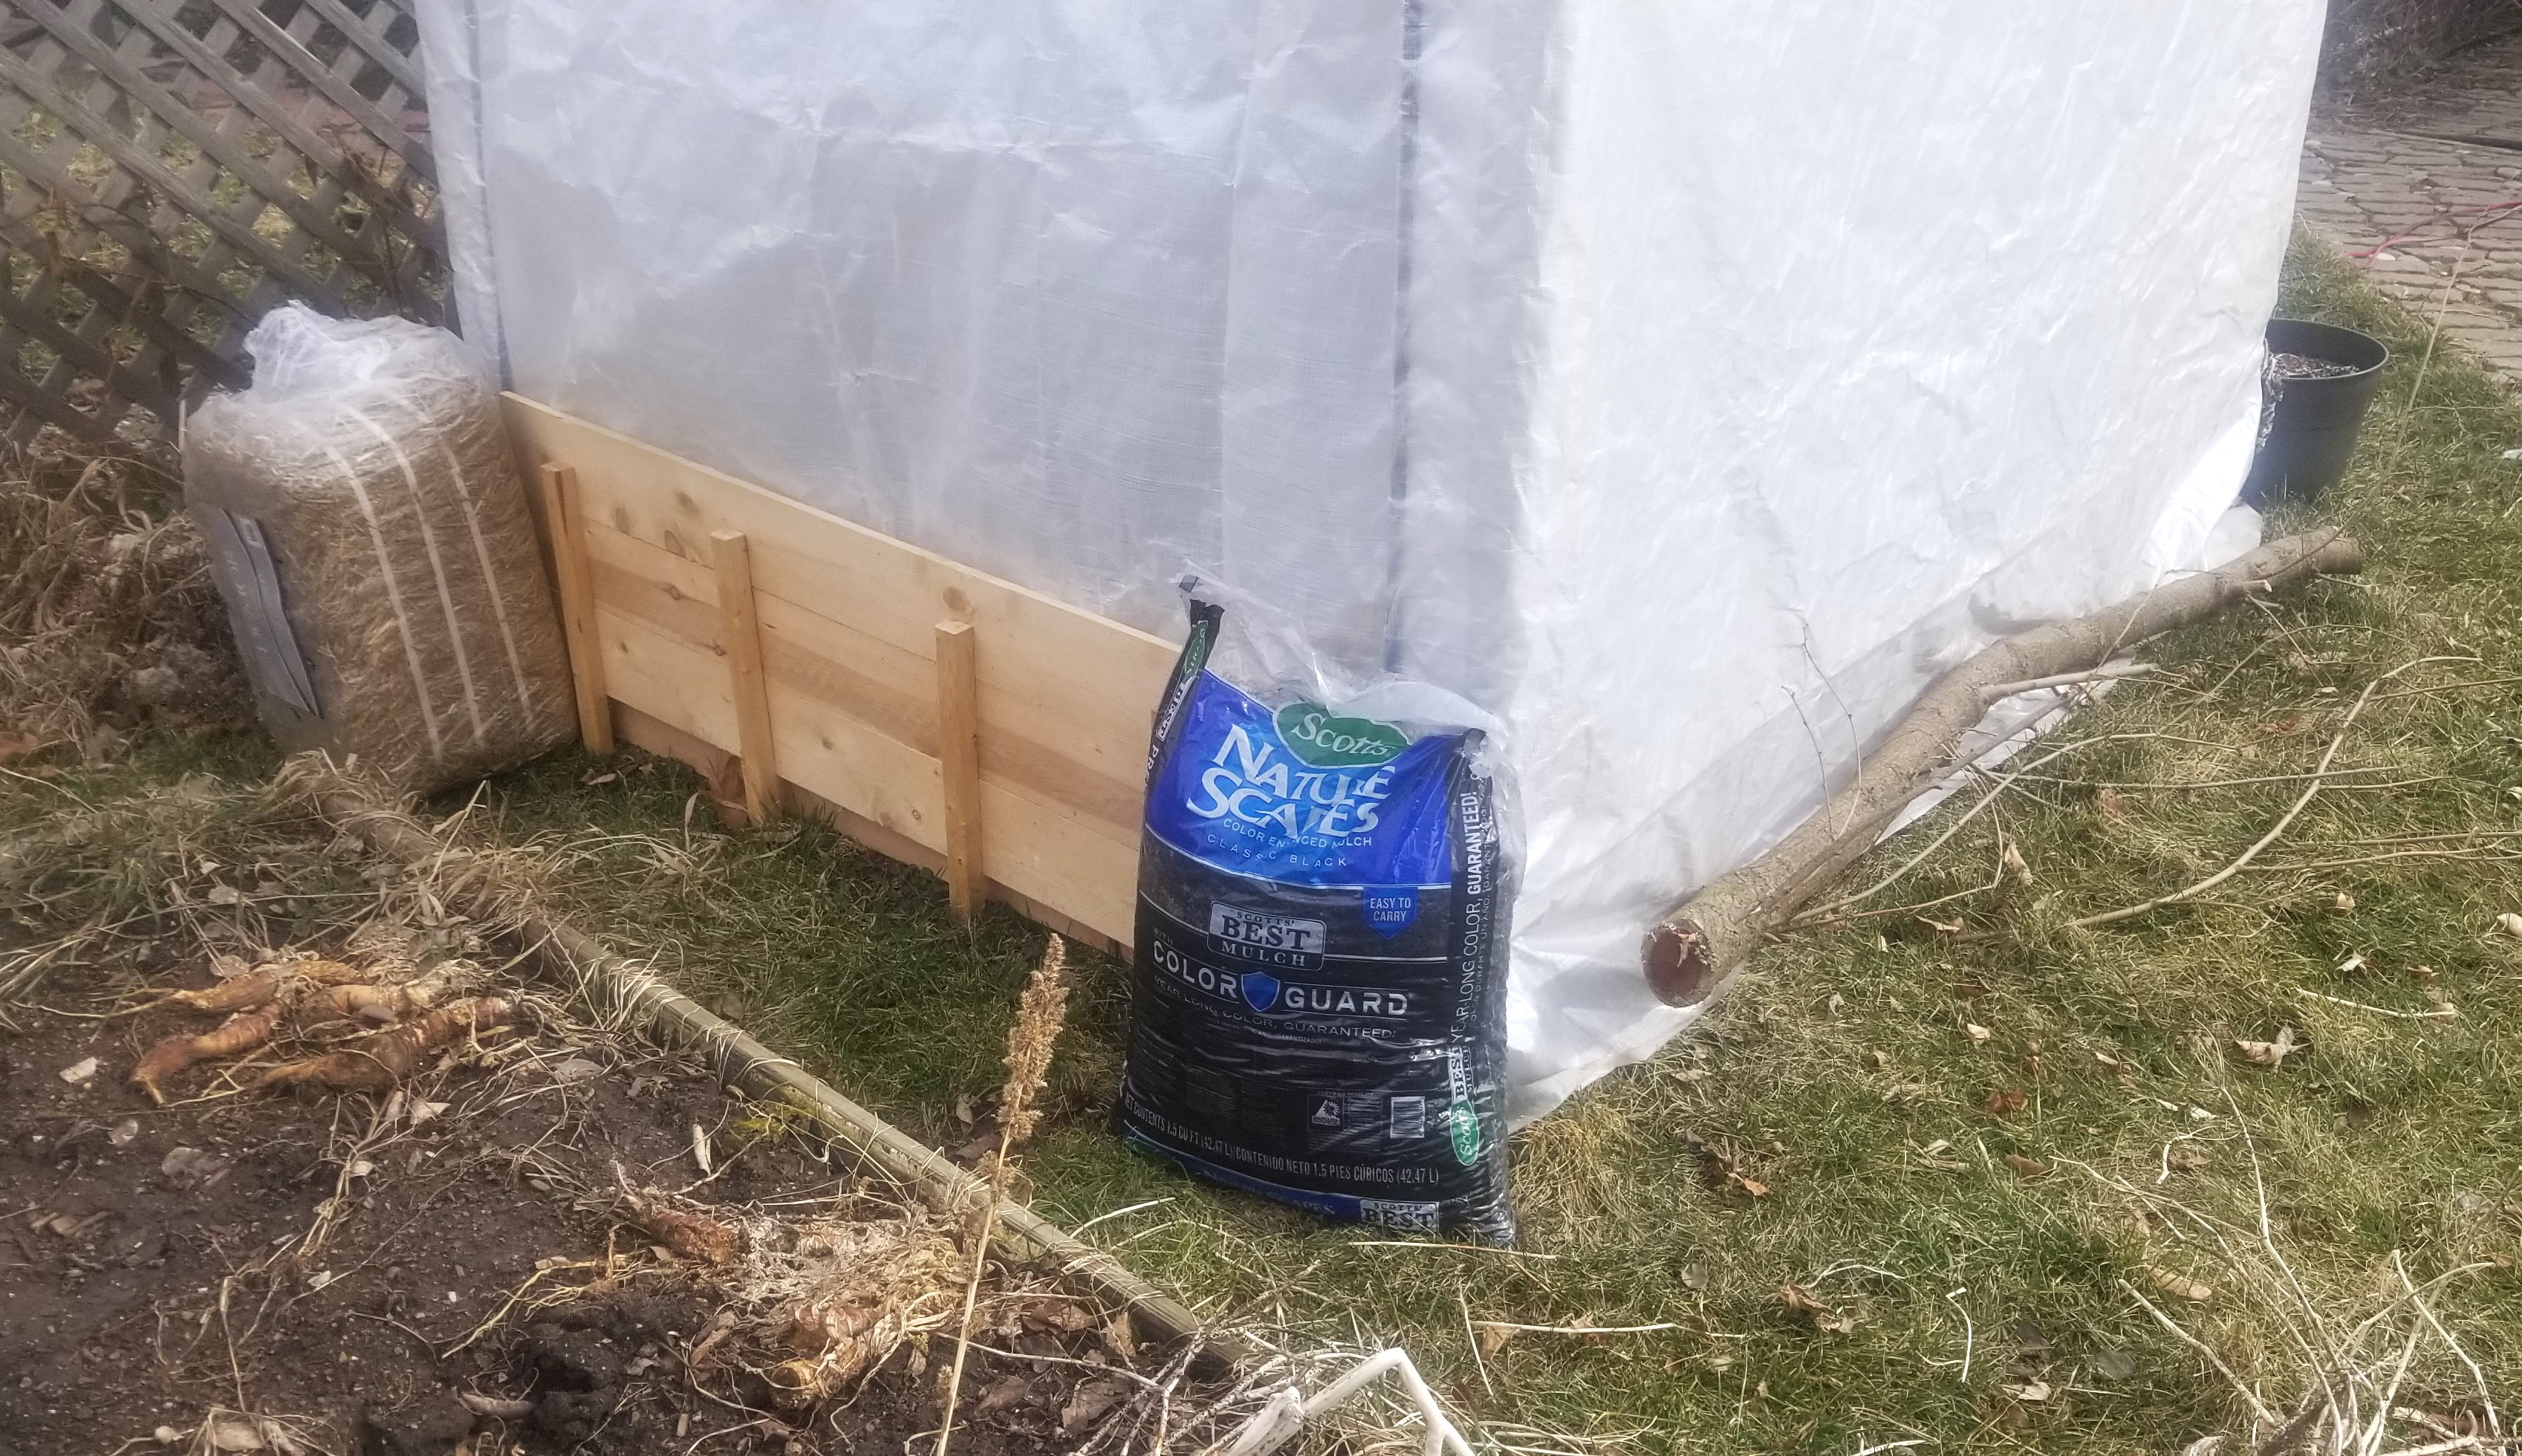
We’re also using an outdoor greenhouse for the first time because we needed the indoor space for overwintering the tropical plants for the yard and gazebo. I’ve owned this Shelter Logic “greenhouse in a box” for about ten years now and have just started using it here. In 2021, we put it up to use as a shed for protecting the grills and outdoor furniture. Last fall, I bought a larger Shelter Logic “shed in a box” to use instead (and could have used a larger one still). We moved the greenhouse structure to where bed 11 originally sat before it completely fell apart last year and moved the soil to the back before I became too ill to work.
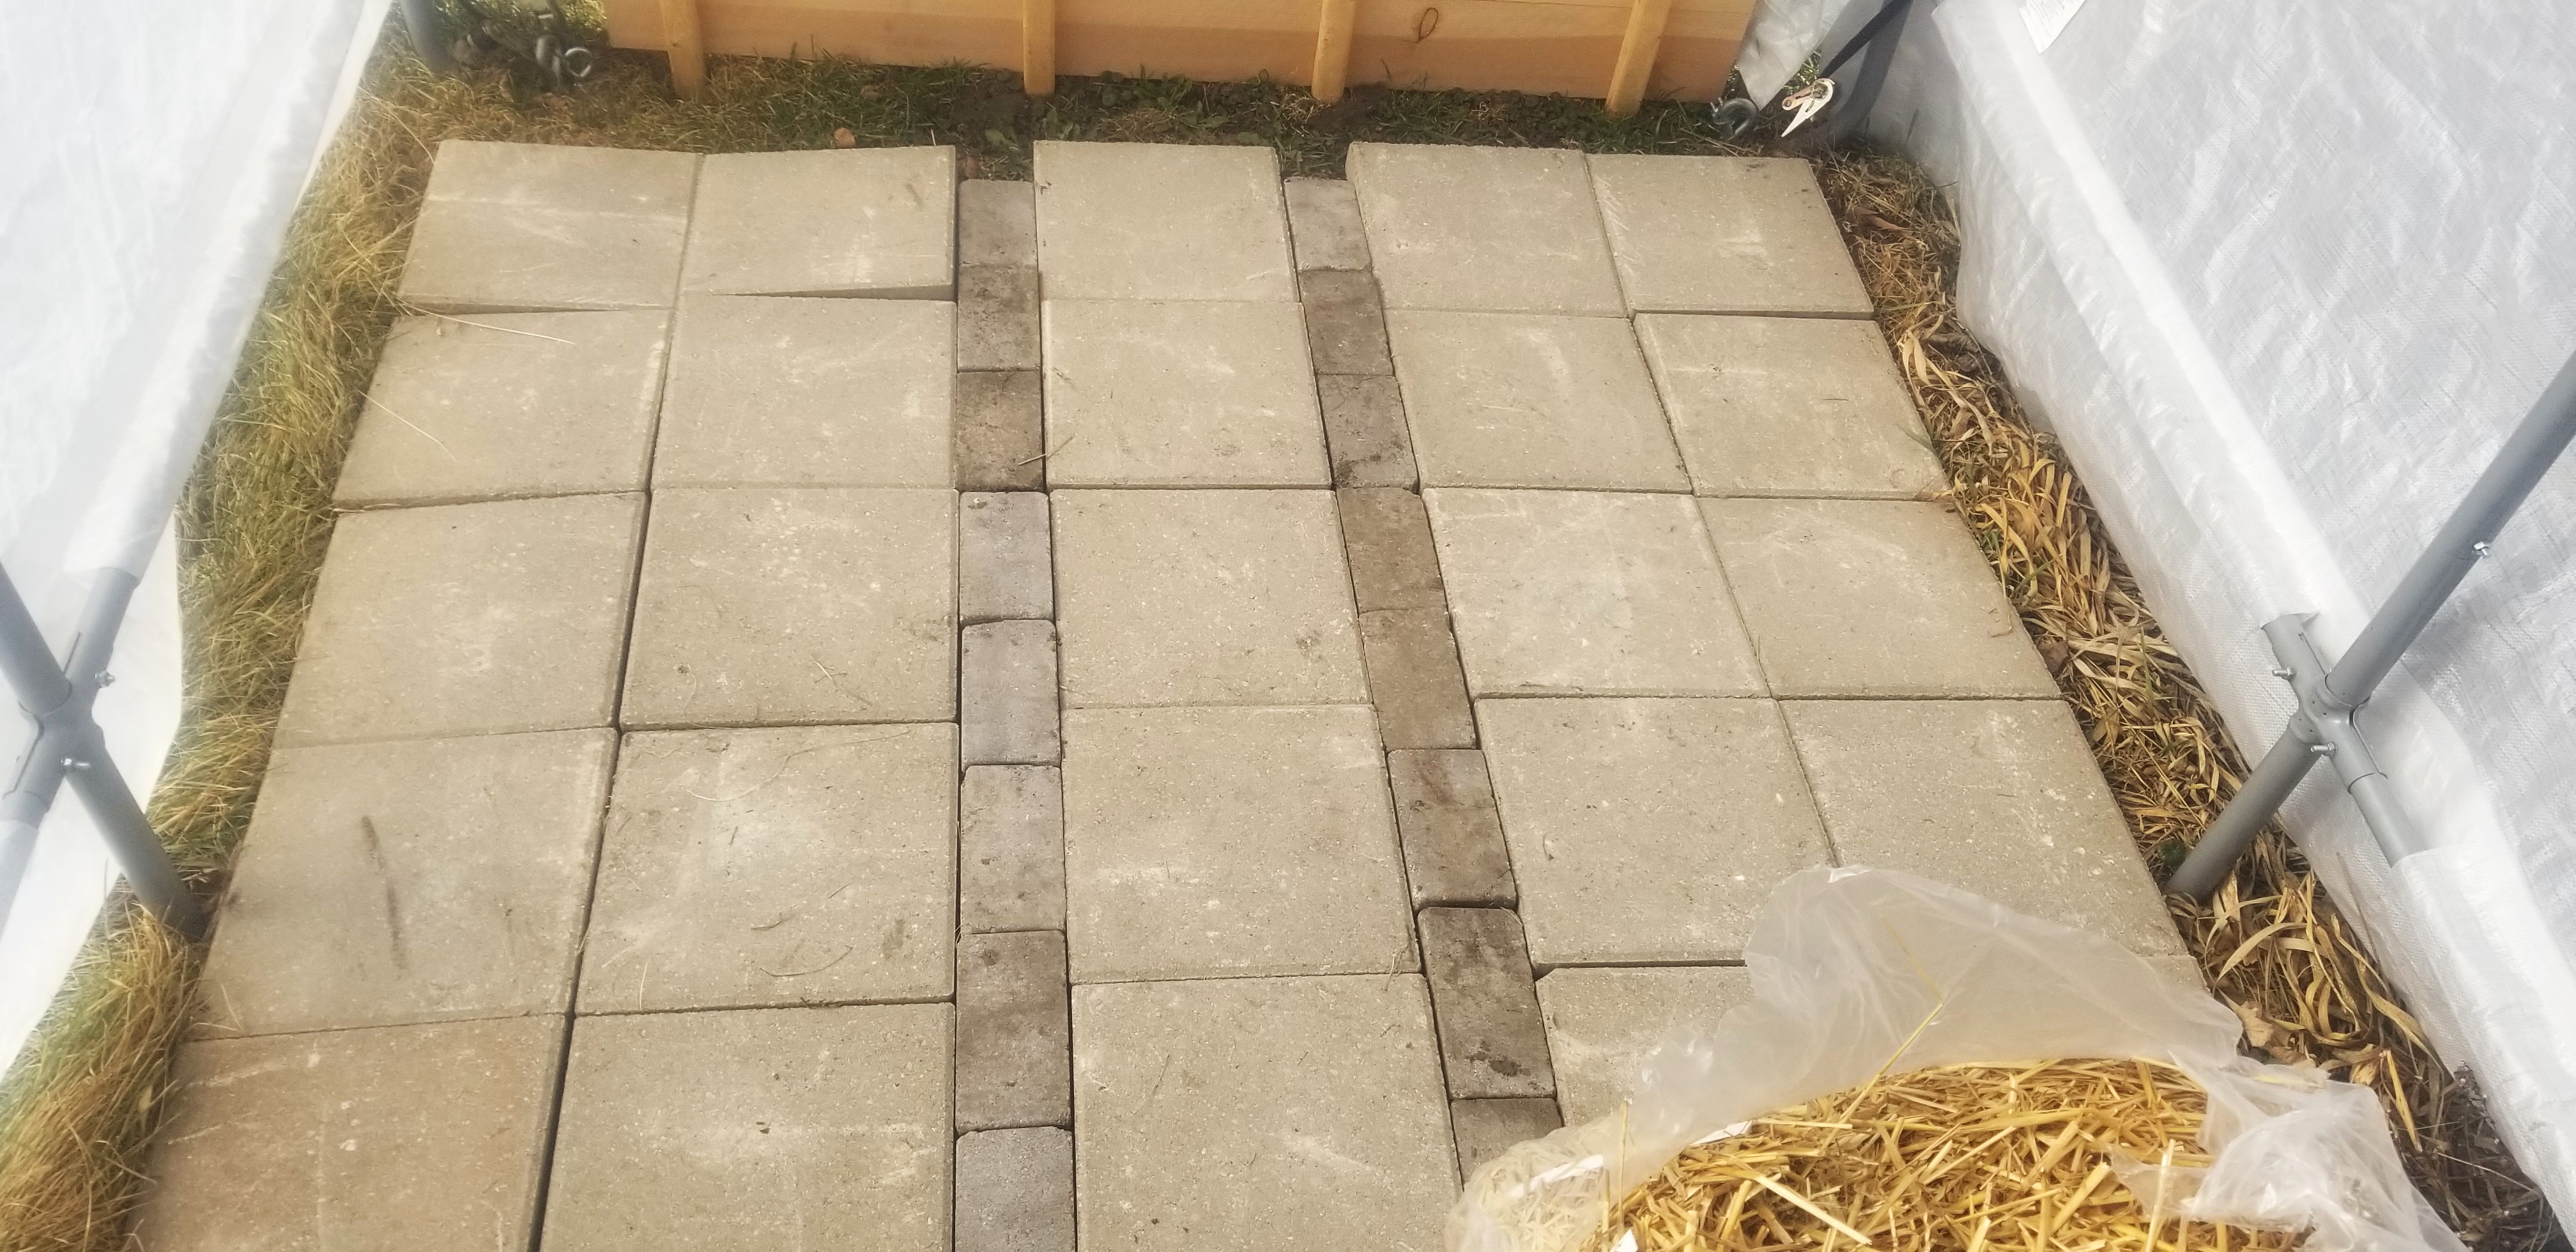
In the delivery for the new beds, I included pavers for about half the greenhouse floor. This was all I needed at first because we’re using the smaller greenhouse from the basement inside of it. At least, that was the plan. The cover for the smaller greenhouse was in a plastic crate because it was better not to use it in the basement. (See some of my earlier posts about basement seed starting.) Unfortunately, storage was not kind to the cover. I was riddled with cracks, splits, and little holes. So a greenhouse within a greenhouse to give me doubled walls was out.
My six by eight greenhouse. The front and back panels need some locking down.Right sideLeft sideGreenhouse floor
Go to plan B.
The problem with the bigger greenhouse is the front and back panels. Neither overlap the ground like the sides and thus allow the cold winds to blow right through. At night and on cloudy days, there is absolutely zero heat buildup and retention. At best, it might be a few degrees warmer. We measured 48, when it was 42 outside. This is unsuitable and even the grow mats and a heater would not maintain a workable temperature.
Plan B thus required blocking the wind. I had already tried to pin the back wall between two wooden panels. But this proved more difficult in practice than theory. They weren’t tight enough to keep a seriously strong wind from pulling it from between them. I currently have them wedged with another piece of wood between the panels.
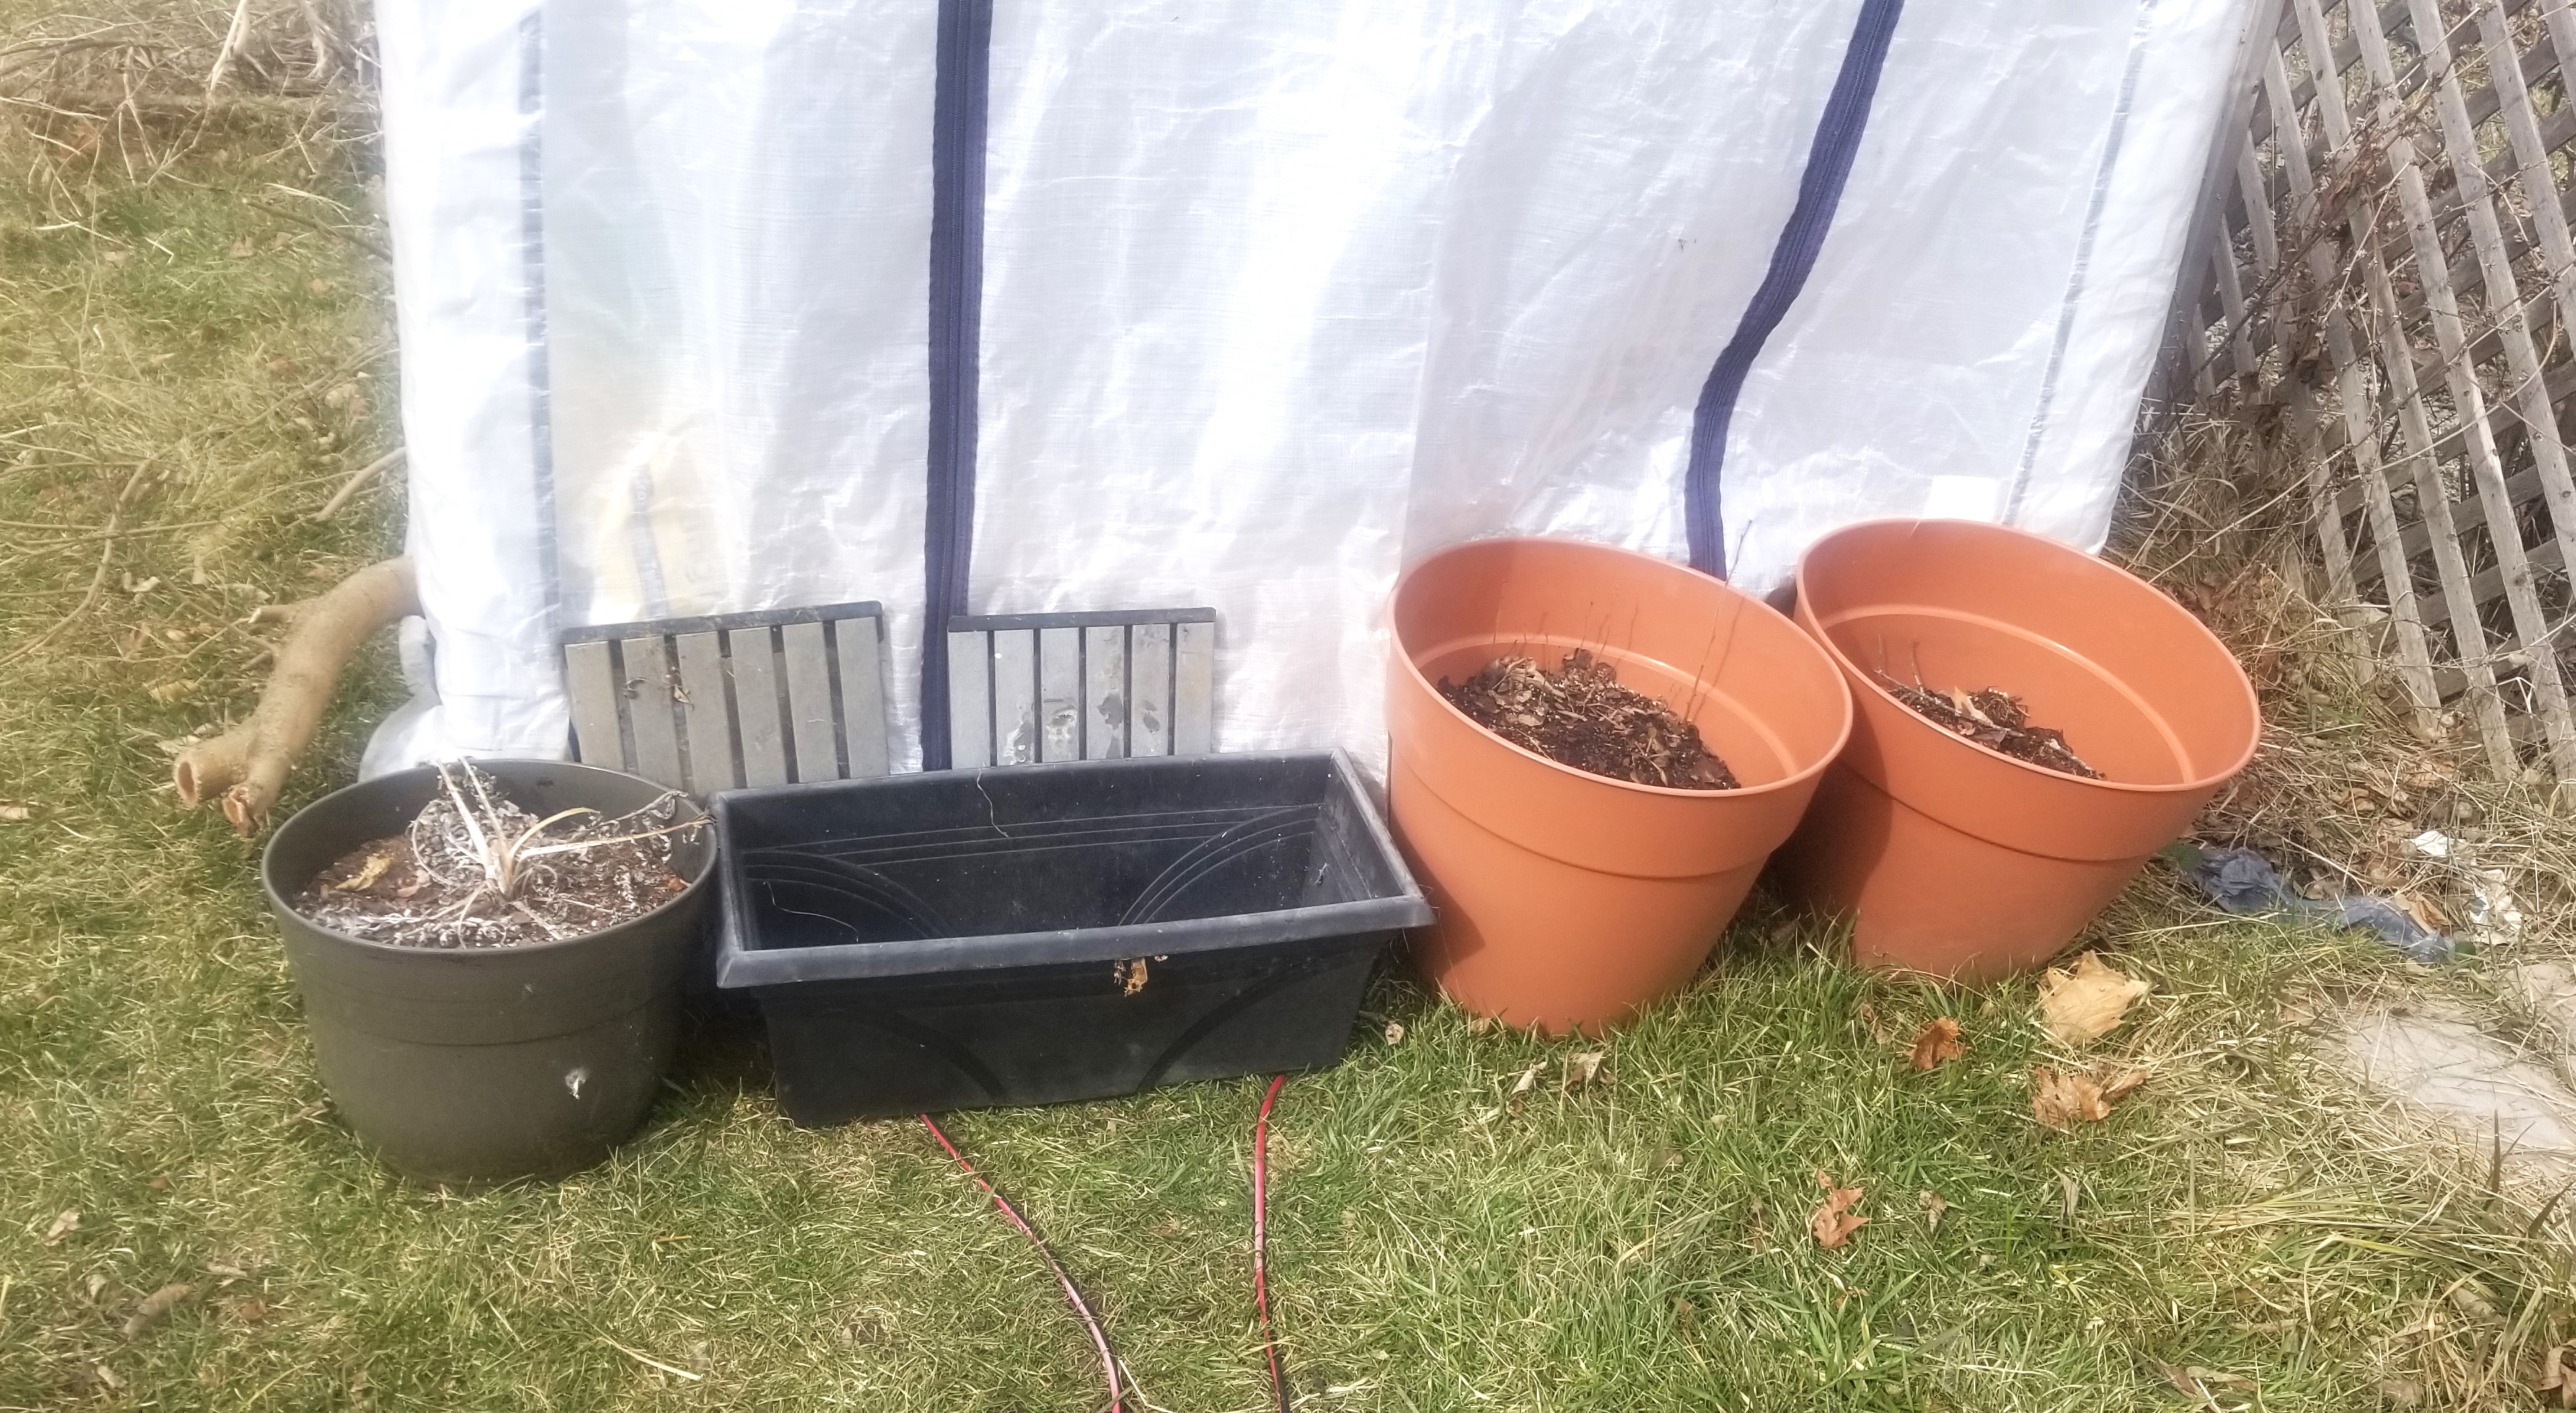
There are gaps at all four corners for the straps to pass through and connect to the frame. I have these blocked with a number of items: straw bales, other pots and flower boxes, a bag of potting mix, and a bag of mulch for around the fruit trees in front. Together, this all seemed to be doing the trick. It was 39 and breezy outside while almost 70 inside without supplemental heat. This was on a sunny day. The real test will be in a couple of days when we’re supposed to get a late winter storm and have cloudy days. If it holds decently, then we can be certain it will be fine with the growing mats and a small heater set at 65.
Temperature Inside the GreenhouseFront panelFront panel insideBlocking the wind from the backBlocking the wind inside
Fingers are crossed.
Over the summer, when we have the time (and energy), we’ll wrap the aluminum frame with wood to attach two layers of thick plastic sheeting with an inch to an inch and a half of trapped, insulating air space between them all around. These will also block the gaps and keep the sides in place rather than billowing like sails on a tall ship in the trade winds. At that point, it will become a year-round growing space.
Part two of these posts on the expansion will include (start with?) and update on how well or not the greenhouse works, as well as cover the addition of berry plants and maybe more fruit trees. The fruit trees are going out front and will be the basis of a mini food forest instead of a somewhat sickly lawn. I don’t know what prior owners did to it, but it’s been in rough shape since we moved in in 2016. That’s beginning to change as I shift some focus and attention to it.
Apples and a pear tree are already in the ground. We’ll add more in the fall. I’m already looking forward to picking the first fresh peaches and figs in a couple of years.
Humble apologies for neglecting my blog during chemotherapy treatments. I meant to bring you on this journey with me, but found I couldn’t after a few sessions. Altogether I had eight sessions over six months and reduced my PSA (bad number) from 394 to 5.5. At the moment, I’m at the end of a month of feeling good and am on the upswing.
Let me tell you, chemotherapy takes a lot more out of you, and in ways you might not foresee, than you would expect. You may have seen people going through the struggle and gotten some idea of the exhaustion. But you can’t really know it unless you go through it, until you feel your energy stolen, feel the sheer lack of strength in your muscles down to your bones. Until you can’t even open a jar of pickles or hold onto your phone.
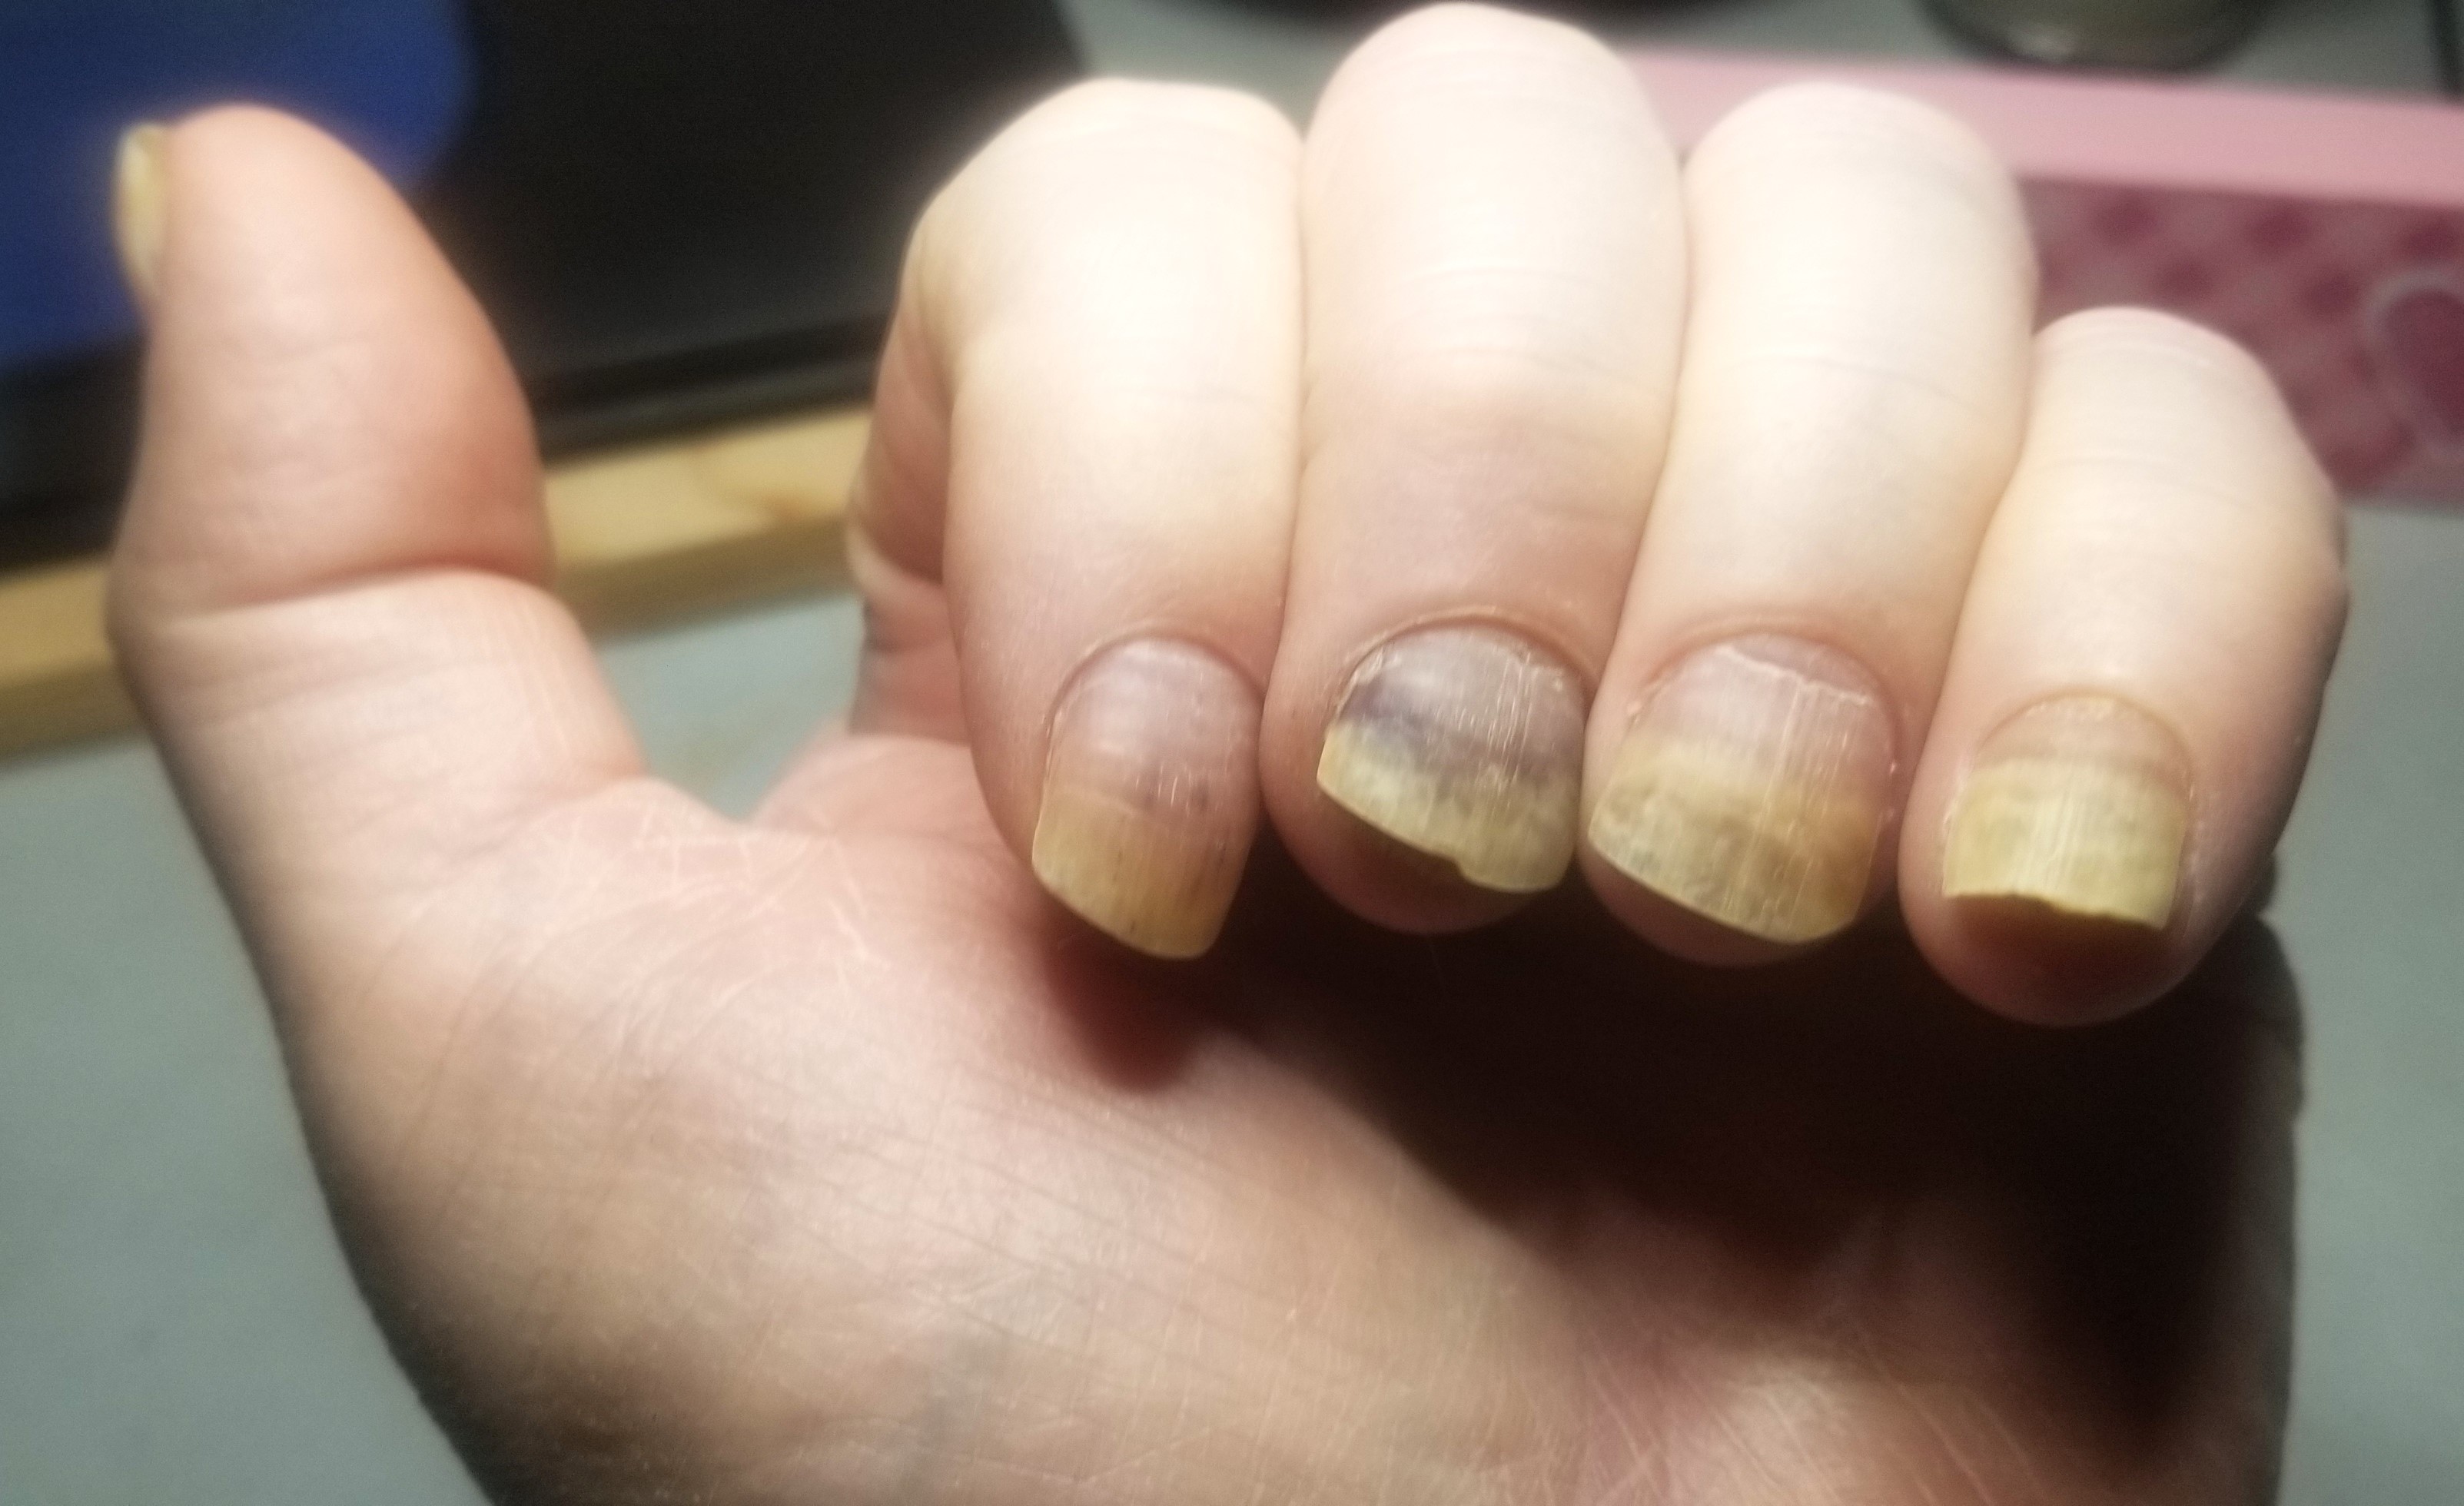
My particular drug weakened my fingernails and toenails. Opening cat food cans bruised my fingertips. Eventually, they swelled and stayed swollen. Taping or bumping them against anything was painful and I had to wear latex gloves when washing dishes because the hot water made them sting. At the end of treatment, as new nails were growing in and pushing out the damaged ones, my right, big toenail broke loose at the top, while remaining attached to the new nail at the base. To prevent it being ripped off, I had to keep it taped on.
Chemo side effect
A month later the new nail growth is progressing nicely and I have been able to put the dish washing gloves aside. My fingertips still feel somewhat swollen, though.
You lose hair from everywhere on your body, not just your head. Because chemo drugs attack fast growing cells: cancer, fingernails, hair follicles, etc. My daughter and I buzzed my hair with a do-it-yourself kit. It wasn’t a perfect cut, but my hair was too thin to worry about it. Also, when I suddenly grew winded just walking up a flight of steps, my hairstyle became the least of my worries.
Of course, it’s all growing back unevenly, including my beard. Although, surprisingly, it appears to be all blond still. For a while I expected it would just come back pure white and I’d be growing it out for the Gandalf look. As it seems to be going back to where it was, we’ll just have to get better with the DIY gear. The wizardly guise will have to wait for my later years.
My hair seems to want to come in at an angle.
My ankles began to swell, which the doctor had told me to watch out for. Eventually, all of me swelled up and my weight expanded with my ballooning body. When I looked in the mirror, I saw what could have been mistaken for a beached whale walking upright. Well, not quite that bad. But definitely a hairless, bloated, white ape. I was the heaviest I have ever been.
I joined the community fitness center to begin walking a few times a week just to keep from getting worse. The swelling was making any use of my legs difficult. I was literally plodding as I walked the track. I couldn’t walk up the stairs from our basement without pausing. Halfway through a weeklong course of water pills the swelling had reduced to where I could get up the stairs without stopping. Today, I can ascend them without needing to grab onto anything or lean on the wall. I have also started using the stationary bike at the fitness center as I work to recover normal movement.
Another set of short-lived, fast-growing cells are your tastebuds. Did you know they only last two weeks and are constantly replenishing themselves? I do now. After each treatment, and I managed eight cycles, I would have five to seven days of altered/diminished taste (dysgeusia/hypogeusia) to no taste at all (ageusia), while I waited for enough tastebuds to grow back as the initial blast from the medication eased.
There were a few days I could barely eat because everything tasted wrong or bad. Did nothing to help the weight gain, though. Guess I made up for it when my sense of taste returned.
Fortunately, the worst part of the recovery period only lasted a week. I would have a bad week, a so-so week, then a good week before receiving the next dose over the six months of treatment. I was able to get a few things done in the so-so weeks and was almost like normal in the good weeks. I managed some small projects over the winter. A few. My daughter is beginning to drum her fingers on the table waiting on some home repairs I need to make. I can put them on my radar now.
When it came time for a ninth treatment, my doctor and I took an assessment of my condition and the diminishing returns of the medication. The cancer and your body gradually build up a tolerance to the drug. Unfortunately, the cumulative side effects remained. My fingers looked ready to fall apart and if I swelled up any more I would have needed a shoehorn to put on my slippers. As it stood, fluid was beginning to collect in my lungs. We opted to stop chemotherapy at this point and go on a maintenance regimen of two drugs, one received quarterly and the other semi-annually. Neither one results in debilitating side-effects.
I’m still working to get my lungs to feel clear. My health goals for the next few weeks are to concentrate on rebuilding my lung power and endurance.
The outcome was acceptable to my oncologist. We never expected to reduce my PSA to zero. Given anything over 10 would signal a concern, had I not already had cancer, I’m also pleased with the low number. While ideally you want zero, levels of up to 4 are not unusual for a man my age. So, I can live with 5.5.
Which was the goal at the beginning of treatment; get it to a level I could live with. Literally. I will always have this disease. However, it’s at a controllable point and won’t impact my life anymore. Other than time spent going for the maintenance drugs six times a year.
If it should resurge, we have other options. One, most commonly applied, is a third medication which is like a low dose chemo drug taken daily in a pill form. We won’t go this route unless it’s necessary. Two, we did genetic testing of my cancer and found I had a P-ten mutation, for which there are several clinical trials going on right now. I could be put into one of those or go on a treatment resulting from one of them. We have a few more tricks up our sleeve even in as good as position as I am right now.
Of course, I turn sixty-five this year and know I will need to adjust my activities eventually, regardless of having cancer. I had already begun building my new beds out of low maintenance stone so I’m not rebuilding beds every year. The expansion went on hold last fall. This week, I received the blocks and got back to it. I’ll pace myself; one dug in and leveled out per day when the weather is decent. Then, two weeks from now, I’ll start my seedlings for the year, one I look forward to being more normal. I have never craved normal and boring more in my life.
As though our microfarm bores me. It’s challenging and what I’ve always wanted to have. And now that cancer is no longer in control and chemotherapy with all the associated lost time and damage to my body is over, I can.
At this point we know what and how much we want to grow (even if only eventually), and we have determined the best places and layout for out garden beds. Now it’s time to build them.
At a minimum, you will need a digging fork, spade, metal rake, and wheelbarrow to move the sod you remove. To build raised beds, you will need at least a measuring tape, saw, and hammer.
Additionally, a hand trowel makes knocking soil away from the bottom of sod pieces easier. A kneeling pad and/or garden stool also relieve some of the aches and pains of the more tedious parts of the process. A bucket, preferably tin can be used for moving stones and smaller organic matter pulled from the cleaned beds.
A 10” miter saw will make better cuts than a handheld circular saw. A nail gun will save you the exertion of nailing and a cordless drill or screw gun will spare you twisting a screwdriver by hand. At my age, power tools are my favorite toys.
Watch for sales, particularly at the beginning and the end of the season. I bought my wheelbarrow for $35 at a spring sale at a big box store. It’s heavy duty vinyl and has made it through five seasons already with considerable use each year. Plus, I used it to move several yards of sand and limestone I used in constructing our flagstone walkway which is one-hundred and twenty feet long by thirty inches wide. It’s going to see a lot of use this year as well, especially if we make the walk extension we’re planning.
Shop around to find who has the best prices on wood and mending brackets. Don’t skimp when it comes to nails and screws as this is an item where you get what you pay for. Inexpensive nails bend like prairie grass in a tornado and cheap screws strip out before driven halfway. Also, you don’t necessarily need galvanized metal items, either nails or brackets. Stainless steel brackets will last about as long as the wooden boards and are much cheaper.
To begin constructing your beds, measure carefully and stake out the outside points of the four corners. With your digging fork or spade, cut through the sod around the perimeter about an inch outside the desired size to keep from having grass under the wooden frames. Marking the square or rectangle off first will help you keep it the right shape and size. Cut out the sod in blocks with your digging fork and spade, turning them over as you go. Keep the pieces of reasonable size as you will need to pick them up to knock the excess dirt from them. Chuck the sod pieces into your wheelbarrow for removal or relocation. I used the pieces to sod the area under my elm, which was nothing but mud when we purchased the house. You can also compost them by piling them upside down.
Measuring out the beds.
Digging out the rectangle.
Hauling off the sod after breaking the dirt from the clods.
Filling in the completed, staked beds.
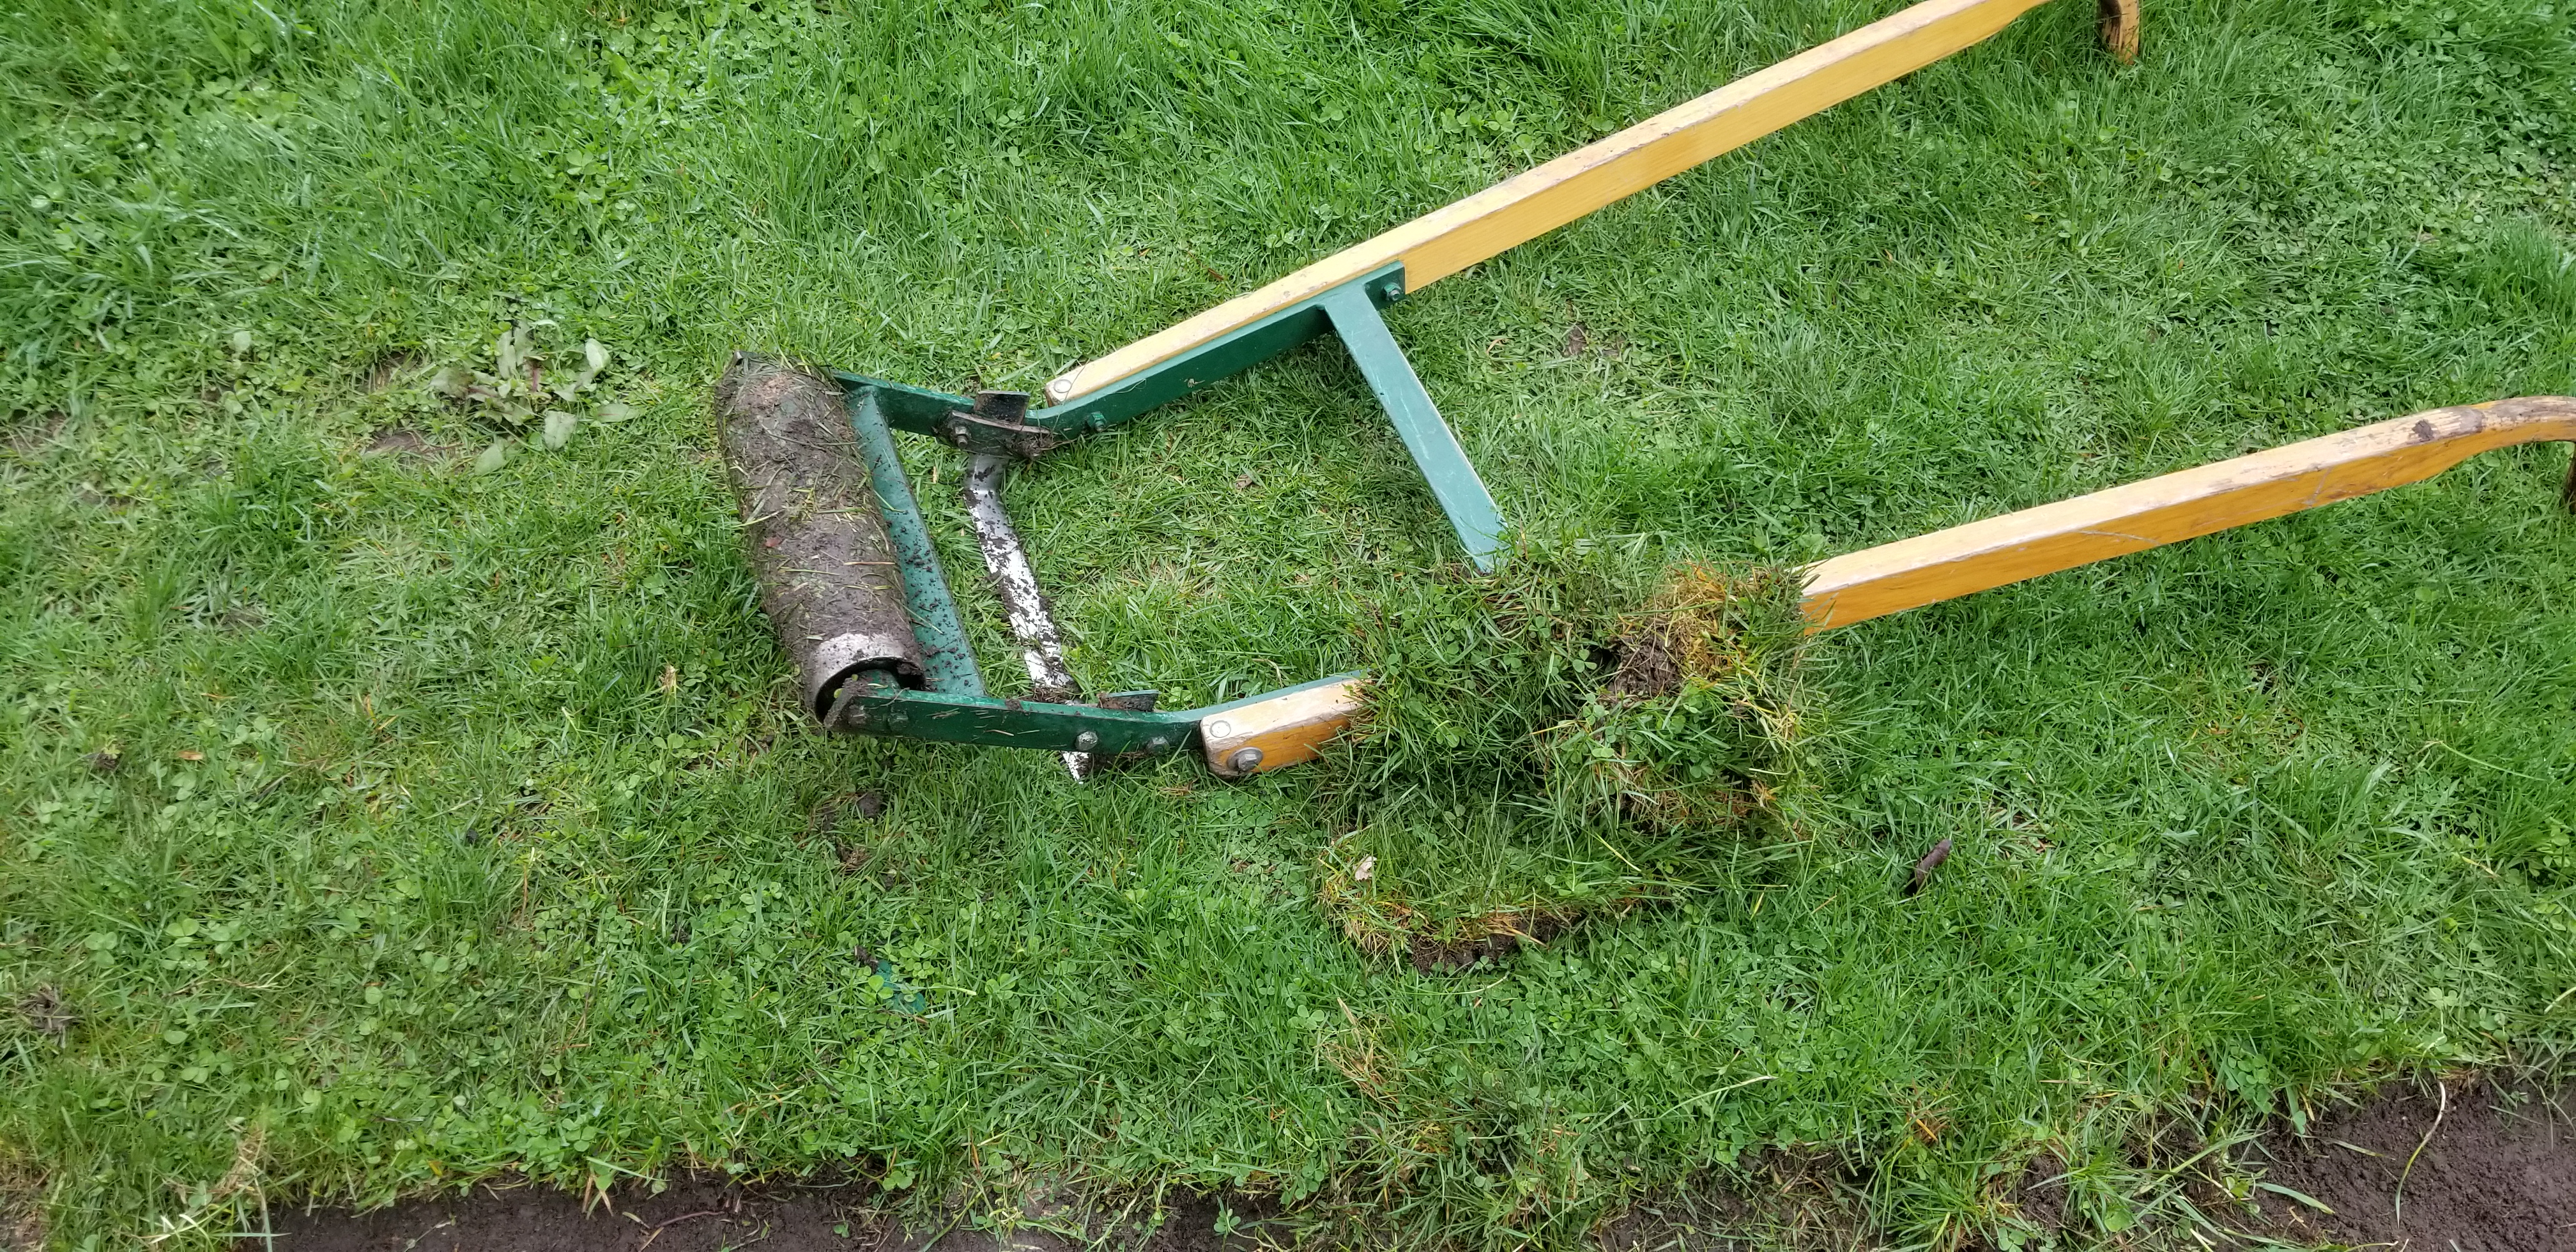
There are sod cutters you can rent. A manual one looks and operates a lot like an ox drawn plow. Except there’s no oxen, just you pushing it. The blade is a foot wide and cuts about two inches below the surface. If you want the exercise, rent one of these. I know. I used one to clear the path for that walkway I mentioned. Motorized slicers cut a little deeper and twice as wide. They are heavy and look like mini Zambonis. They are much easier to use, unless your lawn is extremely wet and soggy from a lot of rain. In that case, the wheels of these heavy machines will dig into your grass and bog down. This is why I used a manual cutter. It had rained for a week before I could start on the project.
Old school sod cutter, aka once upon a time exercise equipment
If you’re doing a lot of beds and can afford renting a machine, use an motorized one. Otherwise, be prepared for a good workout.
Once you have dug up the sod, break the chunks of soil from the matted grass roots to keep as much dirt in the bed as possible. Next, till the soil at least six inches deep even if you’re going to build a raised bed. If you don’t have an electric tiller, use your digging fork to turn and chop up chunks. Alternatively, you can purchase and use a broadfork to loosen the soil. I highly recommend using an electric tiller, even if you need to borrow or rent one. Make a pass in all four directions to really dig and loosen the soil. If you are digging by hand, double dig, which is exactly what it sounds like. Dig once and break up the clumps, move that soil aside and dig again and break up the clumps. Then return and level the soil in the bed with the back of the metal rake. This ensures a good, deep dig and loosening of the soil.
If you’re using ground level beds, fill in the void left from removing the sod with a good garden mix at this point. If you’re building raised beds, you’ll fill it in after building and placing the frame.
Garden mix is two parts topsoil to one part compost. Please don’t spend a gazillion dollars buying a pallet of bags from a big box store. Check with your local garden centers and greenhouses. You will find a nearby source of soil for half the price of big box stores and they will deliver it by the yard. I bought five yards a year minimum for the first three years of building my garden beds. I paid $32 a yard for garden mix as I just described. A big box store wanted $50 a yard just for plain topsoil and their delivery charges were higher.
Five yards of garden mix. Third year in a row for this amount.
I saved money and supported a local, mom and pop shop. All I had to do was a little online searching and make a phone call. This is also who I bought my sand and gravel for the walkway from. Bulk prices and free delivery after the first one of the year. Smart shopping equals smarter buying.
If you already have compost, mix it in with or in place of the garden mix. The more organic matter added the better. Compost is my only fertilizer. We don’t do chemicals.
Note, if you are building a platform bed or container garden, you’ll need to use a basic potting mix or add soil lighteners like vermiculite, peat moss, and even sand to keep the garden mix from compacting in the contained space. It will compact in a raised bed, though it’s not much of a problem as the roots can spread further down into the soil we tilled earlier.
As noted in parts 1 and 2 of this series, I built my garden over time. Year one, I had only six ground level beds. In the second year, I added three ground level beds and raised the first three. Ground level beds are the easiest, but have a few problems, most notably weed and grass incursion. Miss one week of weeding and it might look like you never cleared the space. They are also prone to flooding. Raised beds drain better and warm up faster in the spring. You still get weeds, but keeping them under control is easier. You also don’t need to bend over as far, which becomes more of a bonus the older you get.
What height you want to make them is up to you. As I mentioned before, my late friend built his three feet high so as not to bend over at all. I initially wanted to make mine a foot deep. Budget constraints made me reconsider and arrive at eight inches if I wanted to be able to afford seeds to put into the beds. Oddly, an eight-inch high bed four feet by eight feet required approximately one yard of garden mix to fill. Seems like it was meant to be.
For each bed I purchased two eight-foot long pieces of 2×8 for the long sides and two six-foot long pieces for the short sides. I cut these six-foot pieces down to four foot three inches in length. The extra three inches was to account for the thickness of the two side pieces. Note you can purchase studs, which are not quite eight feet long, generally 2x4s. These are for use as wall studs and take into account the thickness of top and bottom plates. Don’t buy that size. Buy the eight-foot long lumber.
NEVER use pressure treated wood. This is fine for your deck. It is not good for your garden as the chemicals will leach into the soil. The green in the wood was arsenic in the mix intended to kill termites, etc. The industry has been phasing its use out, though. It doesn’t matter. Just use untreated lumber.
When I say my beds are eight by four, I mean the internal dimensions. The shorter side pieces are attached to the ends of the eight foot pieces so that I have eight feet by four feet of useful space within each bed. The outer dimensions end up being eight-foot three inches by four-foot three inches, because the boards themselves are an inch and a half thick on each side.
I didn’t discard the leftover parts of the short pieces. I split those into long wedges that I used to hold the frames in place while I filled them and allow them to settle. I left them in place for two to three seasons.
You can simply nail or screw the short pieces into the ends of the long pieces. This works perfectly well, although nails have a tendency to pull out if the wood warps. A more secure and permanent method is to use 90 degree mending brackets, aka angle iron. Use two per corner to screw and effectively clamp the pieces together.
Once the frames are constructed and in place, fill the beds an inch or so above the top of the wood to allow for settling. As the season progresses and rain does its thing, the soil level will eventually drop below the level of the wood. Fill it in next year with compost or more garden mix, when you loosen the soil with a broadfork and roto-tiller, which we’ll talk about in part 6.
A platform garden is an oversized garden box on legs. I would make it at least twelve inches deep to give the roots plenty of soil to hold onto to and draw nutrients from. At the start of each season, mix in as much compost as you can to enrich the soil for the year. The bottom of the box is CDX plywood or a resin composite material. Each will need good reinforcement with 2x4s, no more than twenty-four inches apart to prevent bowing. Drill a few weep holes at regular intervals. Four or five in a four by four box are sufficient for letting excess water drain out. Line the bottom with one or two layers of plastic screening to keep the soil from leaching out with the excess water.
For container gardens, use no less than twelve-inch pots with drainage holes in the bottom for beans and peppers. Tomatoes and other larger plants will require twenty-four inch pots. This is to ensure enough soil and moisture for the roots and to provide some stability in the rain and wind.
Both platform and container gardens will require twice as much watering, including twice daily in hot, dry weather. Keep an eye on the soil. The leaves may show wilting on a hot day even in plants sown directly into the soil. This is normal and does not mean the plant is suffering. It’s simply how nature protects itself in the heat. If the leaves do not bounce back in the evening hours, water the plant. In any event, check the soil a couple of inches deep for dampness. Water when the soil dries out below an inch for small pots and two inches for large pots.
Clay pots dry out faster than plastic pots, although keep the soil cooler. If you live in an extremely hot climate, use clay pots to keep from burning the roots. Shade the pots as best you can with smaller plants in front of larger ones and decorative edging in front of those smaller pots whenever possible to slow their drying. Be prepared to water morning and night at the height of the season. Water until the pot drains.
Please note, if you’re container gardening on a balcony, set your pots in large, utility trays to collect the drainage. Your neighbors will not appreciate the shower from your draining pots. Voice of experience here; twenty years later, still sorry. Your plants will absorb the drainage overnight or during the day, keeping them more evenly hydrated.
Here in the Midwest my garden needs on average an inch of water a week. In August, especially when the weather is dry, I’ll increase the amount to an inch and a half, possibly two. In the southern states, you’ll water more heavily throughout the summer. Let your plants be your guide. As mentioned above, they will droop in the heat of the day. If they don’t bounce back during the early part of the night, water. Keep a record of how many inches were required for future reference.
In very arid climates like the southwest, you will need to conserve water through heavy mulching. I recommend three inches of straw across the entire bed and growing lettuces and small root crops in shady areas. Otherwise, most of the water you put out will be lost to evaporation from the soil. Irrigation systems, especially drip types, beneath the mulch will save you time and expense. Taking your arid climate garden to the next level, you can create a waffle-board style garden, which is a number of shallow, square depressions in the soil in which you put your plants. It looks like a giant, dirt waffle. The bowl shaped hollows will collect water, which might otherwise have run off across flat soil.
A constant showering style sprinkler can deliver the desired amount of water in thirty minutes at normal municipal pressures. Use a rain gauge to measure any rainfall and make up the shortfall by watering on a weekly basis. Don’t worry about exceeding an inch a week. Worry about not delivering that inch. This is an area where you can safely err on the excess side. Pick a day of the week to water. If it rains that day or the day before, wait another day and water enough to be sure your garden received an inch, if the rain wasn’t sufficient. Skip watering for the week, if you received enough rain.
Wrinkle: Several trees shield my shade garden. Unless a real tempest blows through, it won’t receive as much rain as the garden beds. I still need to check the soil for dampness and water when it feels dry to an inch depth. Watch your shady areas.
For both raised and ground level beds, you can set up irrigation systems if you have the budget and inclination. Currently, I just put the sprinkler out and set a timer on my phone to move it. I have a meter I will install this year that will automatically shut off after delivering the correct amount of water.
The most effective and most expensive is a drip system, which metes water out slowly to each plant or plant cluster. This is fine for tomatoes and peppers, plants with a single stem. Carrots, potatoes, and the like need a broader delivery of water. For these, you can install sprinklers, either pop-up or pole mounted. Personally I would use pole mounted so I can reconfigure the setup for each season. Note a drip system is excellent for container gardens.
The only irrigation system I have in place runs to part of my butterfly garden. Our house sits on a spring apparently. Even now as I write this, when it’s below zero out and two feet of snow cover the ground, my sump pump is filling enough to run a several times a day. In summer, when the ground warms up it will run several times an hour, whether it has rained or not. Rather than lose this water, once the chance of freezing is over I hook the sump output to perforated piping I installed in the butterfly garden. When the pump runs, it delivers clean groundwater to my Asiatic lilies, Shasta daisies, liatris. and coneflowers.
Irrigation for the butterfly garden.
In addition to the beds, you’ll want to set up your compost pile. If you don’t want to have a pile, invest in a tumbler or other composter. These pay for themselves in the nutrients you put back into your soil. You can start it by inverting the sod you removed for the beds. Throw on all the weeds and other yard debris you collect. Add the ashes from your grill and sawdust from your projects. Add the parts of the plants you don’t eat like apple cores and broccoli stalks after harvesting the heads. Add any store bought organic items to the pile during the year, like banana peels and those lemons you let go bad because you never made that recipe you found online (winking emoji). Just keep piling it on. Throw in some dirt as well. It contains and attracts beneficial microbes and other creepy crawlies that help break the plant matter down.
Composting is a subject unto itself and books on the process abound. All I will say here is: put it in the sun and keep it wet, though not sodden. Maybe completely turn it over once a month. Otherwise, let nature do its thing. In the spring, use what hasn’t fully broken down as the bottom of the next pile and incorporate the finished humus into your beds.
In the winter, when it’s too cold to compost, I maintain a worm box in my basement greenhouse. This is nothing more than two medium sized storage tubs with lids. One tub gets several small holes drilled in the bottom and the sides and is then set inside the other. Be sure at least one row of holes is above the top of the second tub so air can get inside the first. Line the first with a layer on newspaper and add several inches of garden soil. Wet it down without drenching it and bury some kitchen waste into the dirt. Use only fruit and vegetable waste, no animal fats or bones. Keep it the covers on the tubs except when feeding your worms. A couple of days after setting it up add a container or two of redworms. I bought two, giving me sixty worms to start. I saw numerous baby worms inside the other day.
Once a week, add the collected kitchen waste to the bin by simply spreading it out on top. The worms will come up for it. If the soil starts to look dry, add some water. You will usually see several worms every time you open it to feed them. A small worm box like this can actually support hundreds, if not over a thousand worms, depending upon how much food you have for them. I keep kitchen waste in plastic bags in the basement refrigerator just to be sure I have plenty of rotting organic matter for them to munch on. In the late spring, when the ground has warmed up, I’ll dig a hole or two and release the worms into the garden.
Coffee grounds are a different story when it comes to composting. Brewing removes much of the acidity. However, I do not add them to my compost pile except once or twice a week out of an abundance of caution and because I have a lot of them (drink a few cups every day). I do spread grounds I’ve collected during the winter over the beds in spring to work them in with the finished compost for the added organic matter. Any acidity added this way is minimal. What I will do during the year is spread them out over the lawn for a bit of fertilizer and because they allegedly repel ants and other undesirable insects. By the way, use a mulching mower so you don’t need to fertilize your lawn.
Collecting grounds may seem obsessive and I wouldn’t expect you to jump right into doing so. (You can always get used grounds from Starbucks for free anyway.) One of our main goals, however, is zero waste. Our long-range plans include a number of waste digesters, such as the Green Cone, which can break down animal fats, bones, and cat litter. Zero waste output.
Big Question: Are you renting or do you own the lot? If you rent, ask your landlord about putting in a garden. For all you know, they may be excited by the idea. A nice garden can add value to a property. Plus, it’s a good indication you intend to continue renting from them and good tenants can be hard to find. If you own the property, consider holding back on a huge garden if you have moving relatively soon on your mind.
Lastly, if you’re leasing space in a community garden, follow their guidelines. You may still be able to build raised beds and install sprinklers. Just ask first. At this point our garden is physically ready and it’s time to start growing things, which we’ll talk about in the next installment.
Previously we chose what we wanted to grow based on what we intended to use our produce for. Now we need to plan where we are going to put the garden (or as much as we are starting with). The two questions we need to answer first are; where do I get the most sun, and how much room do I have?
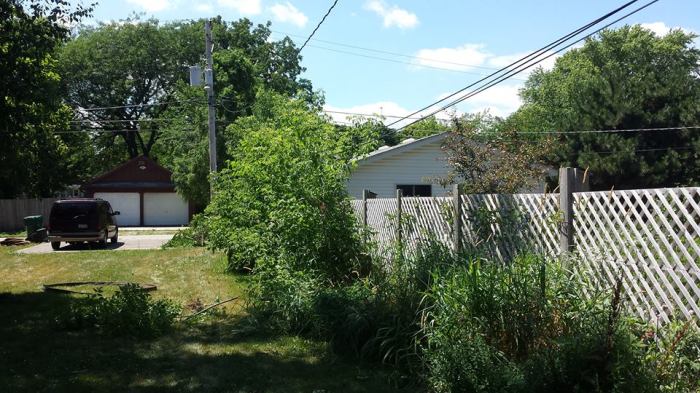
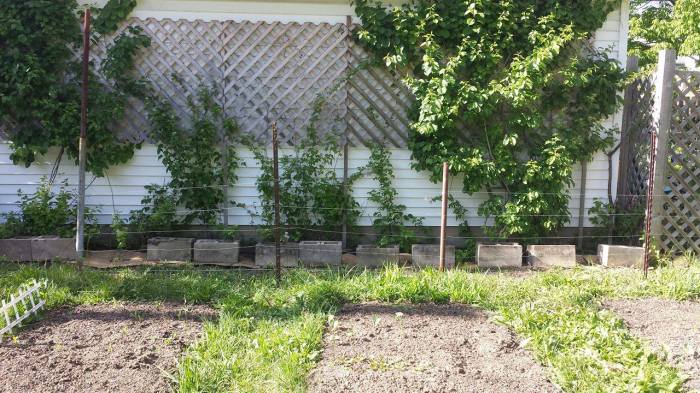
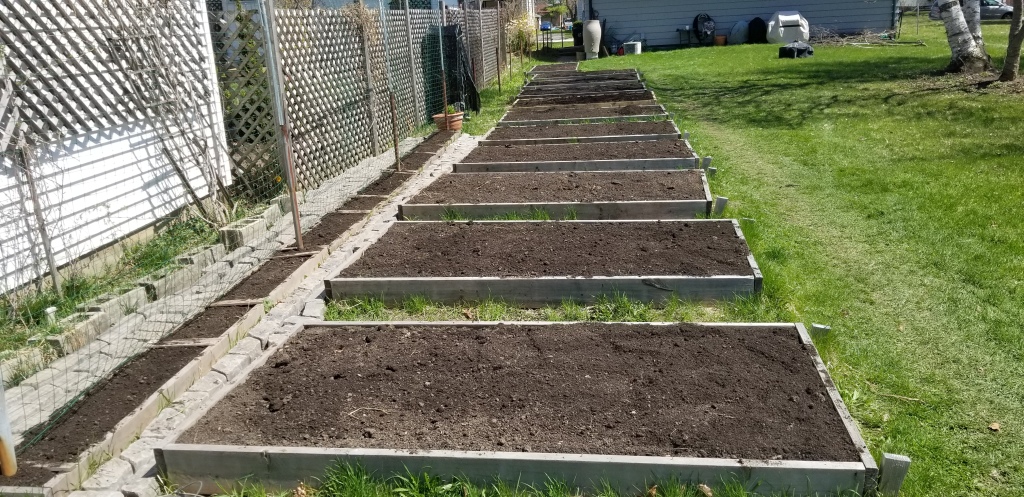
Move in condition of garden area
Filled beds or alien graves???
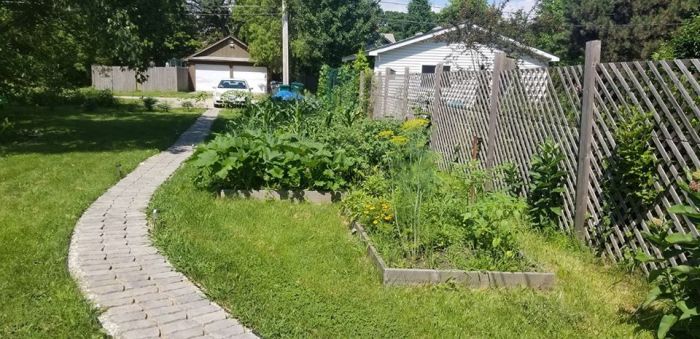
View of the garden in 2020.
If you’re observing where the sun falls during the winter, remember the sun is much lower in the southern sky than it will be in the summer. (Northern if you’re south of the equator. Reverse the directions.) The sun’s angle changes by more than forty-five degrees from solstice to solstice. That’s enough for a summer sun to clear a line of trees throwing shade into your yard in the winter.
How do you determine where the sun will peak? It’s not entirely essential to know this because it will occur in June on the Summer Solstice, when most of us are still getting our gardens going and the summer heat has not yet set in. Most of our growing season will occur as the days grow slowly shorter and hotter, which come after the Solstice.
At our latitude the sun seems to pass directly overhead for the few weeks around the solstice. After that, it remains high in the southern sky bathing our garden in sun. More than likely, there will be trees or structures, which will throw some shade on your garden at points of the day. Anything about thirty to forty feet high will shade an area roughly half its height during the summer. This may not be a concern because your garden needs about eight hours of sunlight a day so a few hours of shade won’t hurt it.
In our case, a huge crabapple tree and a paper birch shade a swath of our garden a few hours a day, moving from west to east as the sun traverses the sky. While this creates a shade garden area in the middle of the yard, it doesn’t impact the growth or output of our plants, because I located the beds as far past them as I could. A few hours of shade does not greatly impact your garden.
Fun fact: every globe and some maps have a lopsided figure 8 on them to show the angle of the sun to the earth throughout the year. This is a called the Analemma. It shows how much the angle of the sun changes across the year. It’s most common use is for predicting sunrise and sunset times. These days, our weather apps do that for us.
I highly recommend contacting JULIE or whatever utility locating service is in your area to map out your yard. This is a free service. In our case, we could have created longer beds, but would have been locating them over the incoming water and gas lines. It also determined where our walkway went in to keep it away from the water and gas lines. More than likely, the utility companies will never need to dig in your yard. Doesn’t mean we can’t be cautious.
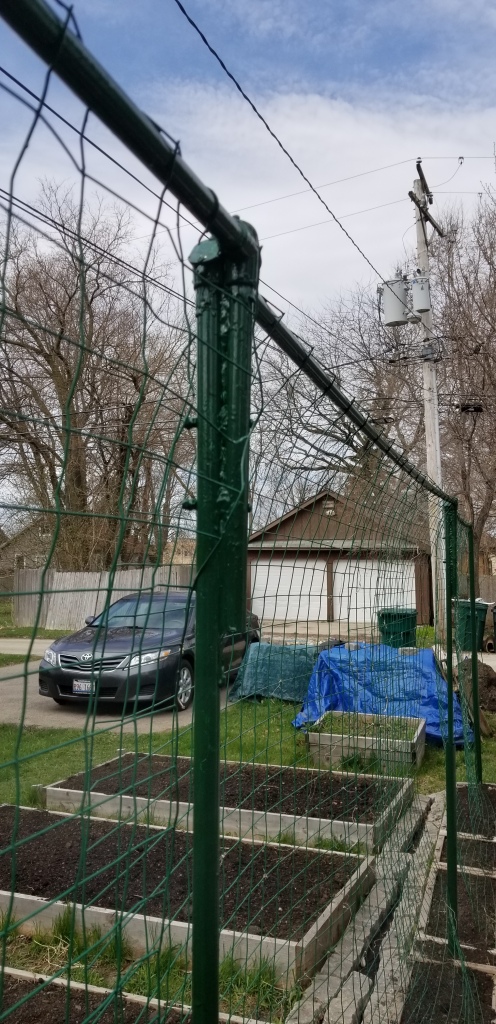
Other things to consider are easements and local restrictions. If you have a HOA, you may be prohibited from locating garden beds in certain areas around your home. Check this out before you need to undo your hard work. In suburbs where there are no alleys but power and phone lines come in from poles along the back fences of everyone’s yard, you will face an easement issue. The utility company will have an easement, a right of way along the back of your property for purposes of maintaining the lines. They can remove fences, trees, gardens, etc. in this easement area without your consent or even notifying you ahead of time. Never locate a garden in an easement. The legal description of your property should describe any easements.
Once you figure out the place or places in your yard which get the most sun, measure the area to determine how much space you have. You want to keep your garden beds no wider than four feet so that you can easily reach the center from either side (two feet deep if along a fence). How may four foot wide swaths can you fit, leaving a couple feet between them for you to get in? I am able to use the entire length of my yard because no part along the north side is completely shaded in the summer.
My beds are four-feet by eight-feet oriented north to south, meaning the eight-foot length runs north to south and the thinner part is east to west. I have approximately two-feet between them (actually the width of my mower so I can keep them neat). You may need to orient your beds in a different direction if you have a shady yard. Play with design ideas and layouts of different sized beds by drawing it on paper until you maximize your growing space. Your final sketch will be your rough plan.
Important note: our natural tendency is to keep our garden beds together in a neat, attractive design. You do not need to do so. If you have separate and several useful areas, spread your beds across them (neatly and attractively in each area). Eventually, as city zoning allows, I intend to include my front yard as well as most of the back. Grow gardens not lawns, as they say. More food, less mowing.
You should also keep in mind other uses of your yard. Do you have a swimming pool? Keep your garden well away from the potential splash zone, i.e. the chemicals in the water. Do you host frequent cookouts like I do? Keep your garden away from your party zone to prevent accidental trampling or tripping on raised beds, or fence the garden in. Basically, protect your garden from other uses of your yard. You don’t want to accidentally damage it after the work of putting it in.
Another thing to consider is potential storm damage. High winds and driving rain topples tall plants. Locating beds along a fence can help reduce this. You can also consider planting yews or small pine trees to act as a windbreak if you have the room. These also make attractive green fences. Is there an older tree near your garden? These tend to lose branches and limbs in heavy storms and such could fall onto your garden. Small branches hit mine all the time, but are not a problem. My old, English elm lost a limb close to the garden one year. The beds are located far enough away it landed in the lawn. (We cut it up for the fire pit.)
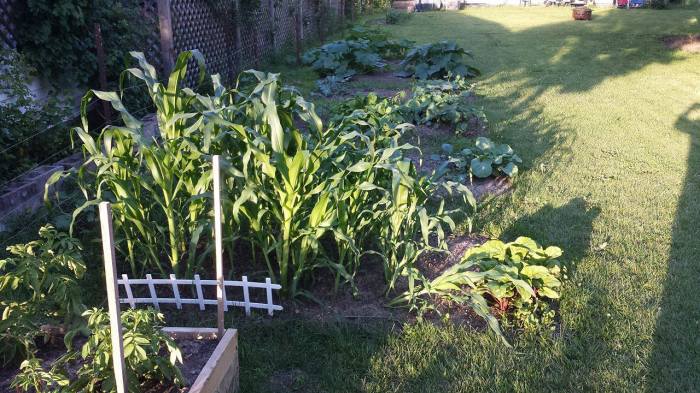
One of my biggest problems is squirrels, who live in the crab apple and elm trees. In 2020, when the late spring frost destroyed the blossoms on the crab apple, they ate my entire crop of blue field corn instead for lack of other food. Keep an eye on the critters in your yard and area and either plan to grow enough for them too or find a way to protect your garden from them.
Finally, you might need to consider the special physical needs of older or disabled persons, including yourself. I’m still quite limber for my age, but the digging is getting harder each year. I’ve told my daughter if she ever marries, my new son-in-law better know how to use a shovel and broadfork. He’s taking over the hard stuff.
The most common adaptation is the table garden, a foot deep bed on a platform at table height. Wheelchair bound gardeners can roll up to and work it easily. The bottom is layered with plastic screening to allow water to drain from a number of weep holes but retain the soil. Container gardens on daises accomplish the same accommodation. A dear friend, who passed recently, had raised beds, which were two or three feet deep as opposed to my eight-inch deep beds. This allowed him and his wife to garden while standing up; no bending or kneeling ever. Although they sometimes had to reach up to harvest tomatoes, which amused them immensely.
At this point, we have determined what we want to grow overall and decided the best place to locate our garden beds. Next time we’ll talk about building the beds, frames, and other structures.
So you want to start gardening or maybe return to it after some time away from the practice. Cool. Let’s do this.
Let’s start with the fun stuff: Choosing what to grow.
First off, why are you doing this? What are you looking to get out of your garden? A handful of fresh vegetables and salads? Veggies which are high priced in the stores? Sauces? Salsas? Or do you simply want to enjoy the therapeutic process of growing things in your yard?
My mother infused me with a love of gardening at an early age. Standing in our mini cornfield as the wind swished through the tassels and scratchy leaves is one of my earliest and fondest memories. However, mom made the same mistake year after year, which was not planting with a specific outcome in mind. Like most gardeners, she planted a number of items she wanted to have fresh during the summer without much concern for how much she was going to have. Every year, she planted six tomatoes and had way too many to even give away. A lot of them rotted. Others plant too many cucumbers or zucchini. How many times have you seen homegrown produce set out for the taking in the lunchroom?
Most gardeners consider excess as good because it means you have as much as you want by default. However, to me excess is wasteful, especially when you are trying to be self-sufficient. Excess of one thing means less of something else I might have wanted.
We’re not going to plant for excess; abundance yes, but not excess. We’re going to stop and think about what you really want; take it to the next level, as they say, and actually make your gardening adventure more enjoyable and productive. Note if you intend to grow non-edibles for ornamental use or for creating floral arrangements, the same theory applies. For example and explanation purposes, we’ll stick to fruits and vegetables.
Almost everyone grows tomatoes. I’m guessing you want tomatoes too. Stop and think about why you want them. How are you going to use them? Do you want slices for sandwiches? Do you want cherry tomatoes for salads? Do you want to make some fresh sauces during the season? Knowing what you want determines how many plants of each variety you grow.
Even if you are starting small, plan out everything you want so that you have a goal you’re working toward. This will drive the plan of your garden expansions as you make them. Whether you start with fewer plants of all your desired items or all the requisite plants of fewer items, do what works for what you want to get from it. It’s your garden. Make it work for you.
Keeping with the tomato example, I use them for enough sauces for an entire year and in a few casseroles and sautés. To a lesser extent, I have a beefsteak variety for baking whole or slicing when the GF is here for lunch. This translates to twenty or more Roma tomato plants, one or two cherry tomato vines, and a single beefsteak one.
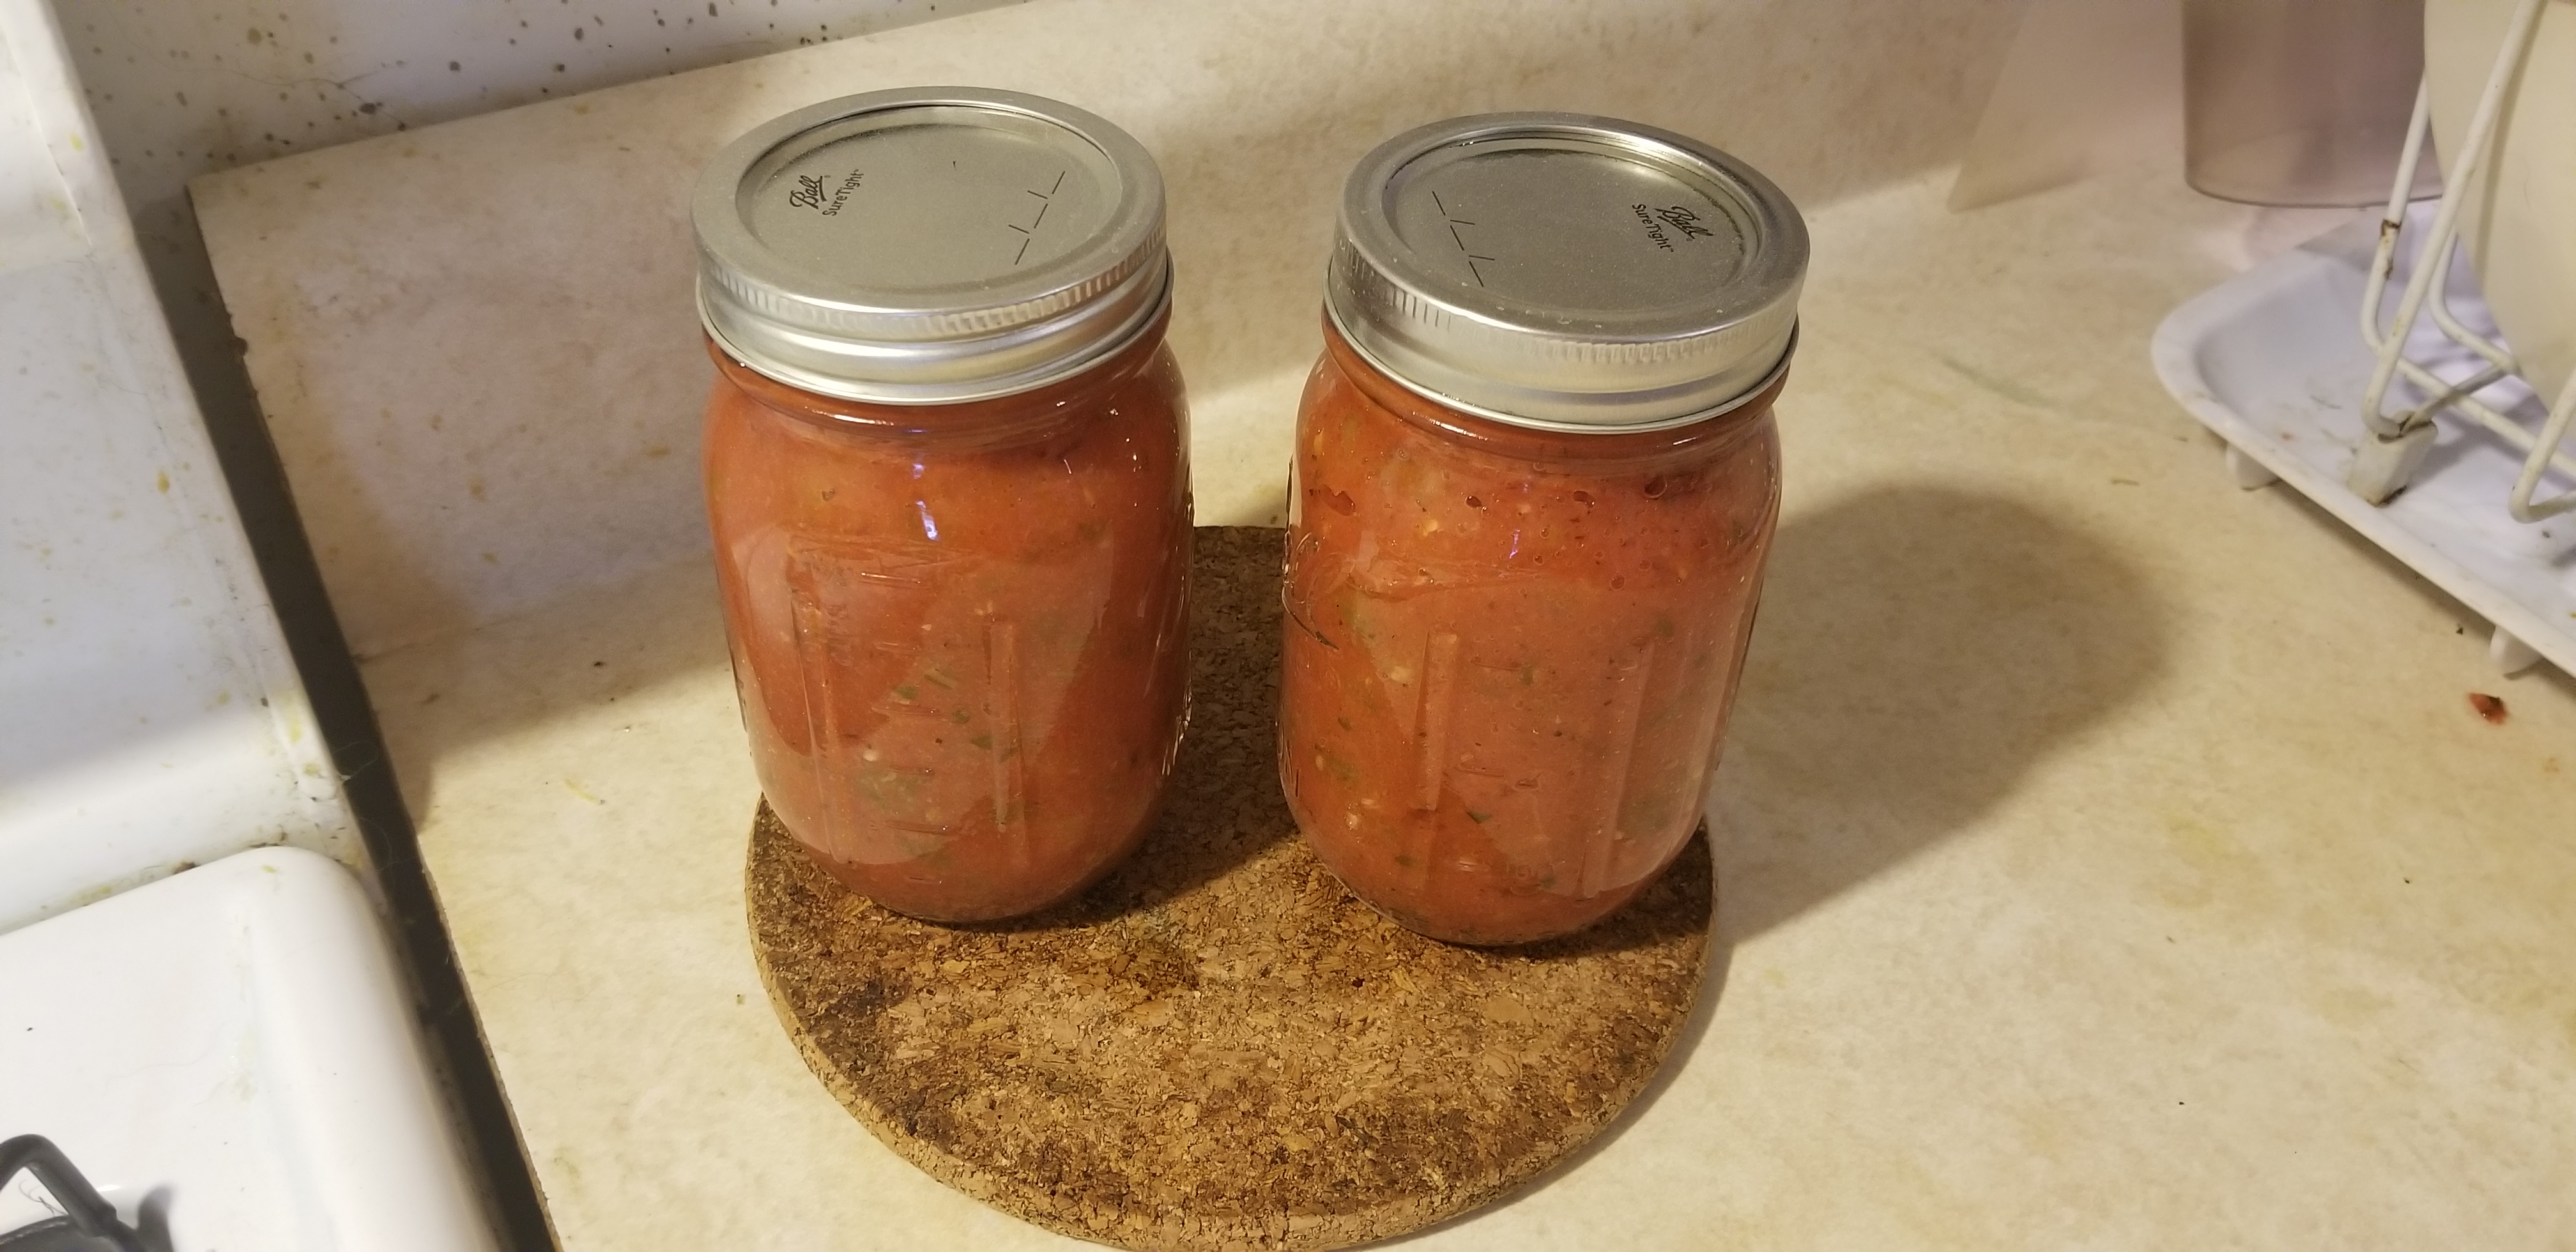
Pasta sauce cooking with garden fresh herbs as well as vegetables.
Pizza sauce
I use jalapeno peppers mostly on nachos and for sriracha sauce. To have enough fiery red jalapenos for enough sriracha for a year, I need to grow twelve plants. At the end of the season, when the time is too short for the green ones to ripen fully, I’ll pickle those as slices.
I grow ancho and chili peppers for making chipotle sauces and chili bases (a blend of chilies, seasonings, tomatoes, and tomatillos, which I freeze for later use). This dictates how many plants I need to grow; usually eight of each pepper.
You see the logic? I start with the question of how much output I’m looking for, then plant enough to meet it. You put in only the number of plants you need to produce the output you want. This saves your garden space. Mom could have grown other items where the excess tomatoes always grew. It also keeps you from being disappointed from growing too little of something for what you wanted to get. Especially if what you wanted was a little bit of a lot of things; otherwise you could end up with a measly amount of some items but too much a handful of others.
You can find online sources for the average yields of various fruit and vegetable plants to use in determining your planting volume.
On a side note, whenever I think of people growing too much I recall how one Chicago neighborhood was spared this problem for a while in the late 1960’s and early 1970’s when a local hot dog stand owner bought their excess every day. It was a classic win-win. The gardeners got a few bucks for what they would have thrown away, and the man’s customers enjoyed tomatoes and cucumbers picked that day. Eventually, because he did so well, he was able to afford a home with a yard, where he began growing his own tomatoes and all.
While that left some neighborhood gardeners dealing with excess again, it is a perfect example of what I’m talking about: planting with a desired outcome in mind.
Now that you’ve decided what and how much you want to plant, the next important question is: do I have enough time to grow each item I want? We’ll get to space in a minute because first we need to know if we’re going to plant something at all. How long is your growing season? Will the plants you want mature in that timeframe? For the most part, the answer is yes. Though you may simply not be able to grow some items in your climate zone.
Where I live in northern Illinois close to Lake Michigan, we have approximately 150 days between frosts with an iffy 30 days on either end. Whatever I choose to grow must mature within those 150 days. Fortunately, that includes most common fruits and vegetables. Brussels sprouts and peanuts require that entire length of time at least. Sweet potatoes and jicama require more time and hotter days. These require techniques to extend my season, which we’ll cover in part five, or I simply wouldn’t grow them no matter how much I want them. Why use space for something that won’t produce?
At this point we’ve chosen everything we’d like to grow and reluctantly filtered out those which need a longer (or cooler or hotter) season than we have. Now it’s a matter of personal time. Literally. How much time do you have to spend on a garden?
On average, tending to a garden takes eight to twelve hours a week, depending upon the size. A garden the size of mine requires a good twenty hours. This is like a part-time job, the payment for which is not having to buy vegetables – ever – and everything is organic. The time estimate includes weeding, watering, feeding, harvesting, preserving, and any unexpected cleanup. This is after you’ve built and planted it. If your time is very limited, start small or consider container gardening, covered in part 2. If you have help, in my case my daughter assists tremendously with weeding, harvest, and preservation, you can go bigger.
Again, that’s after you’ve built it and planted it.
Fortunately you only have to build it once, if you take the time to do it right.
The time required to build a garden from scratch depends on the type of garden you decide to install. (Well, duh.) Ground level beds are the easiest and quickest. Once you remove the sod and large debris from the bed, you only need to fill it in with good garden mix. More on that in part 2. You will need to fill it in because removing the sod leaves a depression in which water will collect and rot your plants from the roots up. Unless you’re growing rice, of course, and want standing water.
I started my garden with three ground level beds. When I filled them, my friends joked they looked like the graves of large aliens. I built it up by adding a few ground level beds each year. No one says you have to install all of it at once. Previous ground level beds became raised beds with the addition of frames and a yard of garden mix.
Filled beds or alien graves???
Each of my eleven eight-foot by four-foot raised beds took between three and four hours apiece to dig out, construct, and fill. In brief, I removed the sod and added it upside down to the compost pile. I tilled the soil so it was loose six to eight inches below ground level and removed large stones and as many grass rhizomes and tree roots as I could. I built a frame consisting of 2×8 pine, not pressure treated to keep the chemicals from leaching into the soil. For a few of them, the third step was burning dried debris from previous years inside the frame, which scorched the inside of the wood. Finally, I filled the beds with wheelbarrow after wheelbarrow of bulk garden mix (two parts topsoil to one part compost).
The Japanese method of preserving wood by scorching and oiling is called Shou Sugi Ban. You scorch the wood without catching it on fire and finish it with a coat of a natural oil. I left my beds at accidentally scorched. Modern builders use a butane blowtorch, which works perfectly. Have water ready to put out any flames. You’re only scorching them, not burning them. My beds are too young still to know if this extra step adds life to them. You should get a good ten to fifteen years use before the wood needs replacing.
Basically, I would say allot one weekend in the spring, when the ground can be dug but before the last frost in your area, to build a two to four bed garden. For a bigger garden, devote more weekend days or add a few beds each year like I did, which also helps with the tending time in that it ramps up as opposed to coming at you suddenly.
Planting will require two days on separate weekends; one before the final frost and one after for different kinds of fruits and vegetables. We’ll cover what and when in part 5.
At this point you’ve determined what and how much you have time (and probably space) to grow and it’s time to buy seeds or seedlings. Seeds are cheaper, though seedlings help you extend the season because most are already anywhere from six to twelve weeks into their cycle. I would never seed Brussels sprouts directly because I need the extra time for them. Those will always be seedlings. Purchased versus homemade depends on your available space for starting seedlings.
You’ll see several descriptions on the labels of both plants and seeds. Annuals are plants, which live for one season. They produce seeds, which may or may not thrive next year, and die off. Perennials live for years (maybe longer than us). These produce seeds or spread via their roots, or both, as in the case of asparagus. These plants die back not off, meaning the roots simply go into hibernation. Many herbs are perennials. When we talk about what goes where in part 5, we’ll discuss the logic of where these go because they will always be there.
Heirloom v organic v hybrid… These are designations of the nature of the seeds and/or how they are generated.
Most seeds used in commercial farming and many in our home gardens are hybrids. This refers to the method in which these seeds were created. It is the deliberate cross-pollination of two or more varieties to develop a seed, which produces a plant with a known output and/or disease and pest resistance. You see this often in field corn. Hybridization gives the farmer a more stable outcome and predictable feeding needs, etc. They make commercial farming easier. What they don’t produce is viable seed. What does germinate will not produce plants true to the parent. Corn plants are stunted. Pumpkins grow long and skinny and take forever to ripen. I’ve tested this for my own gratification.
This is what makes plant breeding as much art as it is science.
Heirloom seeds are successful hybrids in that the breeder managed to create a variety, which is stable from generation to generation. It produces seeds, which are true to the parent plants. You could use seeds from your harvest for next year’s plants with total success, and continue the process year after year indefinitely. Most heirloom varieties are quite old, many developed in the 1800s, and thus were created with all natural processes, i.e. no genetic manipulation. Personally, I use 99% heirloom varieties because we generate our own seed for coming seasons to be more independent.
Organic is a growing method. To be certified organic requires rigorous adherence to a litany of regulations. You may not use anything synthetic at all. Pesticides, fertilizers, etc. must all be natural; no lab or factory created ingredients. We compost everything to use as fertilizer for the next year. Organic certification also involves the condition of the soil. It has to have been artificial chemical free for a number of years. It costs thousands of dollars and much in the way of extra effort to achieve organic certification.
Note, there is a difference between certified organic and organically grown. Certified organic means all of the artificial additives, etc. are long gone and not used in any amount, and the plants are from seed created in that environment. Organically grown only means no artificial anything is used in growing particular plants. I can grow hybrid plants organically in soil, which may still contain synthetic fertilizer residue, by not using pesticides (which I don’t anyway) and by using my homemade compost as fertilizer.
Which seed should you use? That’s entirely up to you. Organic seeds are more expensive, though will not have a history of artificial chemicals in their generation. If you want to have a fully organic garden, buy those. I mostly use heirloom seeds to harvest seed as well as food, because sustainability is one of our primary objectives. The quality and nature of produce from hybrid seeds is the same as the others. Hybrid corn seed produces a type of corn. It does not produce something artificial.
Tomato and other vining plants will also be designated as determinate or indeterminate. This simply means one will grow to a certain size and stay there and the other will continue getting longer and branching out more. Indeterminate varieties will obviously need more space and management. In a small or container garden, pick determinate varieties, or it’s welcome to the jungle on your patio. My pumpkins got out of control in the first year and became a sea of huge leaves and vines going every which way, including into the neighbor’s yard. (Her grandchildren appreciated getting to pick their own pumpkins. They even drew us a thank you note.) I finally spotted the last two in my yard after the plant began dying down in the fall.
Beans and legumes are either bush or vining. Vining types need trellises to grow up on because they cannot support themselves. Bush types grow a couple of feet tall and about a foot around and don’t need support, although they may lean. Which you choose will depend on your garden design. I grow both types.
Is it better to buy seeds online or at a retailer? Yes and no. We are at a point where we generate the majority of our own seed. When I buy seed, it’s a new variety I want to try and I get most from a mom and pop operation. It’s more expensive but I want to support a small business, plus I know I’m getting quality seed which has been properly handled. Of course, once I’ve ordered it, the shipping company takes over. I can’t always be sure they’ll keep the seeds from too cold or too hot of temperatures. Usually, there is no problem.
I will also buy seeds from garden centers and big box stores, if the price is right and I haven’t gotten it from my regular supplier. It’s a good way to try something new without spending as much as you would online. Mostly, I buy flower and ornamentals this way as I’m not worried about heirloom v hybrid, etc. in my decorative plants. You can find good preseason and end of season sales to save even more.
This is important: seed does not have to be planted in the year for which it was packaged.
Seeds remain viable for many years, when stored properly, which is nothing more than putting the closed packets (paper clips or tape) into an empty coffee can in the bottom of your fridge or a cool, dry place. Refrigerating seeds is actually part of harvesting many types because they require a period of cold stratification. Seeds need to go through a certain amount of chilling to finish maturing. This is an evolutionary adaptation enabling seeds to overwinter and not sprout too soon in the spring. Some, like tomatoes, don’t need cold stratification. But it doesn’t hurt them to be in the fridge.
Stored properly, seeds will remain usefully viable for three to five years. The germination rate will go down, though remain as high as 75% -80% for beans and above 50% for most other items. The exception (you knew there was one) is alliums: leeks, onions, etc., which rapidly decline naturally. These don’t keep well.
Because most seeds retain an acceptable germination rate for a few years, you don’t need to buy fresh seed every year. One packet of tomato, bean, or cucumber seeds can keep you supplied for several years. Refresh alliums annually, though.
Then you have to consider the special situation with carrot and celery seeds. All seeds are governed by federal regulations to have a guaranteed minimum germination rates if they are sold in interstate commerce. For most, it’s over 80%. Carrots and celery, however, are 55% to start. So their germination rate can fall below acceptable levels in fewer years than others. If I haven’t harvested carrot seed, I buy a fresh packet for the year.
Now that you’ve chosen what and how much you want to grow, we’ll look next time at where to place your garden.
One question I expect popped into your mind is are we really saving money, when we’re spending so much on building and maintaining our micro-farm, and on the equipment and supplies to preserve the output. The short answer is, probably yes. If not already ahead after just three seasons, we are at least at breakeven.
We did not plant a garden in the first year because we took possession of our neglected house in July of 2016. I spent that summer and fall clearing the yard and getting the house ready to live in. Like the pioneer farmers of old clearing growing space, I was cutting down trees and ripping out brush, which had become entwined with the chain link fence. A prior owner wanted to mow on both sides of the fence and so installed it eighteen inches inside the property line, giving the illusion the lot was three feet thinner than it is. A pair of ailing elderberry vines grew through the fence on the south side of the house. On the north side, where I would locate the growing beds, weeds and junk trees choked it from back to front.
Move in condition of garden area
Front view day we first viewed the house
To remove the southern portion, I had to cut the elderberries back severely, although they needed it. That seventy-foot section of fencing full of vines was quite heavy to drag the hundred and twenty feet to the back of the property, I can tell you. The scavenger wasn’t thrown off grabbing it for metal though. It was gone by morning.
The northern portion was a good hundred feet long. I managed to rip out the first forty feet before finding where the flora had too tight a grip on it. I’m not Conan, but I’m not a little guy either. I couldn’t get it to budge. I left it for winter to knock the plants down. On an incredibly mild February day (70+ degrees), I discovered the problem. The bottom six inches of fencing had sagged and become mired in the ground over the decades it had been there. It was several minutes of digging and brute force tugging at it before I got it loose. And maybe some swearing. And likely some cursing the people who neglected the property.
Of course, having to wait for winter meant I was cutting down the trees in the eighteen inches between our fence and the neighbor’s privacy fence, all the while watching which way they fell or swung because they were into the wires for our electrical power and cable. The old phone wires are there too, but Ma Bell is a legacy company for us. I have not had a hard wired phone for two decades.
By the start of the 2017 season, I had removed most of the weeds, the running-amok day lilies, and the trees, allowing us to start the garden with six ground level beds and ten feet of very short vertical space. I ordered some garden mix from a local garden supply company to fill in the few inches of soil stuck to the sod I’d removed and relocated to the bare areas I’d created in ripping out the weeds. With the eight-by-four beds now full of rich, black soil, my friends were joking they looked like alien graves.
Filled beds or alien graves???
First season vertical garden
First season, July from the west
First season, July, from the east
Season one herb bed
That left the fence posts. Having them pulled by a service would mean spending a lot of money. So we left them for another day. Then Beth saw a hack online. For $40, we bought a two-ton car jack. You dig away any debris around the cement holding the post, then position the jack on a board, which is on a pair of cinder blocks, so that it reaches the pole but does not hinder pulling the concrete out, and soak it for several minutes with your garden hose. Put a big pipe wrench on the jack to grip the post and crank the jack. Lo and behold, the first post popped right out and I lugged it to the back, where a scavenger took it concrete and all.
That was the front post on the south side where the elderberries had been. We left the others to use as the posts for a Concord grape arbor. The elderberries are being relocated to garden north (see last month’s postings for what I mean by garden north). The posts on the north side of the house would be a different story.
We understand the house was built in the 1950s by a doctor, who had a few, shall we say, unique ideas about how a house should be built. Perhaps this is why the basement bathroom was not done correctly and the fence was inside the property line. From my years with a Chicago law firm, I became aware of a few quirky physicians in this area. Malpractice insurance rates here drove their practice up into Wisconsin. (Seriously, it wasn’t them. It was the insurance.) Anyway, it means I have an idea of who might have built this house.
So it was only half a surprise when the fence posts on the north side gave us trouble. We pulled one, but only with the aid of our neighbor’s strapping, young son. The post had been secured with at least an entire ninety-pound bag of concrete plus a few large stones thrown in for good measure. We tried to pull two more with no success. They are too heavy for the hack. I will either have to rent a proper post puller in the spring or cut them off below ground level (which is probably what I will do).
The scavenger didn’t want that post until a neighbor took a power tool to the cement and broke it off for me in exchange for some of the sidewalk chunks I had left from replacing a sinking portion of the sidewalk and installing a walkway to the back. (Jackhammers are fun tools, btw.)
The back four of these posts became the base for our vertical garden back in 2017. I bought large electrical conduit, several connectors, and basic green-poly-coated fencing. I used a string to get a rough level line across conduit sticking upright from inside the fence posts to cut them off evenly with my pipe cutter. (I own most of these tools already.) I used the connectors as well as bolts to attach horizontal conduit bars across the leveled uprights. Locktite metal adhesive and JB Weld marine weld hold them together. The metal fencing hangs vertically from the cross pieces to create a sturdy, wire net for the plants. I painted the conduit and posts with two thick coats of Hunter green Rustoleum to match the fencing. It’s not an eyesore.
It cost under $100 and will last for many seasons to come.
We installed the raised garden beds over the course of three years to spread out the expense. We have eleven of them, eight-foot by four-foot and eight inches high. The vertical bed is fifteen inches wide and thirty feet long. Clearly, absent having dug a hole for a pool, we needed to bring in soil to fill them. I’ll do the math for you; each bed contains a full yard of garden soil (27 cubic feet) twenty-four cubic feet in the bed plus filling in the soil lost in removing the sod. The vertical bed required a little over a yard. We needed twelve yards of soil. I bought three the first year and five in each of the subsequent years, and this fall I added three yards of compost. Because bulk material settles over time despite loosening it in the spring while digging in the cover crop.
If you haven’t purchased materials in bulk, you need to. The cost is a fraction of the dozens of bags you would need to have delivered from the big box stores. Incidentally, the big box stores also deliver bulk materials, though for a higher price than you’ll find going local. I searched online and found a family run supply house a few miles away. Their garden mix (2 parts top soil to 1 part compost) was a little more than half the cost of what a big box store wanted just for unenriched top soil. The delivery price was half, and subsequent deliveries in the same season are discounted.
Over three years, I paid $111 the first year, $185 in the second year, and this year paid $279 total for soil delivered in April and compost in December. Altogether, we spent $575 on good quality soil and supported a local business. I also had about three yards from digging a trench for a walkway to the back, which has gone into new beds for strawberries, raspberries, blueberries, and asparagus. Plus a big pile at the very back for potatoes.
Holy crap! You shout. $575 just for dirt!
Yes, and it was a necessary expense to become self-sufficient in organically grown vegetables. Could we have reduced the cost by not creating raised beds? Of course, we could have, though raised beds require less weeding, drain better, warm up sooner in the spring, and make maintaining the lawn between them much easier. We get better results for less effort, which is a huge benefit when you’re trying to produce as much as we do.
You may have noted I said organically grown, not organic. There is a difference. To be certified as organic, produce must be grown in pure, naturally enriched soil with pure, organic methods; no manufactured fertilizers or pesticides. There is some wiggle room on allowable contaminants, but naturally enriched soil means having no artificial fertilizers or pesticides tainting the soil, meaning the compost used needs to be made from clean, organically grown plants. Because I don’t know all of what went into the compost portion of my garden mix, I could not get my produce certified as organic. (Which is a big, expensive deal for commercial growers.) In a few years, when I’ve worked in enough of my own, properly created compost, I will claim to be growing organic produce. For the moment, I am organically growing produce.
To be thorough in costing, the wood for each bed was about $30, including the vertical bed, for about $360. So at this point we have spent, $100 (vertical growing frame) + $575 + $360 + additional wood for the berry beds = approximately $1100 in materials over the course of three years. That comes to roughly $367 per year to date.
What does that mean in terms of savings in reality? Have we saved any money? Per the USDA, the average American household spent about $766.50 on fruits and vegetables. Of course, we don’t yet grow many fruits. Packer, a produce industry publication computed average spending for fresh vegetables only at $259 in 2015. Quora put it at $234 in 2012. In 2018, per ValuePenquin, the figure was $236. But wait, there’s more. We also can and freeze our produce to last an entire year. Americans spend an additional $130 on processed vegetables per year according to Quora. Together, the average cost per household is $366.
That’s break-even on some very low sounding numbers. Next year the cost per year for materials will drop to $275 per year. In 2020, we will be saving money for certain based on these figures. However, these are not the figures for organic vegetables, nor are they specific to us.
So what about us specifically; our two person household? How much would we be spending on organic produce for an entire year? Taking average prices from the USDA National Retail Report – Specialty Crops of December 27, 2019, our desired outcomes for about two-thirds of what we grow (the rest wasn’t listed) comes to approximately $2,110 per year. Naturally, this estimate is inflated because these are year-end (out-of-season) prices. But if in-season prices are just 25% of these, the figure is still over $500.
I will recalculate these numbers over the course of 2020, using the lowest in-season prices, to figure how much we save in 2020 for all 77 items we currently have planned (including herbs).
Wait a minute, you say, what about the cost of seeds? My response is (or soon will be) what cost? We produce our own seeds. There are a few varieties, new additions, which I need to purchase. The cost of these is minimal, generally under $20 a year. Eventually, there will be no seed cost in some years. Seed starting trays and medium likewise run less than $20 a year.
Yeah, but you spent a lot on canning supplies and two canners, I hear you say. Our pressure canner cost about $75 and will last for many seasons. Our water bath canner is on its second year and was about $30. Mason jars are not one-and-done items. The jars and bands last for seasons. The lids cannot be reused, because you will never get another safe seal out of them. The cost is minimal though. For the sake of argument, assuming a ridiculously short ten-year useful life out of everything, the cost is perhaps $25 per year. Realistically, the cost per year should fall below $10 per year over the life of the jars, etc.
This year we are putting in a dedicated seed garden rather than leaving one or two plants after harvesting all of the others. This will allow us to begin generating seed for biennials such as carrots and beets. I expect the additional cost to be $90 to $100 for the wood and two yards of garden mix. Adding this to the twelve other beds will bring the cost of building the beds to $1200.
So how much have we spent?
Good question. We already had some of the materials and I’ve added more, such as tomato cages for $0.37 each on super closeout. We bought a wheelbarrow for $35 to haul the materials to the beds. We’ve purchased some low fencing and stakes and a few other items without keeping track of the expense. Of course, we bought seeds to get started, usually on preseason sale at a big-box store for 30% to 40% off, plus at closeout sales. In my experience, these seeds are no less productive than the pricey seeds from full-color catalogs. For specialty seeds, such as our dragon beans and carrots, we have gone to the catalog and online shops to start. I can only give you a best guess, which I believe is $1500 total for everything, including canning supplies and equipment.
So at this point, we’ve spent about $500 per year (including the seed garden to come), which is equivalent to my above estimate of how much we would have spent buying enough fresh, organic produce for an entire year. Next year, it becomes pure savings.